Connecting JTL FFN Merchant
Connecting a JTL FFN Merchant account is easy but requires some steps that have to be executed in the right sequence. This guide will describe the process.
Before we begin:
This guide assumes you have already connected your JTL Fulfiller account to ChannelDock as described in this guide:
https://help.channeldock.com/books/english-en/page/connecting-jtl-to-channeldock
Onboarding a new merchant
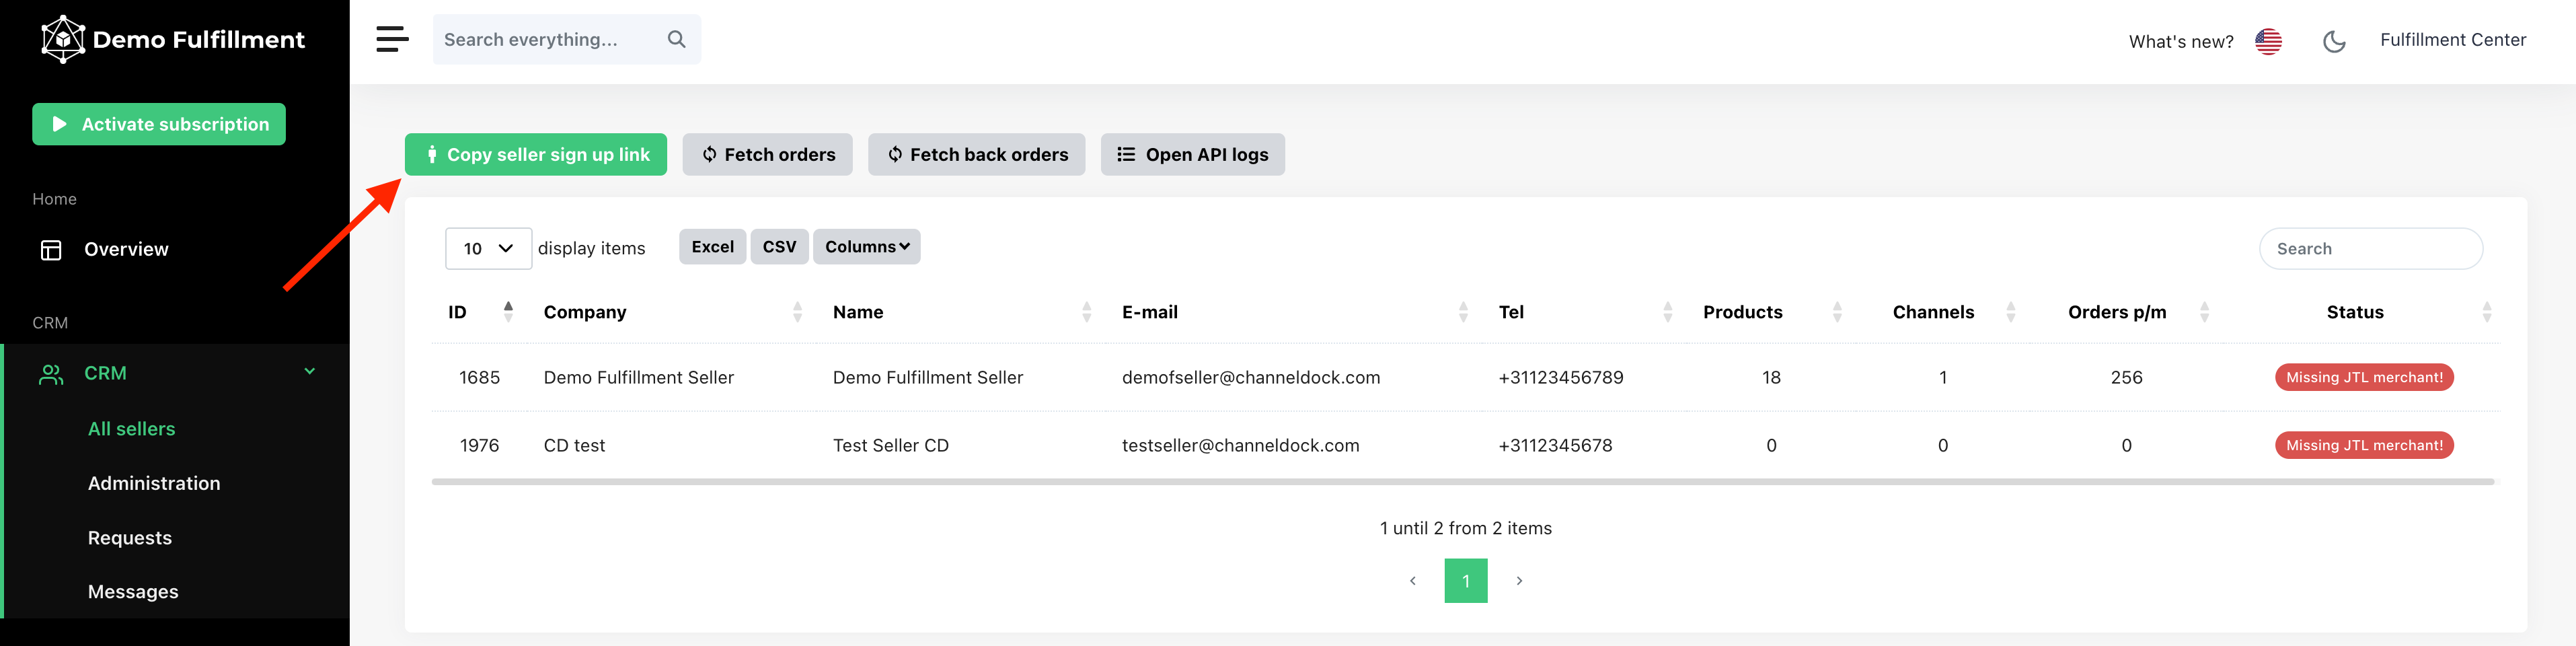
Before you can start connecting a JTL FFN Merchant account to ChannelDock, the merchant must have created a ChannelDock seller account for him / herself. A merchant can create their own free ChannelDock account by using your personal sign-up link that you can find in your ChannelDock Fulfillment account via 'CRM > All sellers'.
Once your merchant has created his / her own ChannelDock account we can start the process of creating a JTL FFN Merchant account for the seller. To keep things easy for your merchant, this JTL FFN Merchant account will be managed by you as a fulfillment center. This means your merchant does not need access to the JTL FFN account we are about to create in the following steps.
Creating a JTL FFN Merchant account:
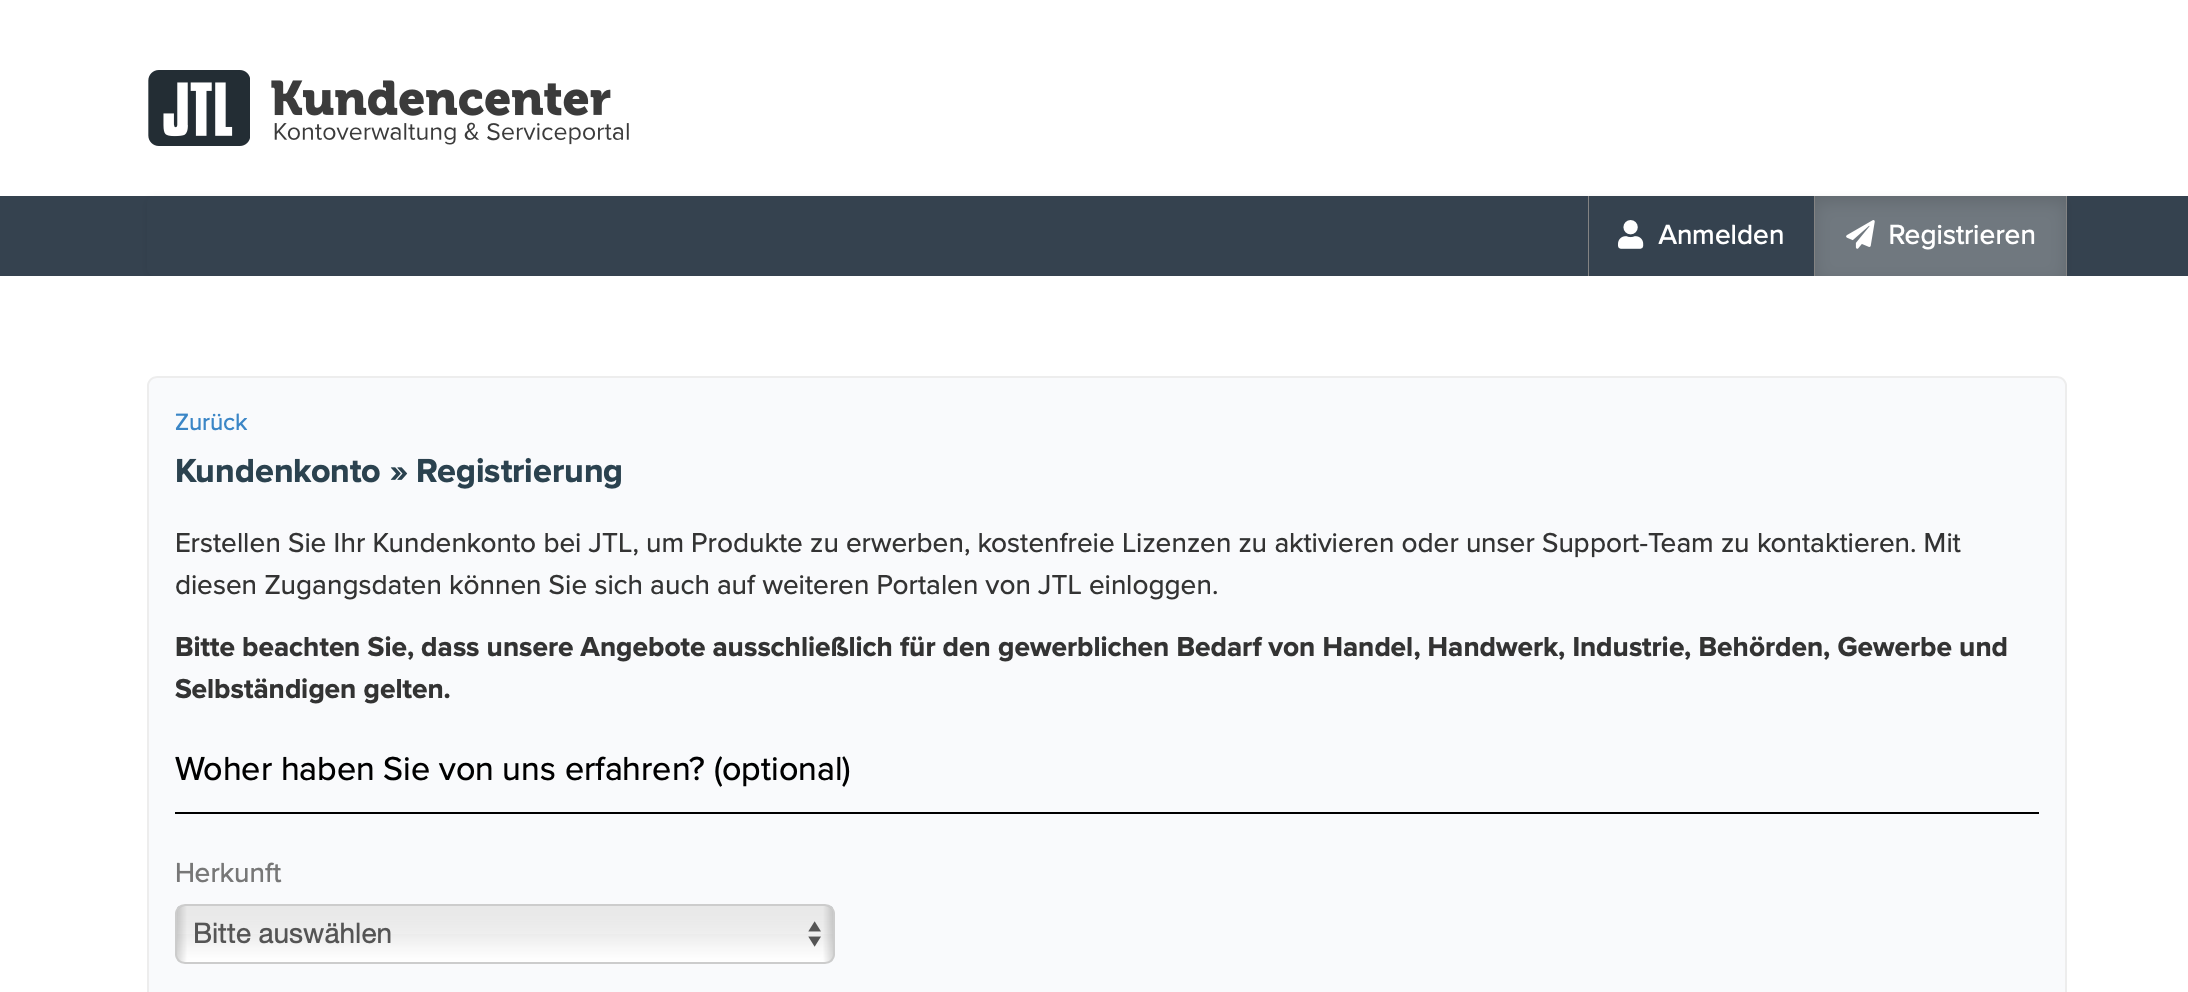
- Create a JTL merchant account by clicking on the following link:
https://kundencenter.jtl-software.de/login/registrierung
You can create this account with the email address of the merchant.

- Once you have created the account, sign in with the JTL fulfillment network using your new account:
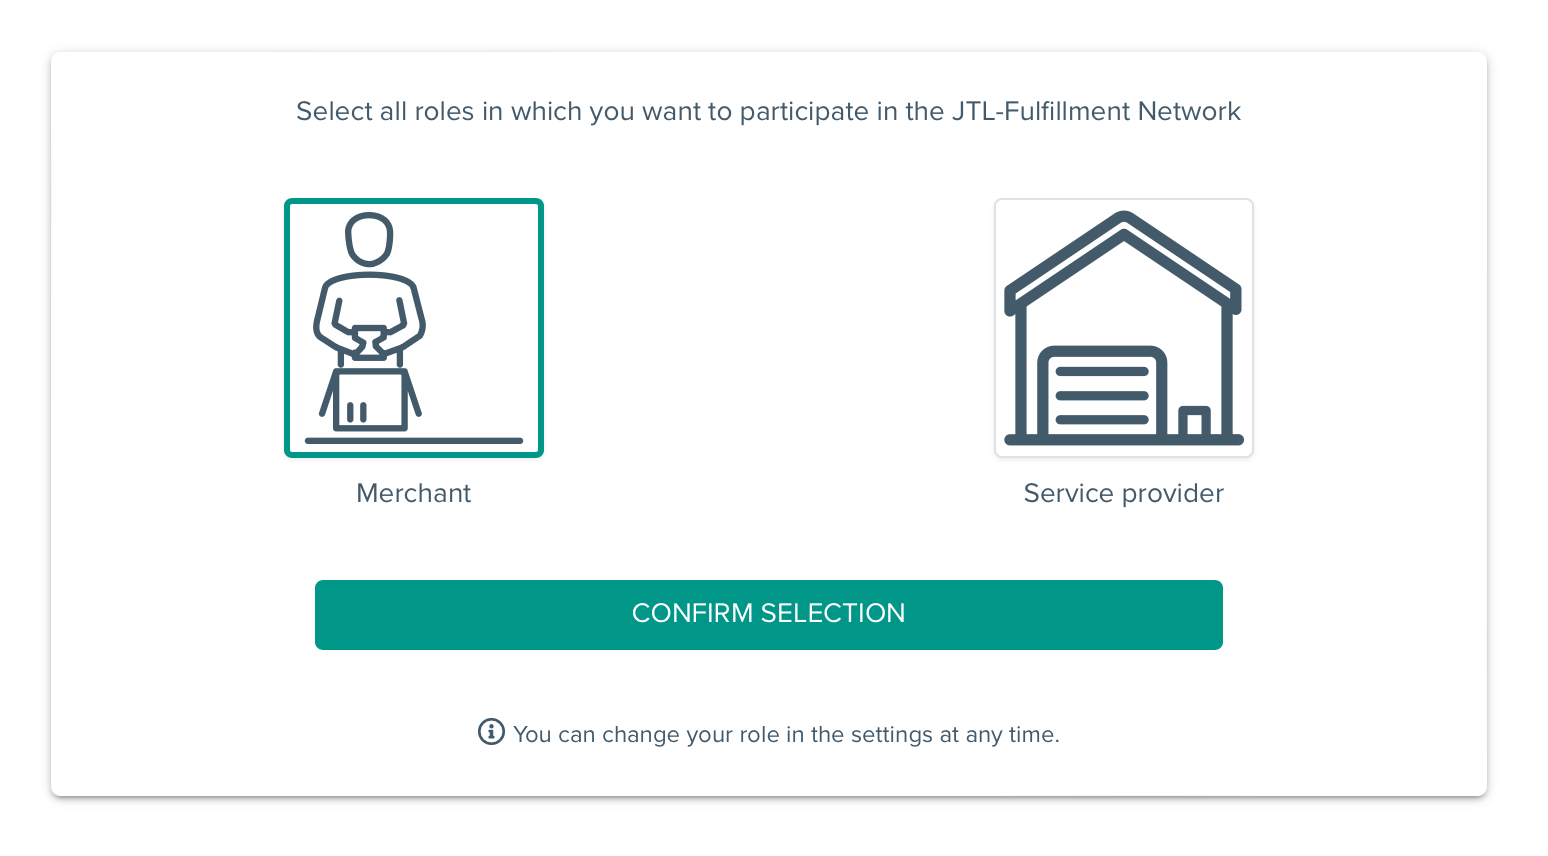
https://fulfillment.jtl-software.com - Select that you want to join as Merchant:
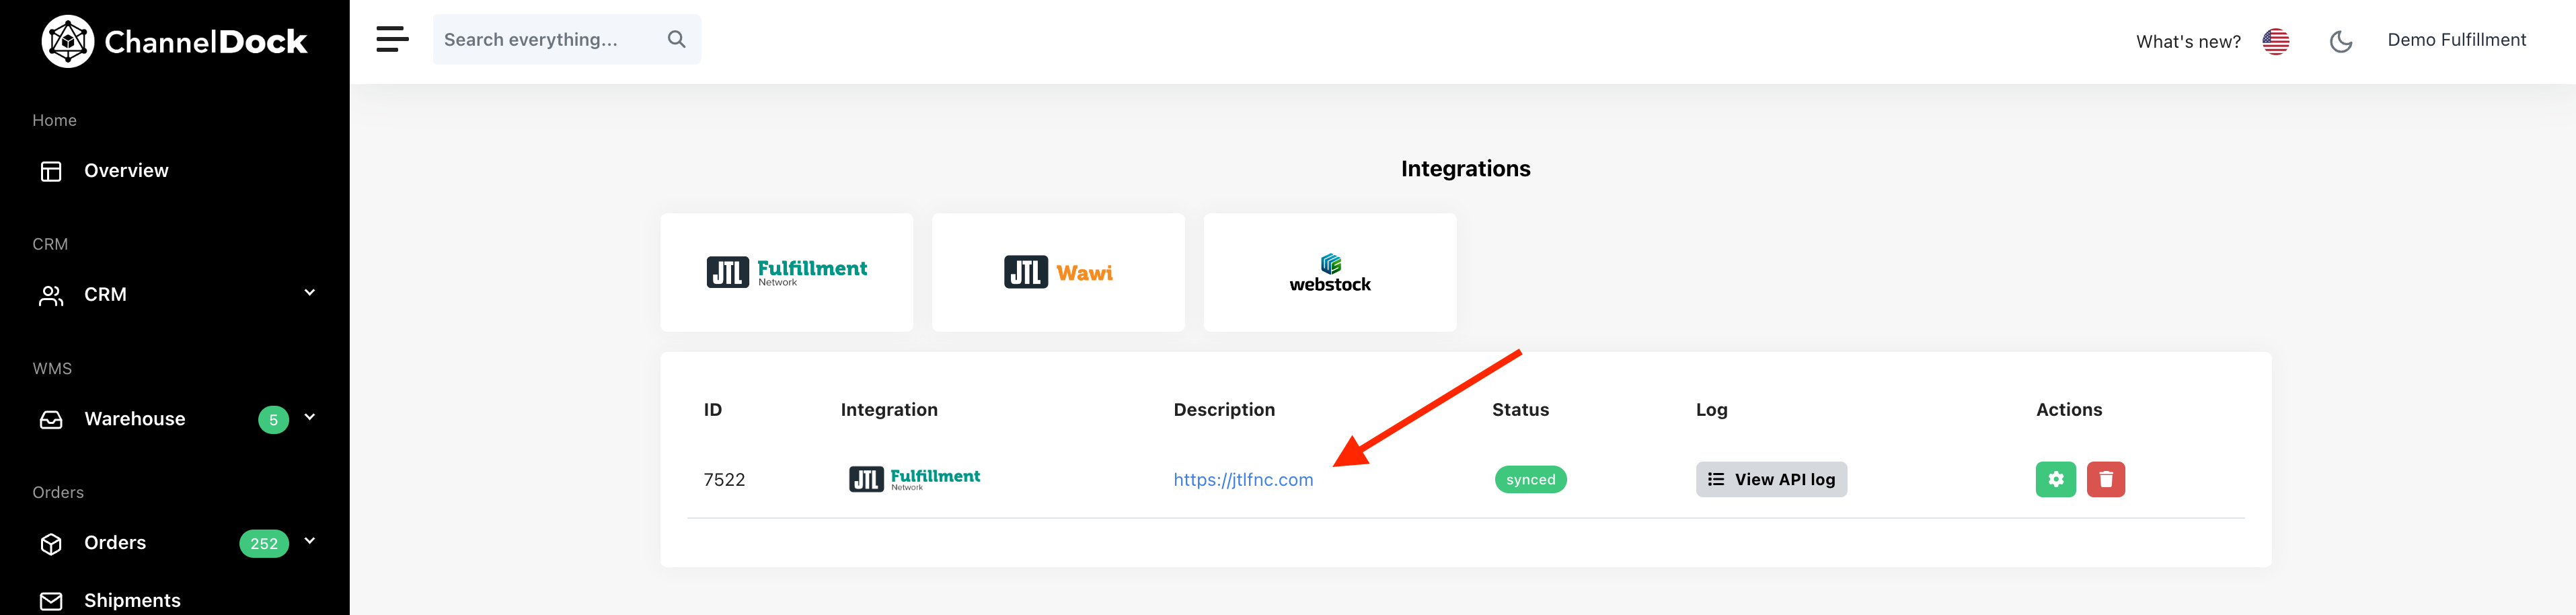
- Now go back to ChannelDock and go to 'Settings > Integrations' and click on the URL from your JTL integration:

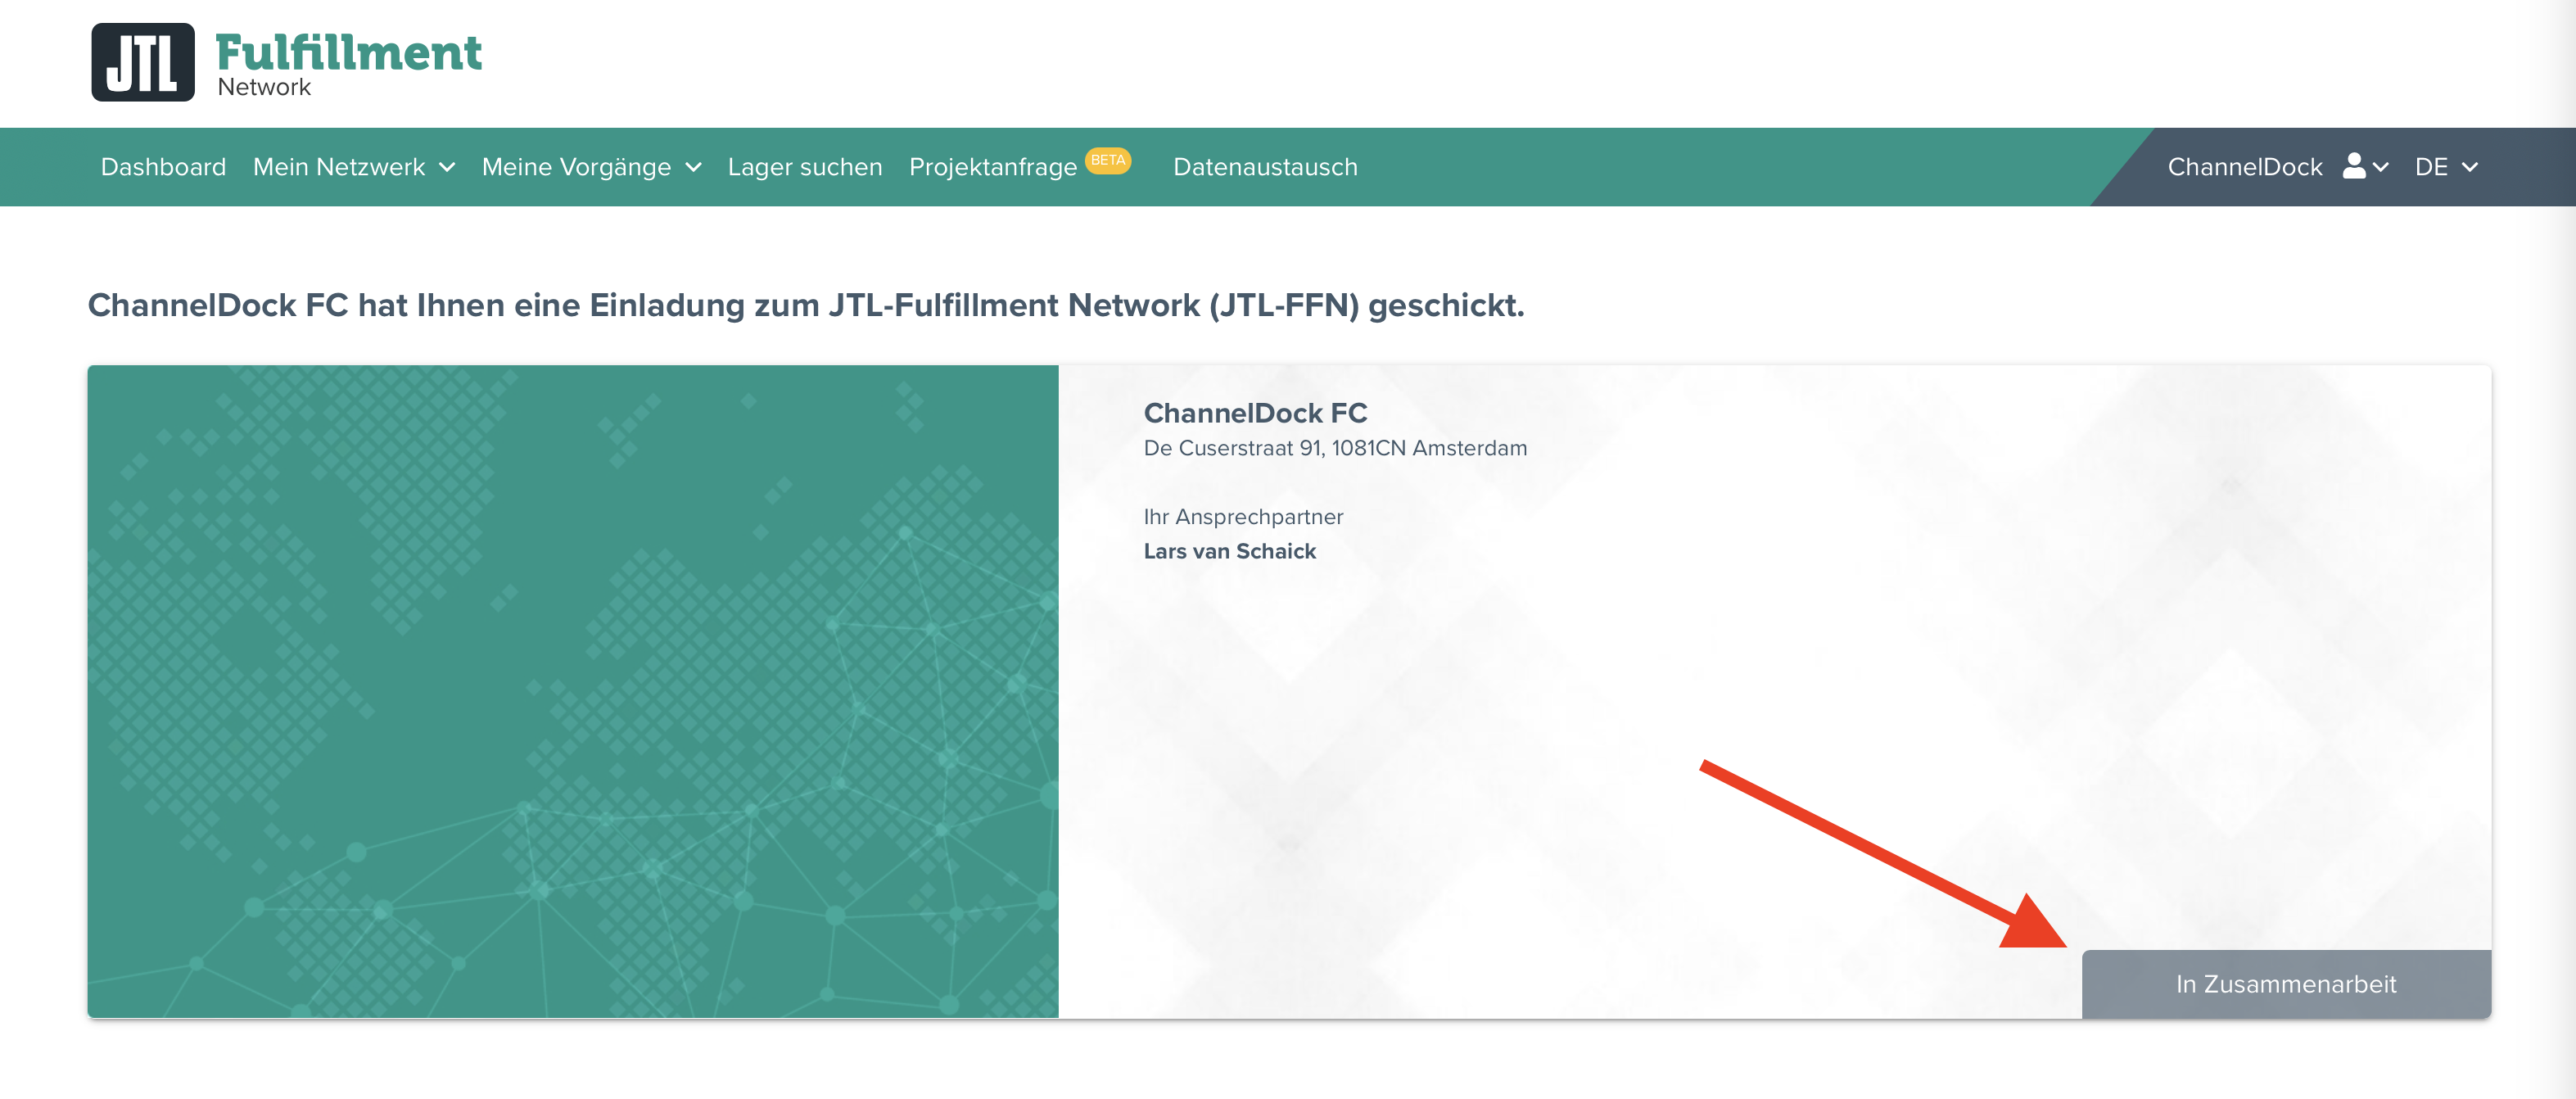
- This will redirect you back to your JTL Merchant account and ask you to accept the invitation to connect your JTL Merchant account to your JTL Fulfiller account.

- Once you completed step 5, you can now click on the following link to create a token that we will need to connect your JTL Merchant account to your ChannelDock Fulfillment account:
https://fulfillment.jtl-software.com/extern-access/YCEY0XCHANNELDOCK
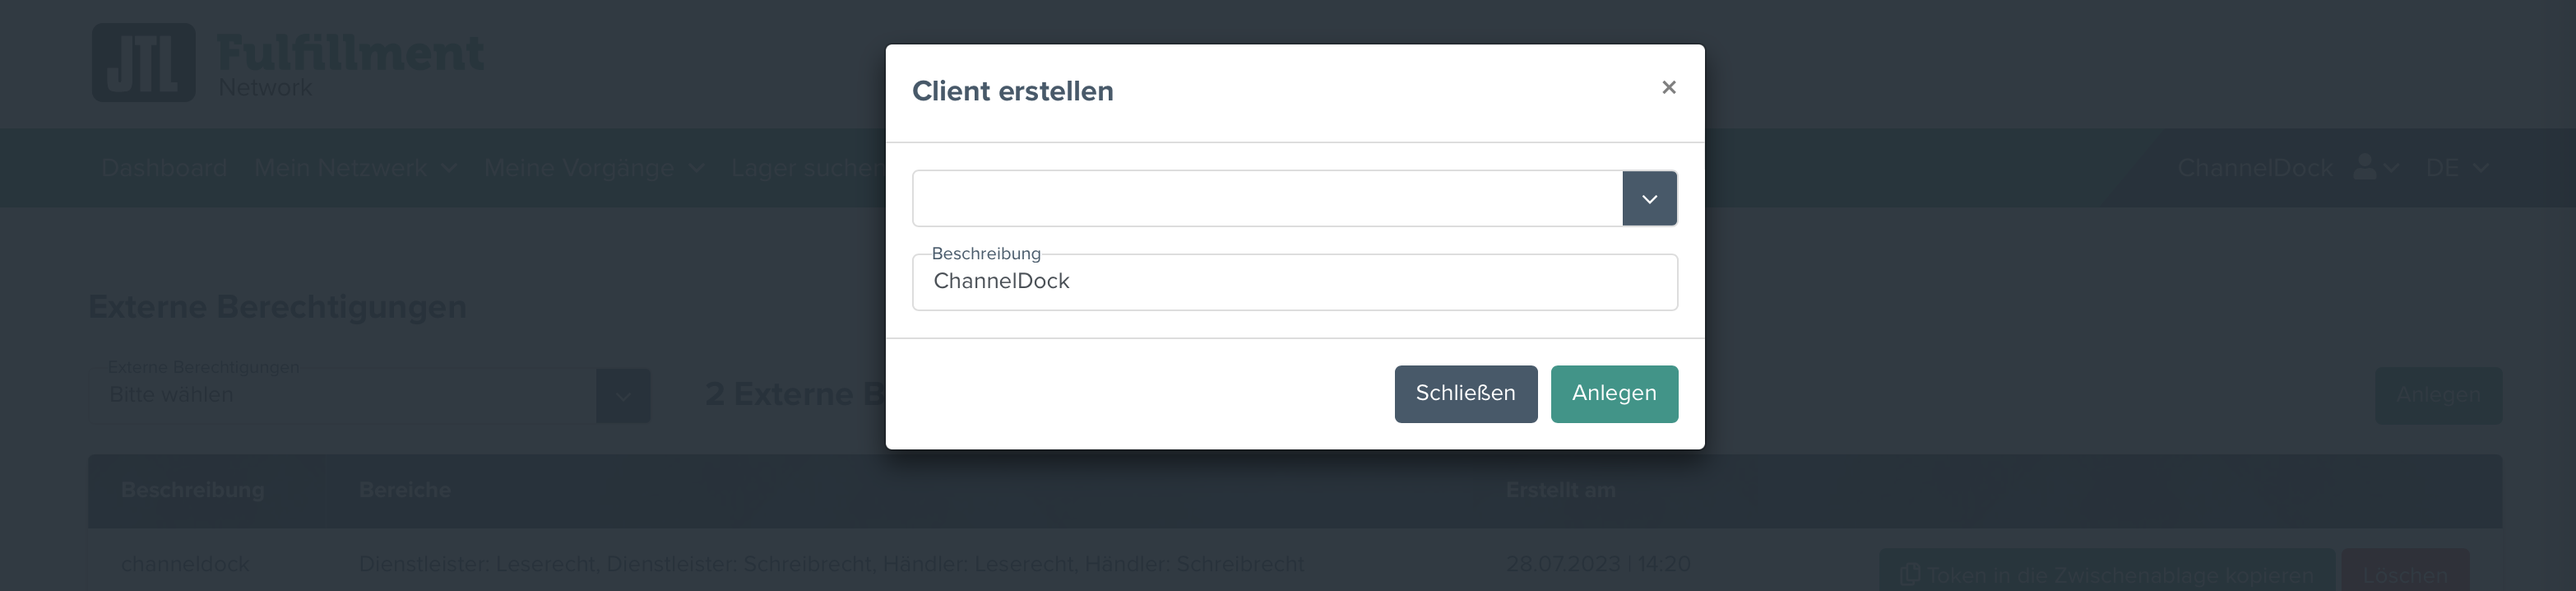
VERY IMPORTANT: leave the dropdown select empty! - Once you clicked on the link of step 6, you will see a pop-up open in the JTL Merchant account. It is very important that you leave the dropdown select empty. In the second field below the dropdown, you can input 'ChannelDock'.

- Click on 'Anlagen' to create the token.
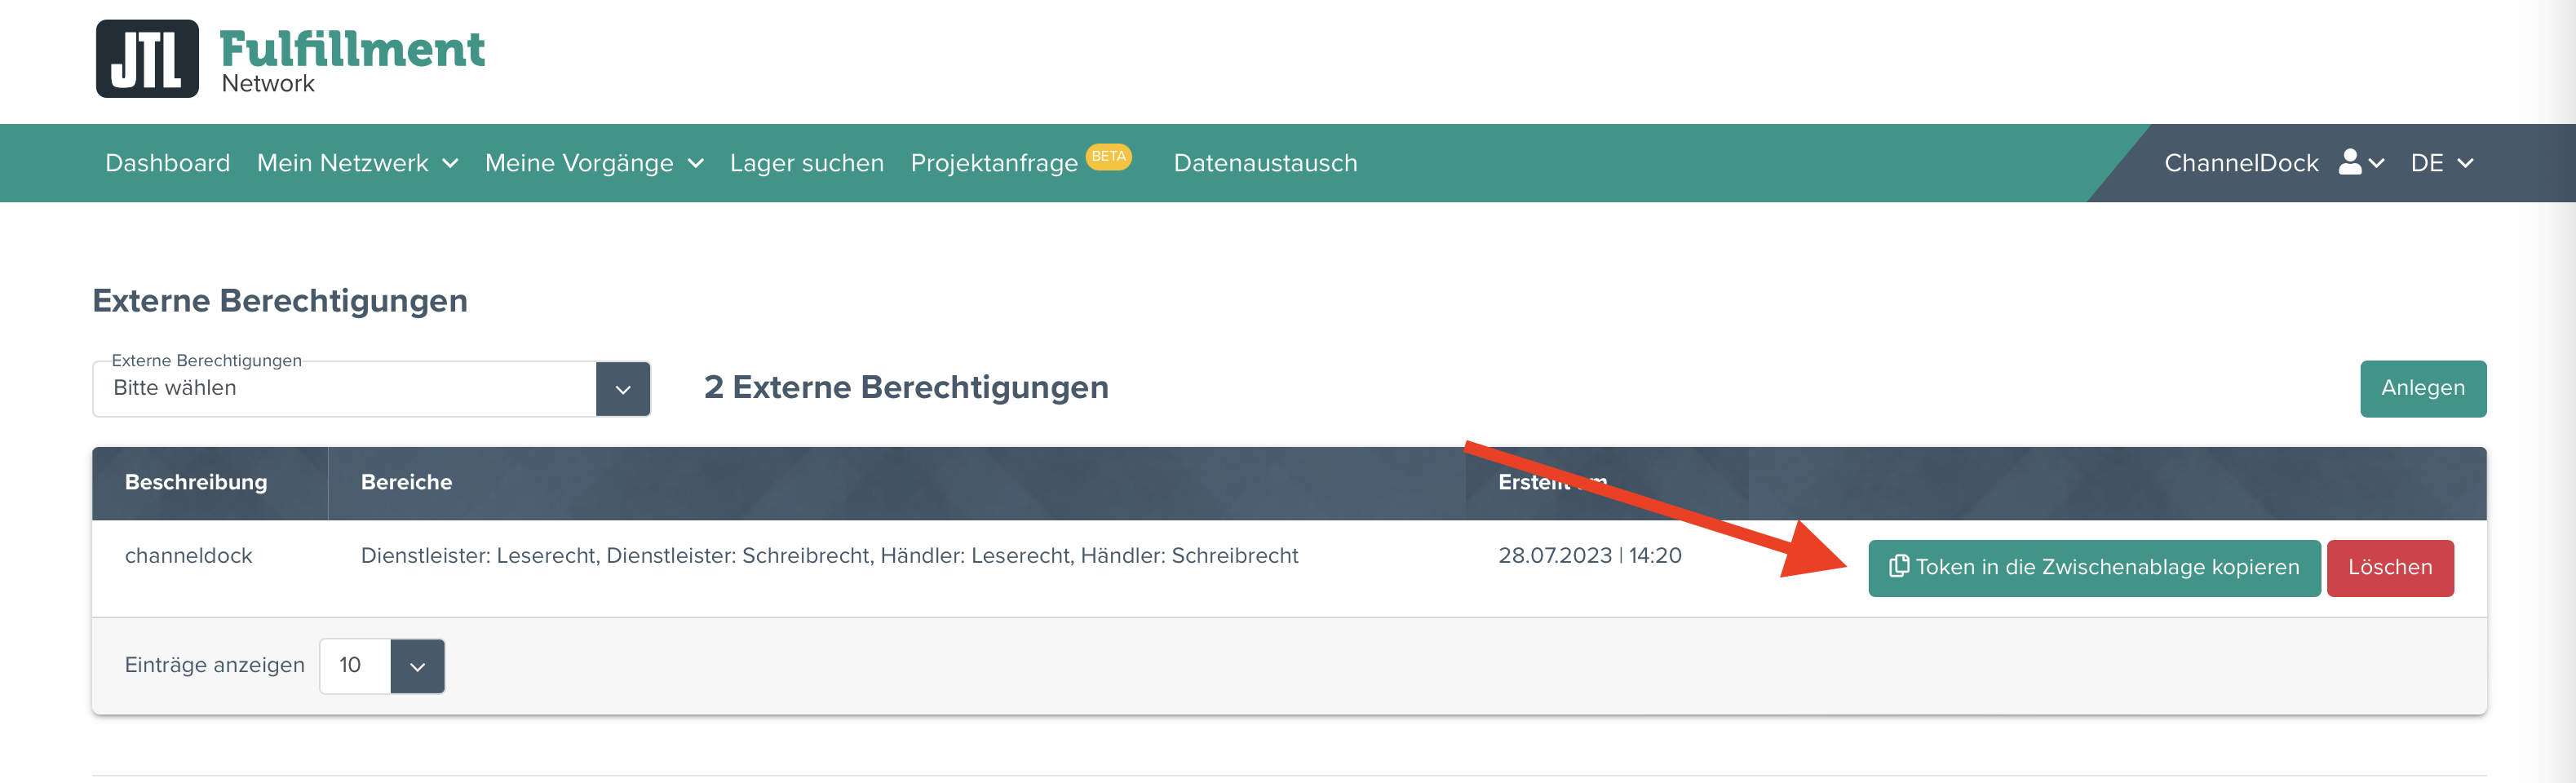
- Copy the newly created token by clicking on the button:

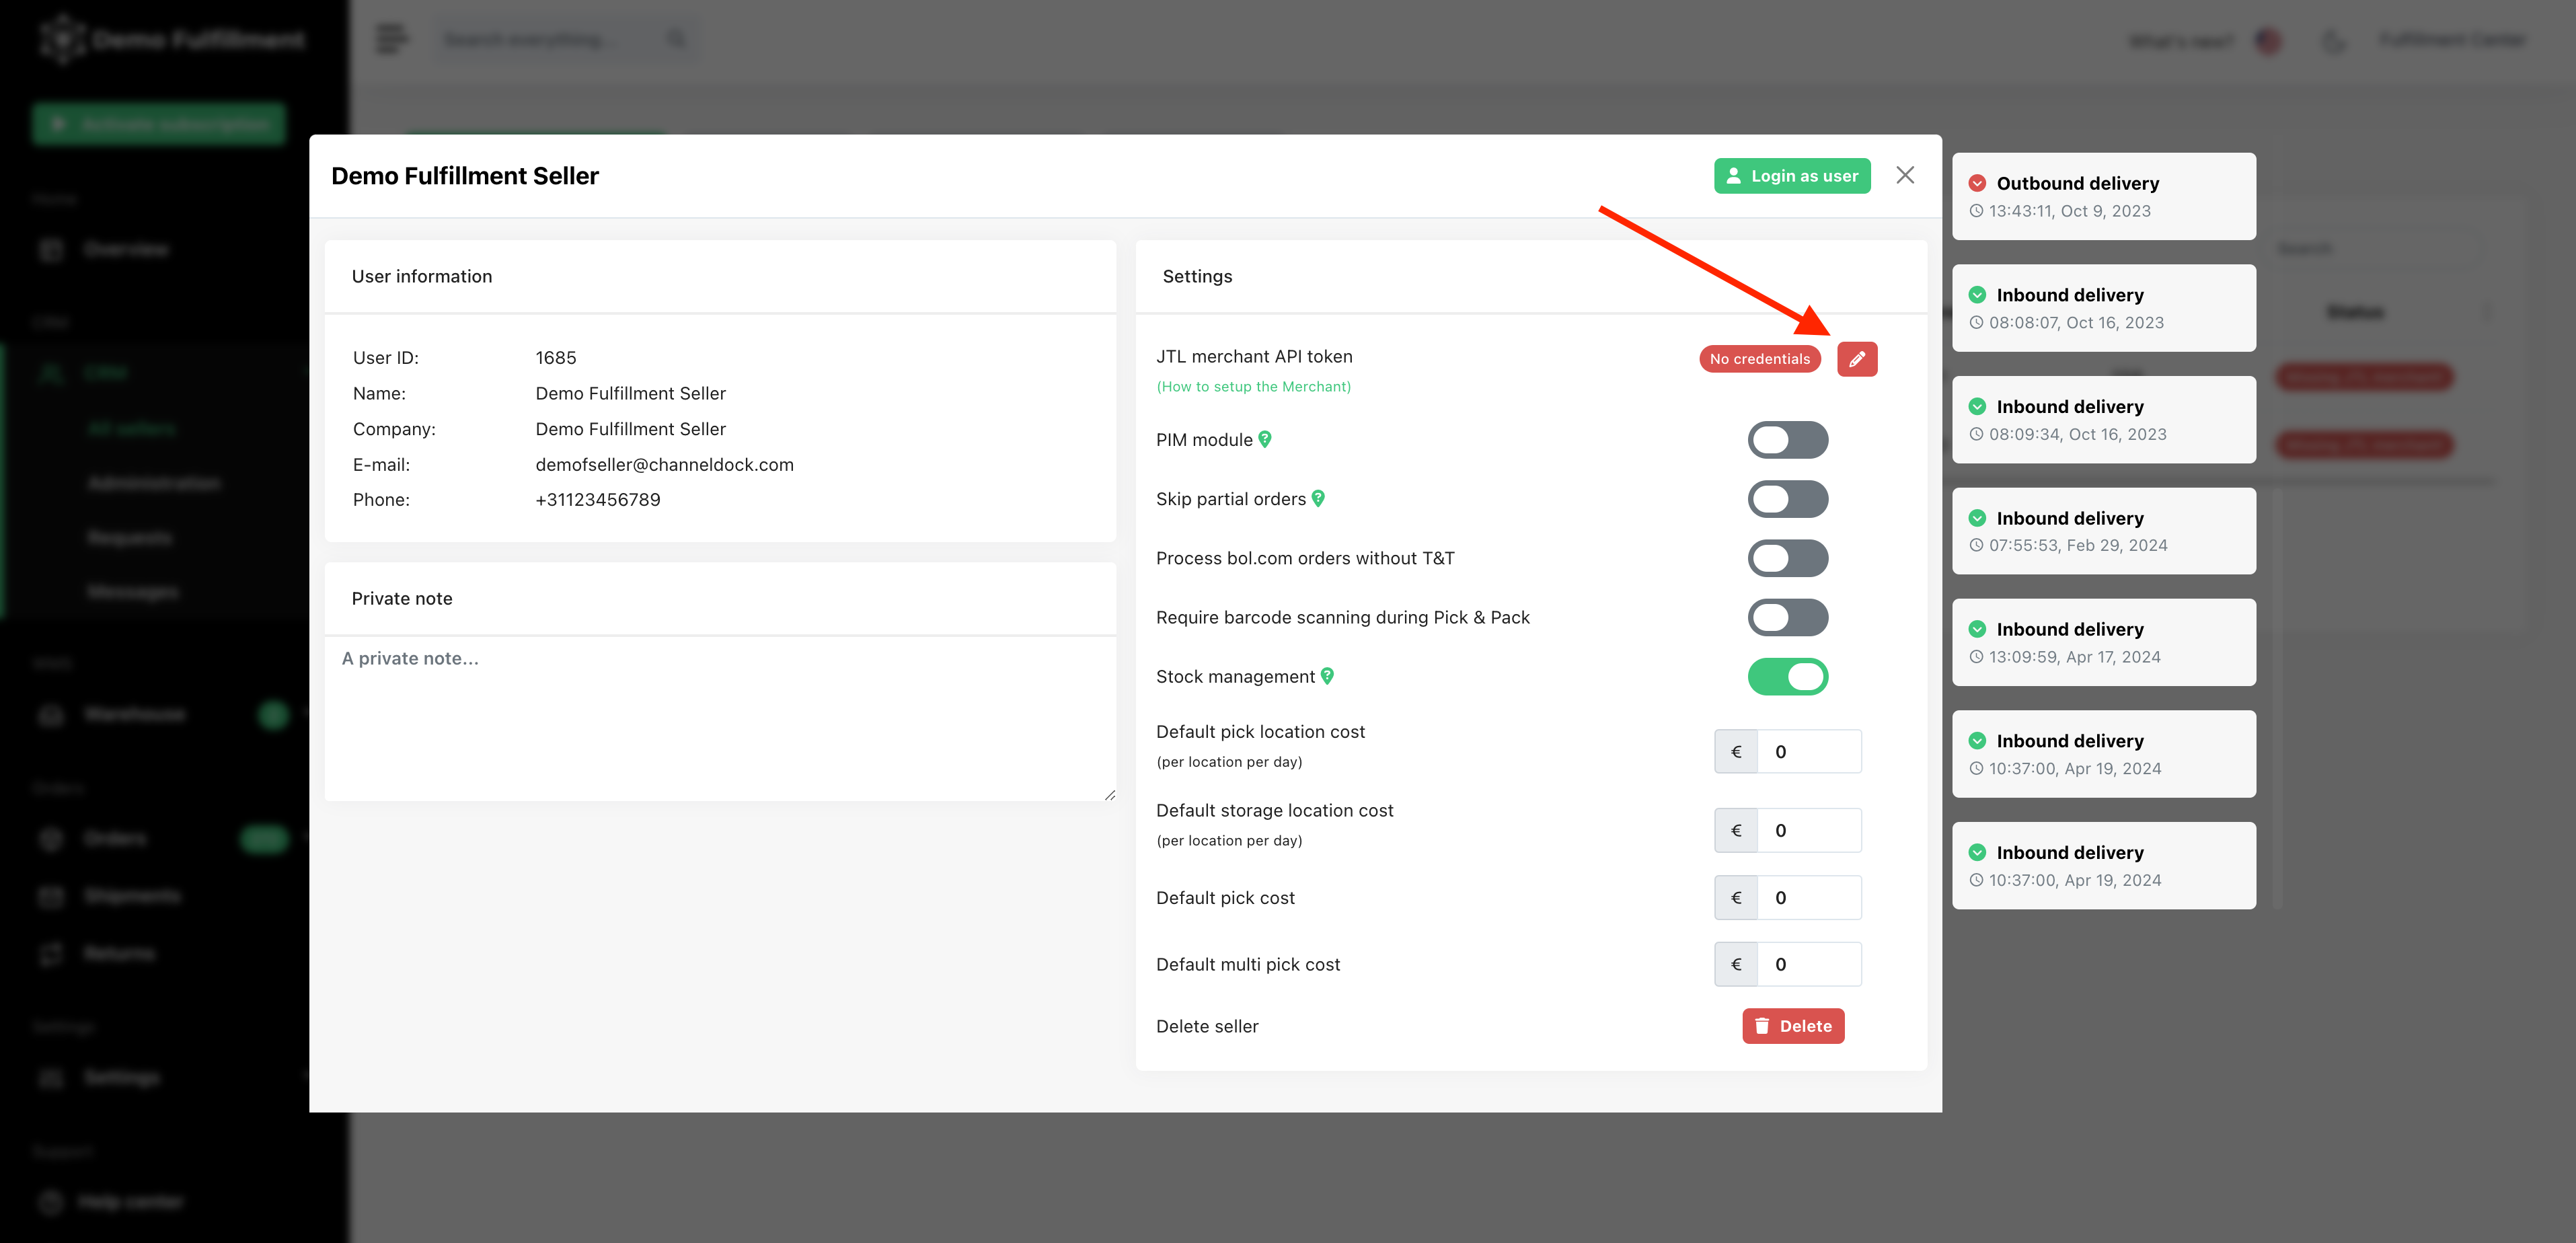
- Now go back to ChannelDock and visit the 'CRM > All sellers' page and click on the seller that you have just created the JTL Merchant account for.
Remember: as mentioned at the start of this guide, a merchant must have created their 'ChannelDock Seller' account before you can continue with this step.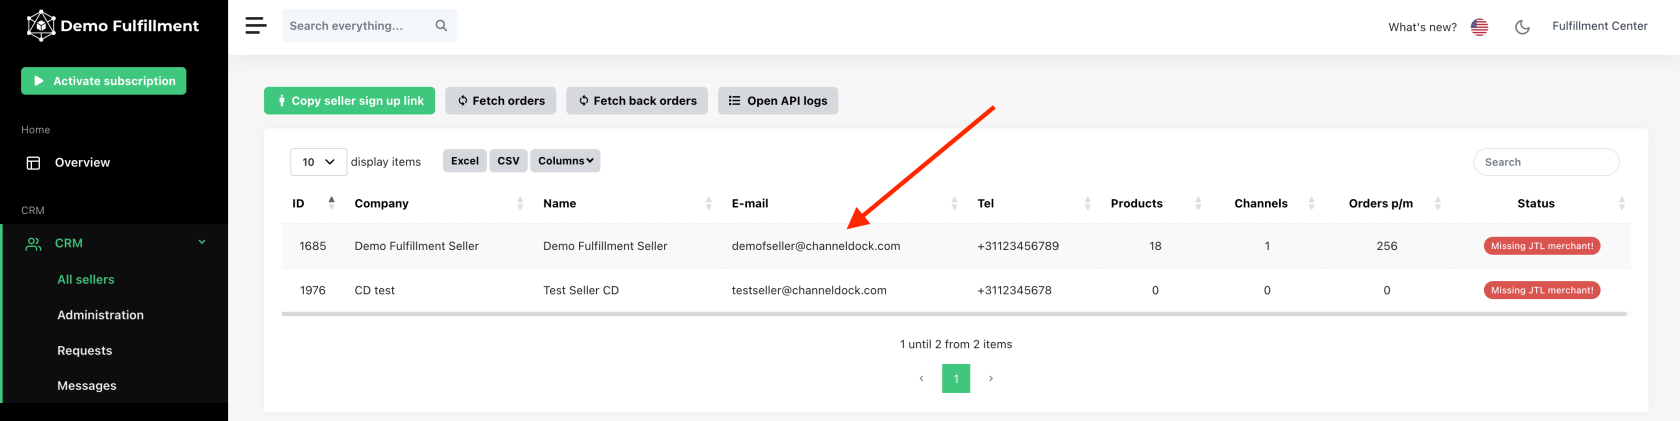
- Click on the pen icon:

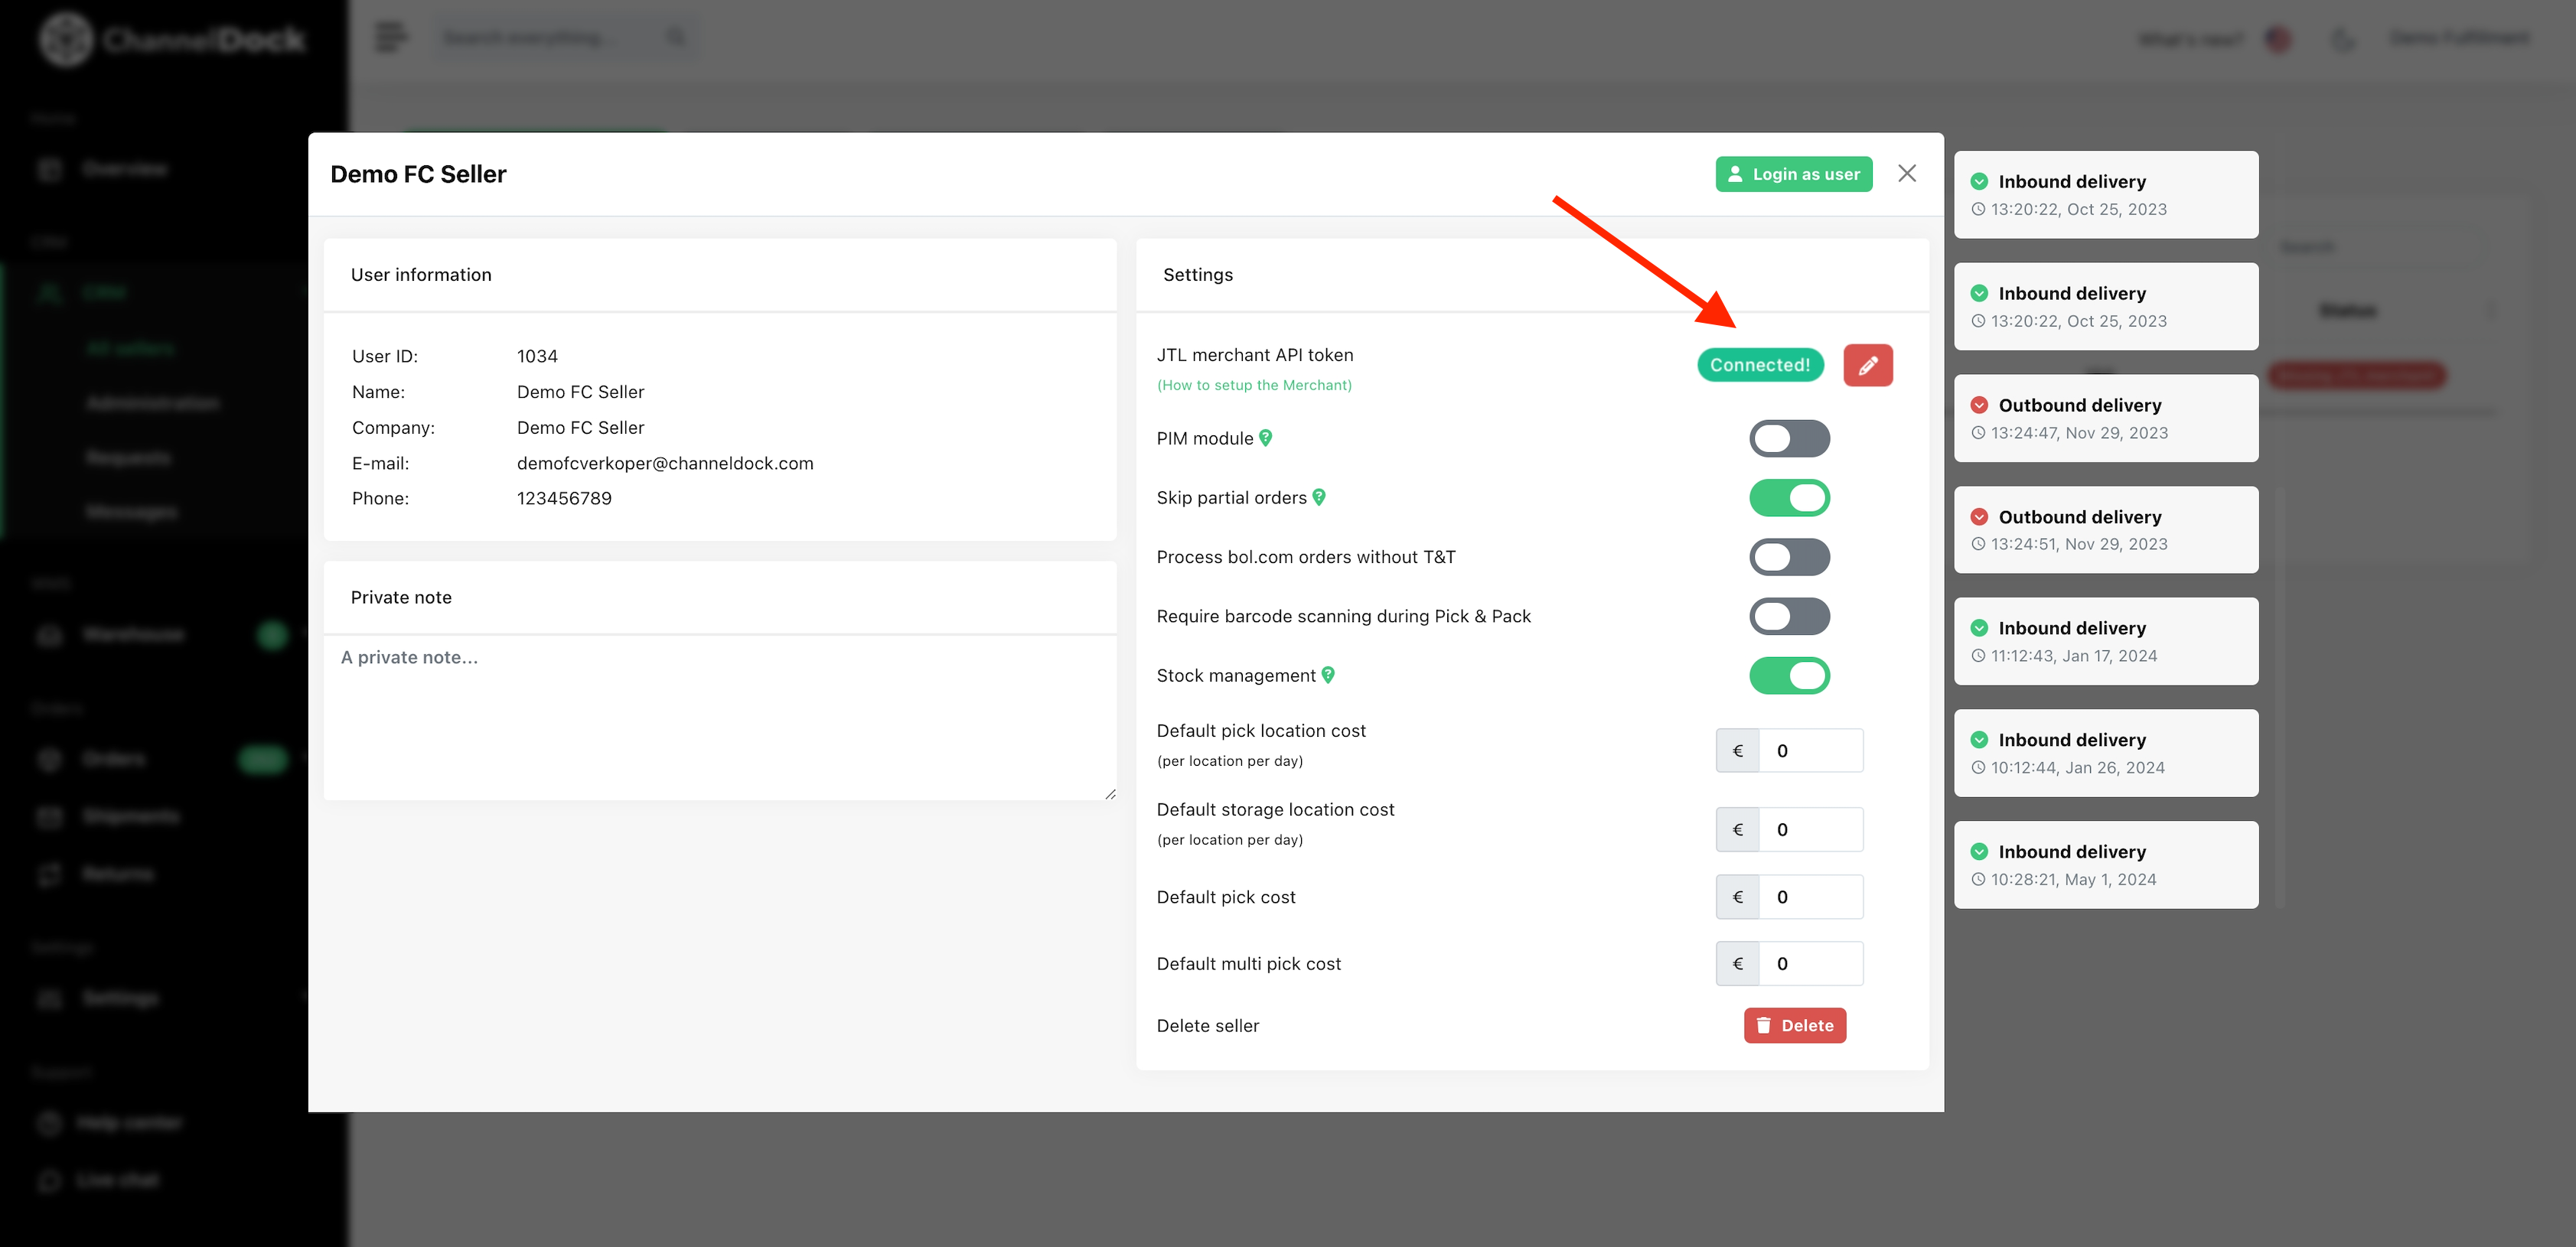
- In the pop-up that appears you can paste the token that you copied in step 9 of this guide.
- If everything went successful, you will see the 'Connected!' badge


Congratulations! You have connected a JTL FFN Merchant account to ChannelDock. Please take note of the following things:
- ChannelDock will now send all the products of the merchant that are available in your ChannelDock Fulfillment account to the FFN.
- You still have to assign a warehouse to the Merchant on the FFN network. You can do this in JTL Wavi.
- You still have to assign shipping methods to the Merchant on the FFN network. You can do this in JTL Wavi.
- Inbound shipments from the seller are also automatically send to the FFN (if you assigned a warehouse to the merchant). You can then accept these Inbounds to increase your stock level in JTL Wavi.
- If there is stock level available, orders present in your ChannelDock Fulfillment center account are automatically synced to JTL Wavi