Administration
Our administration page is a powerful tool that allows you to monitor your fulfillment operations efficiently. In this guide, we will walk you through the process of setting up the administration page:
Set up picking costs for products:
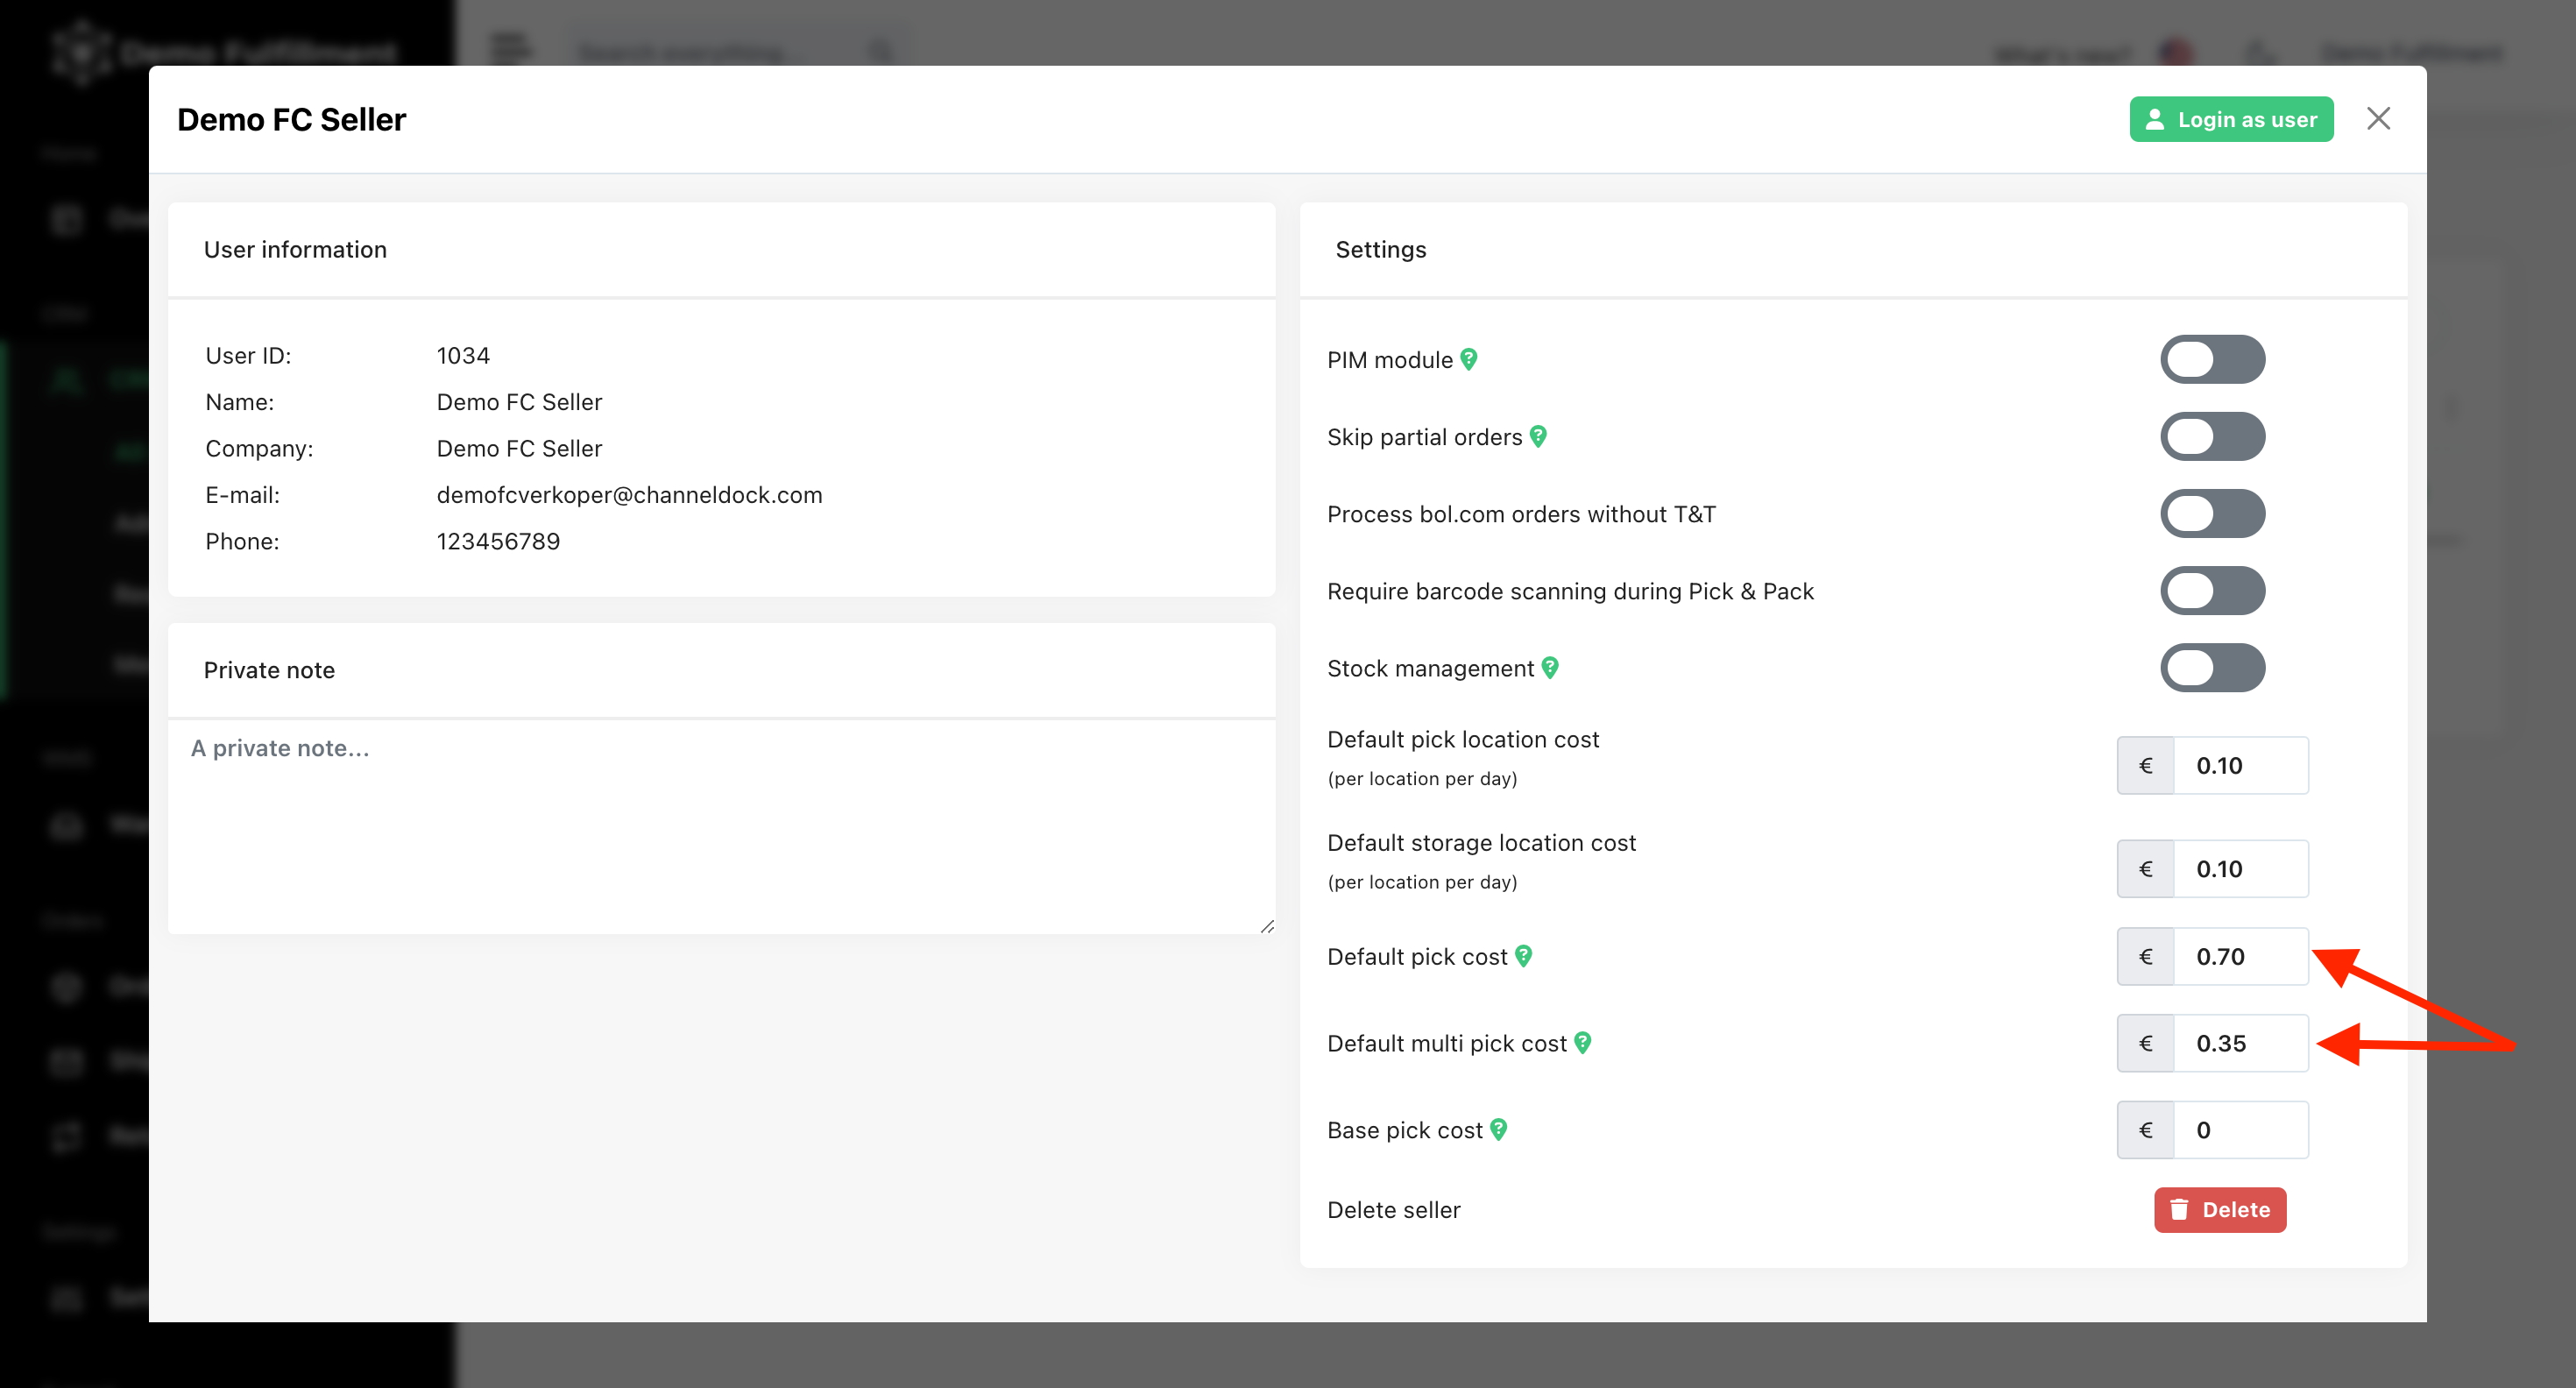
You can set up default pick costs and multi-pick rates for each seller. These default rates will automatically apply to new products added by the seller. You can also customize pick costs for individual products if needed.
1.Set up default pick costs:
To configure pick costs, go to CRM > All Sellers, search for the desired seller, and open their profile. From there, you can add or update the pick costs.
Important: Leave the base pick cost empty if you want to apply pick costs on a per-product basis.
2.Set up pick costs per individual product:
Navigate to Warehouse > All products and select the product you want to add picking cost for, then click Edit.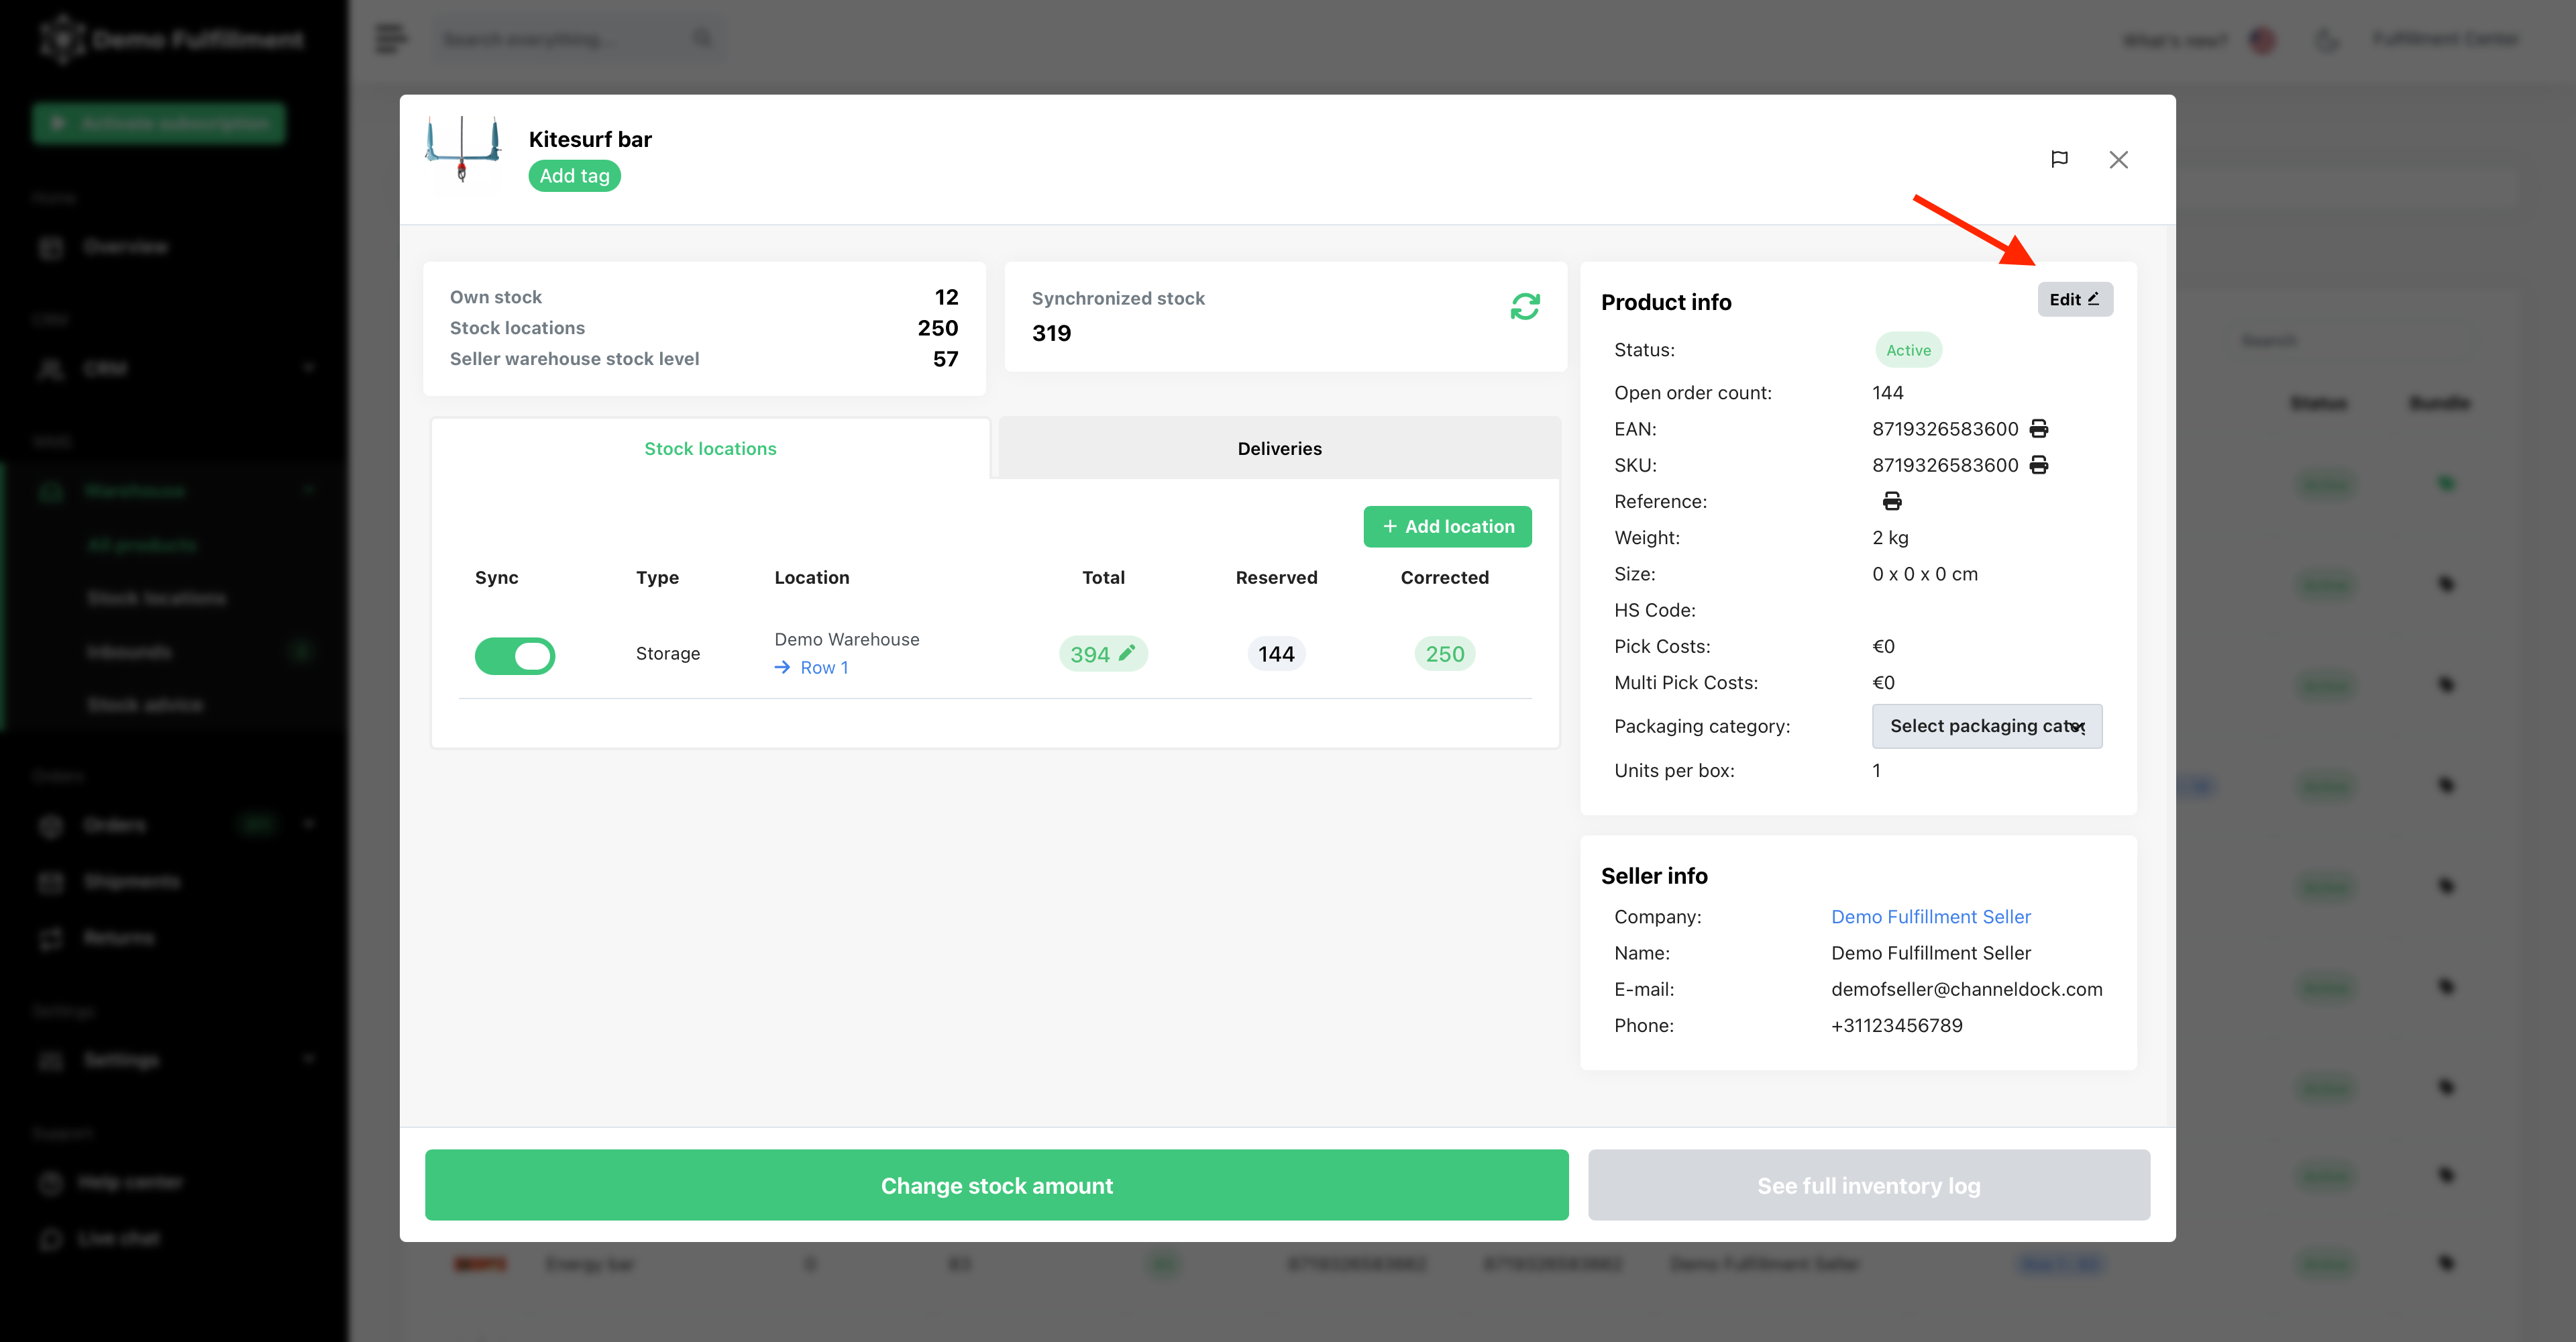
Here, you can add Pick costs for a single product and Multi Pick costs for picking multiple items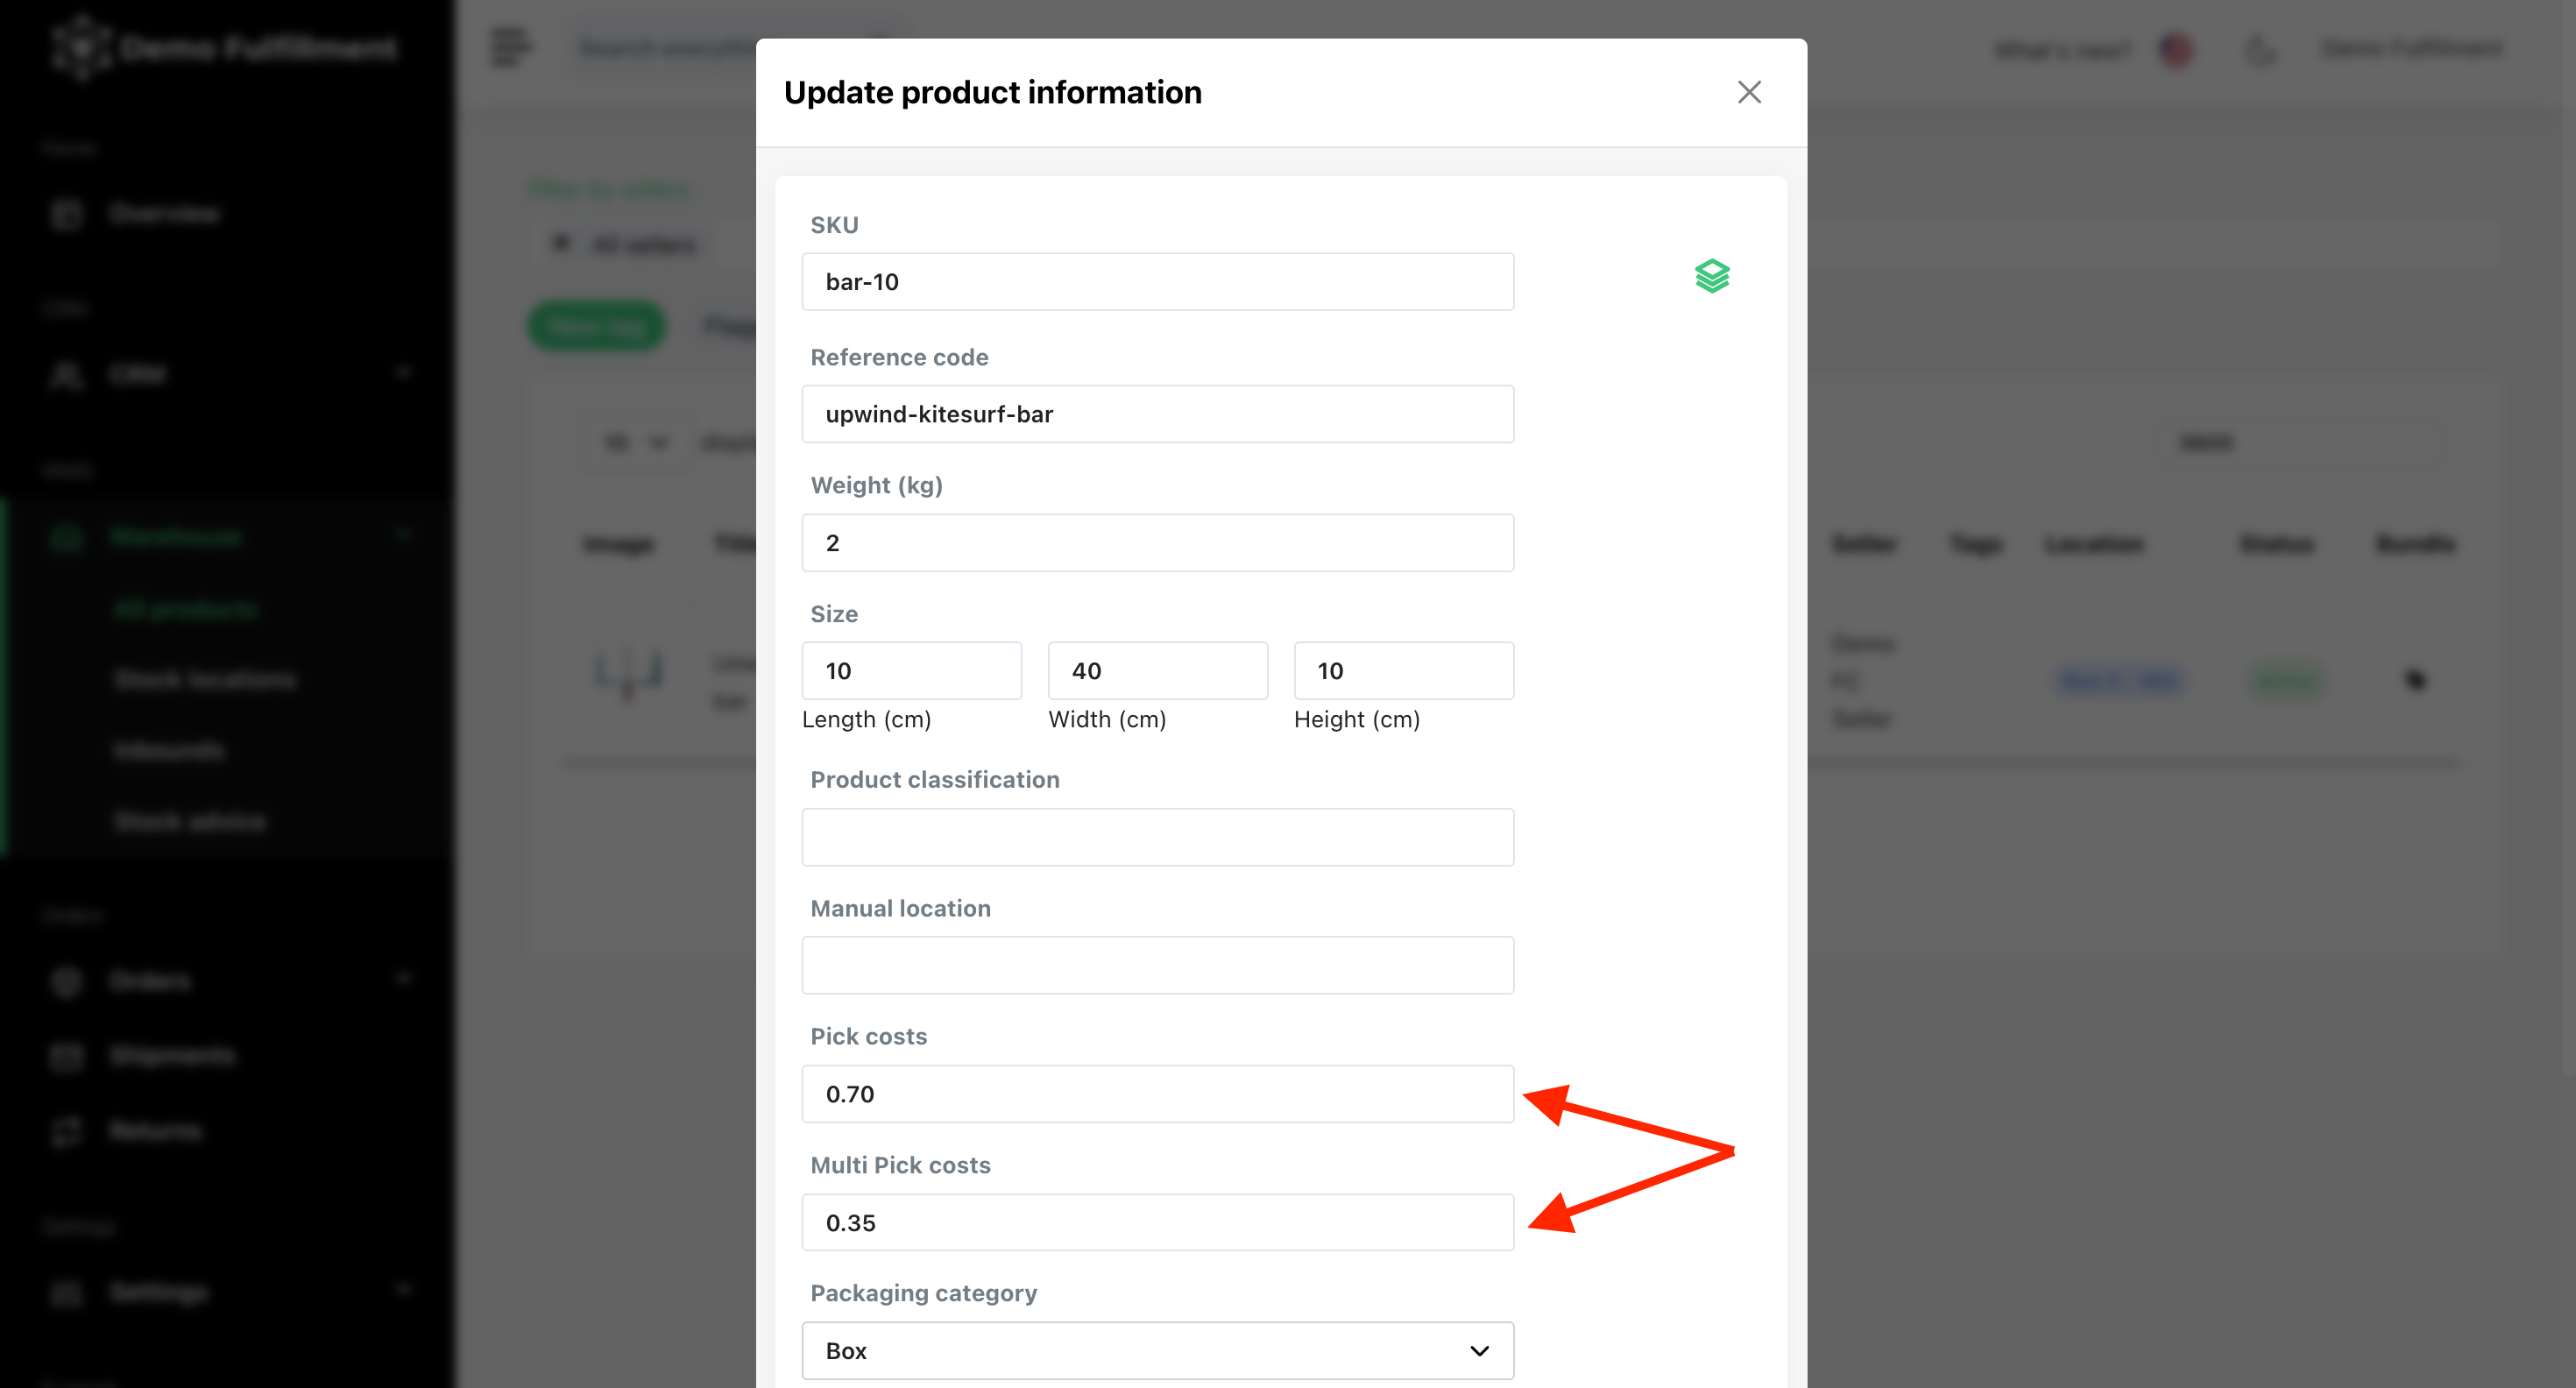
CannelDock supports two methods for charging pick costs:
A.Pick costs per product:
- Leave the base cost empty or set it to 0 to use this method.
- Example: For three identical products in one order, the seller is charged 1x pick cost and 2x multi-pick costs. This applies to all products in an order.
B.Pick costs per order:
- Leave the pick costs empty in the product settings.
- Add a base pick cost to set a fee for the first product in the order.
- Remaining products in the order are charged as multi-pick costs.
Important! Bundles are charged as a single product (not per individual product within the bundle).
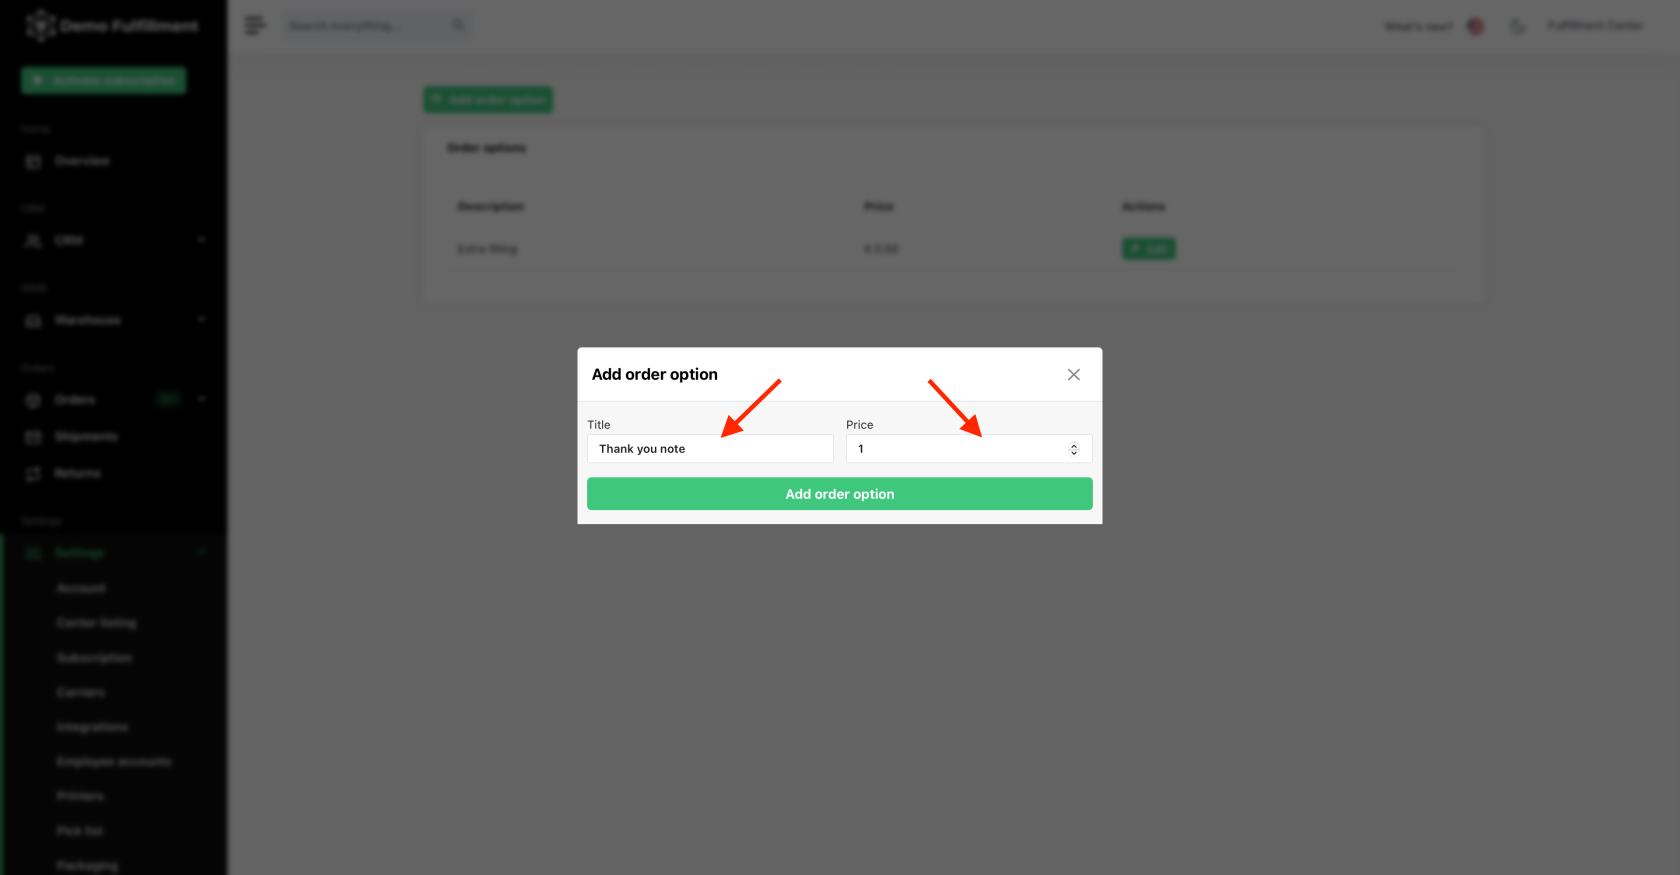
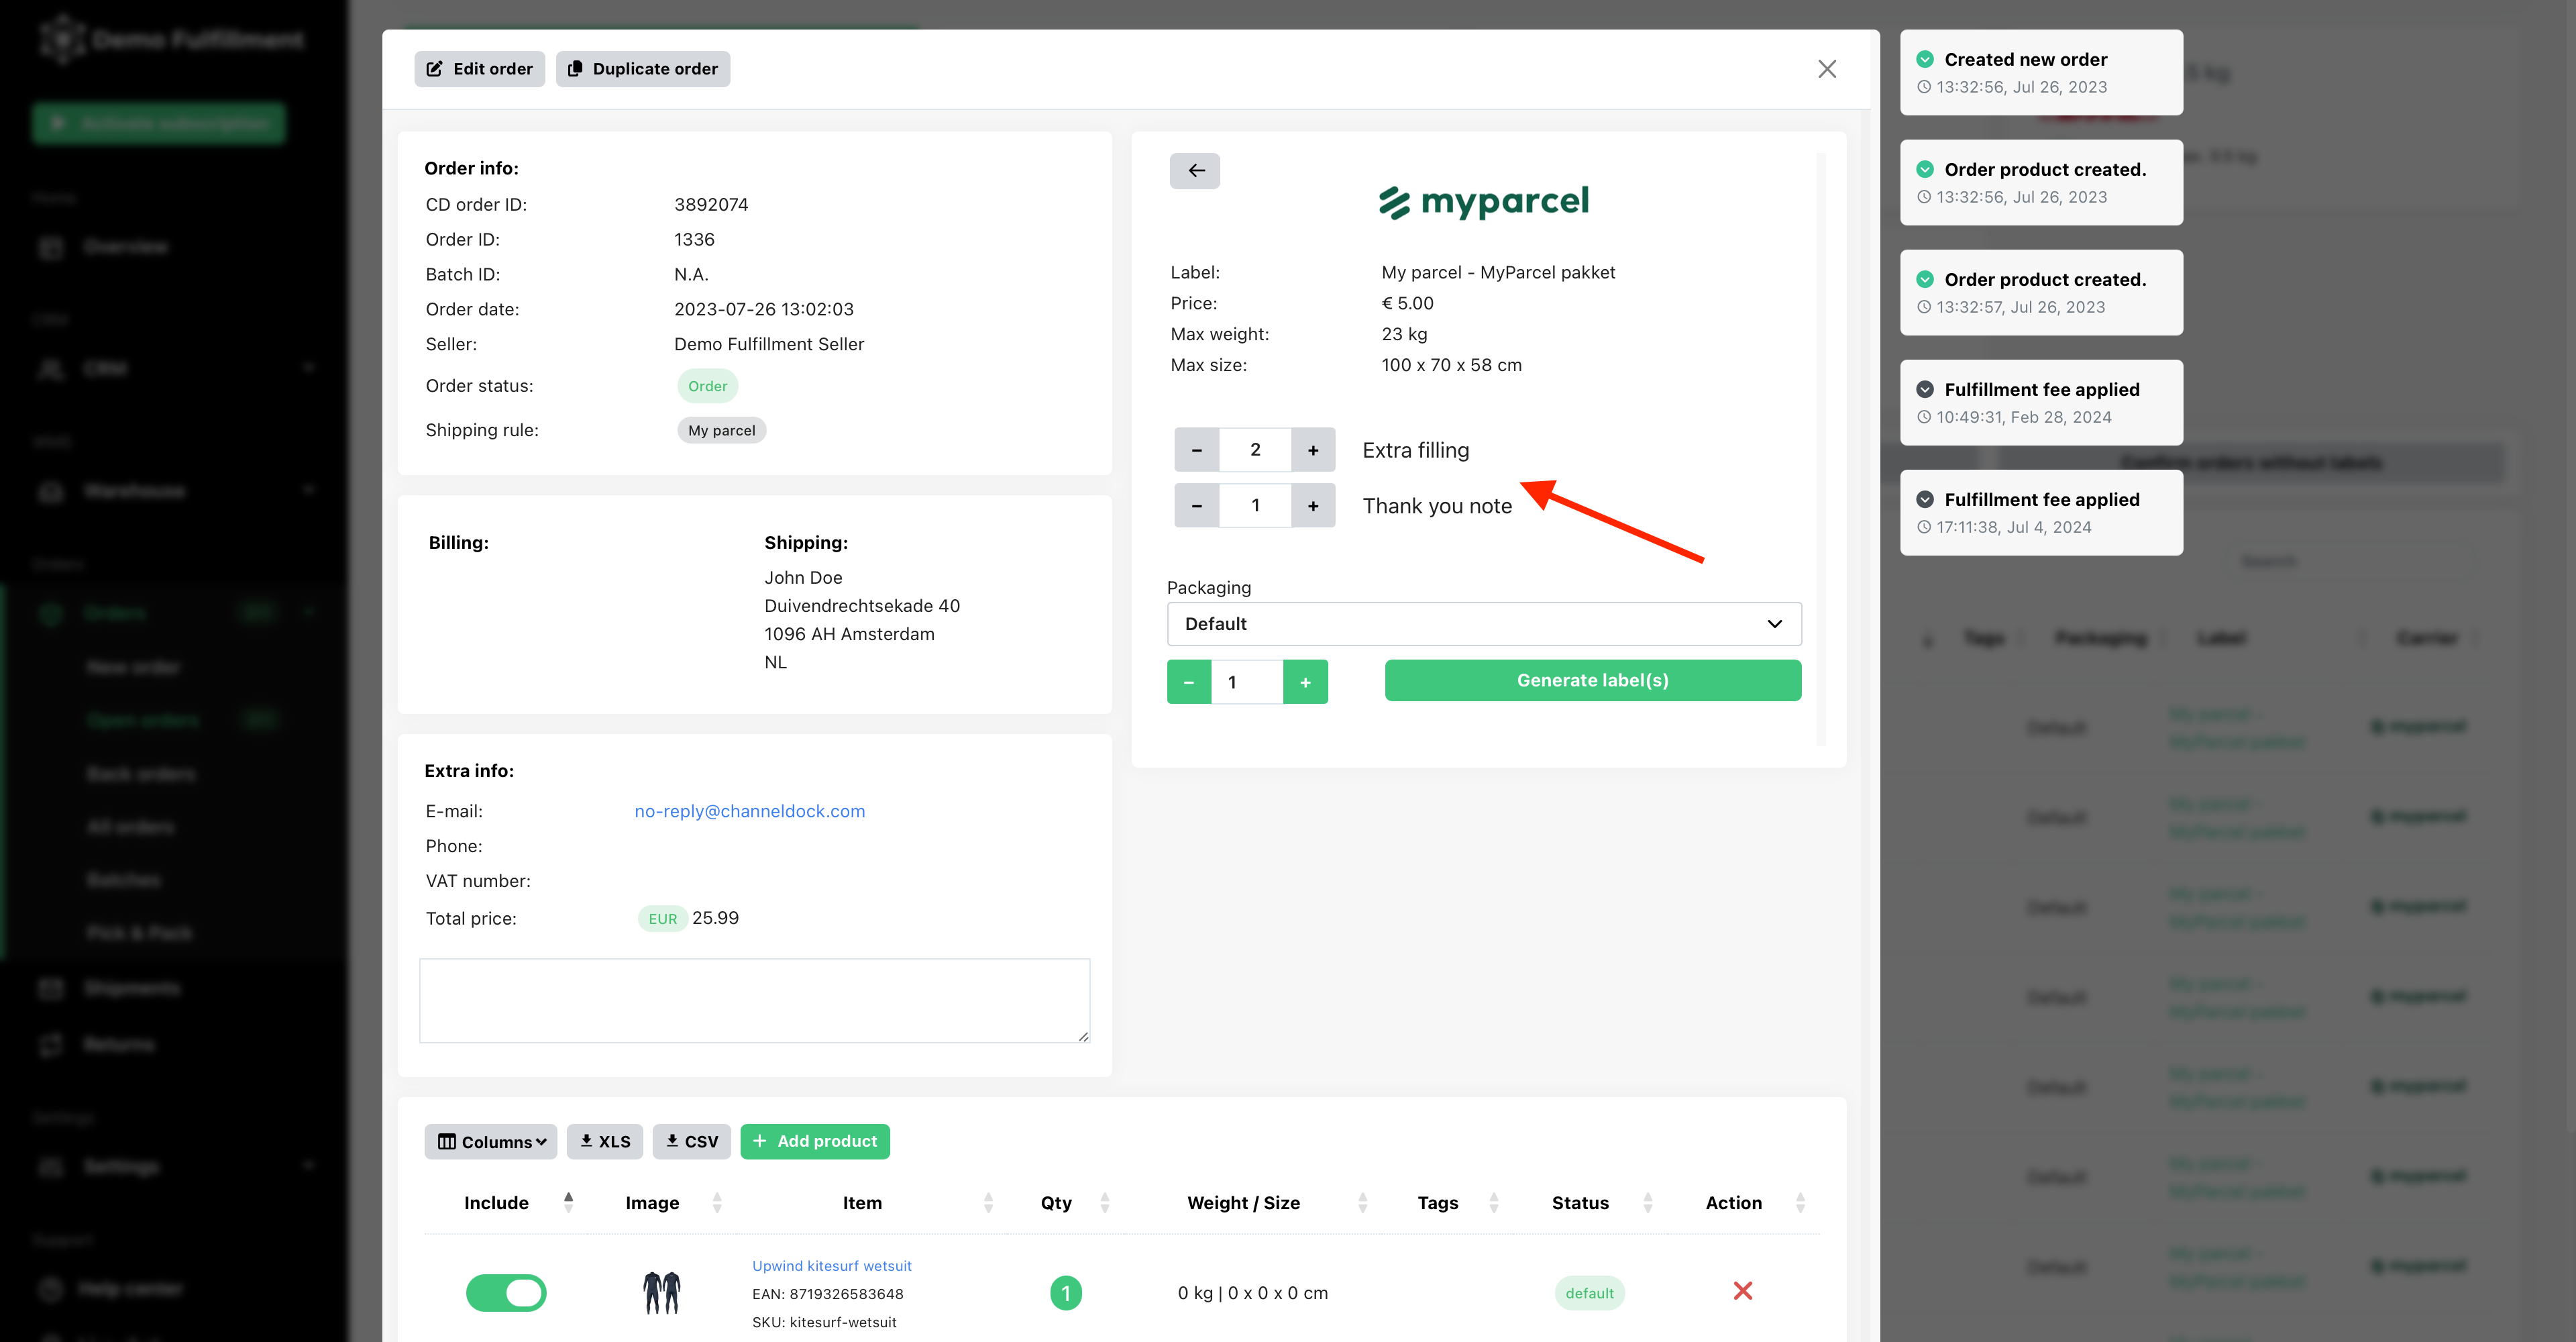
Add order options
- Navigate to Settings > Oder options, then click Add order options, fill in the title and the price fields and click Add order option. You can add as many order options as you like.
- In open orders, you can then see these options and select/add as many as you like.


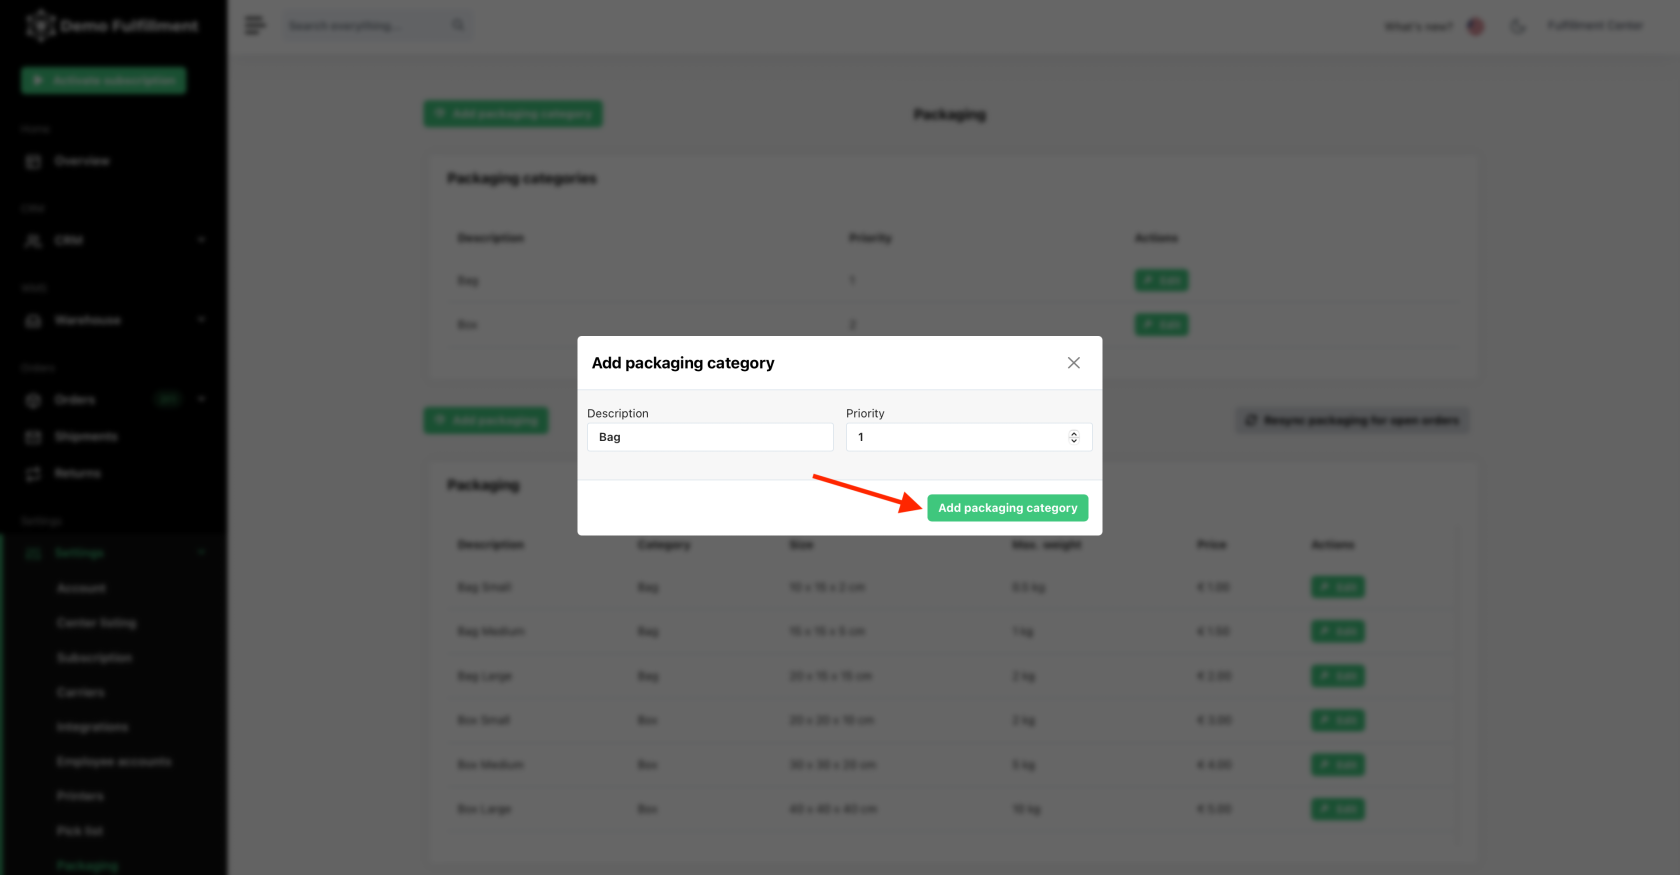
Adding packaging
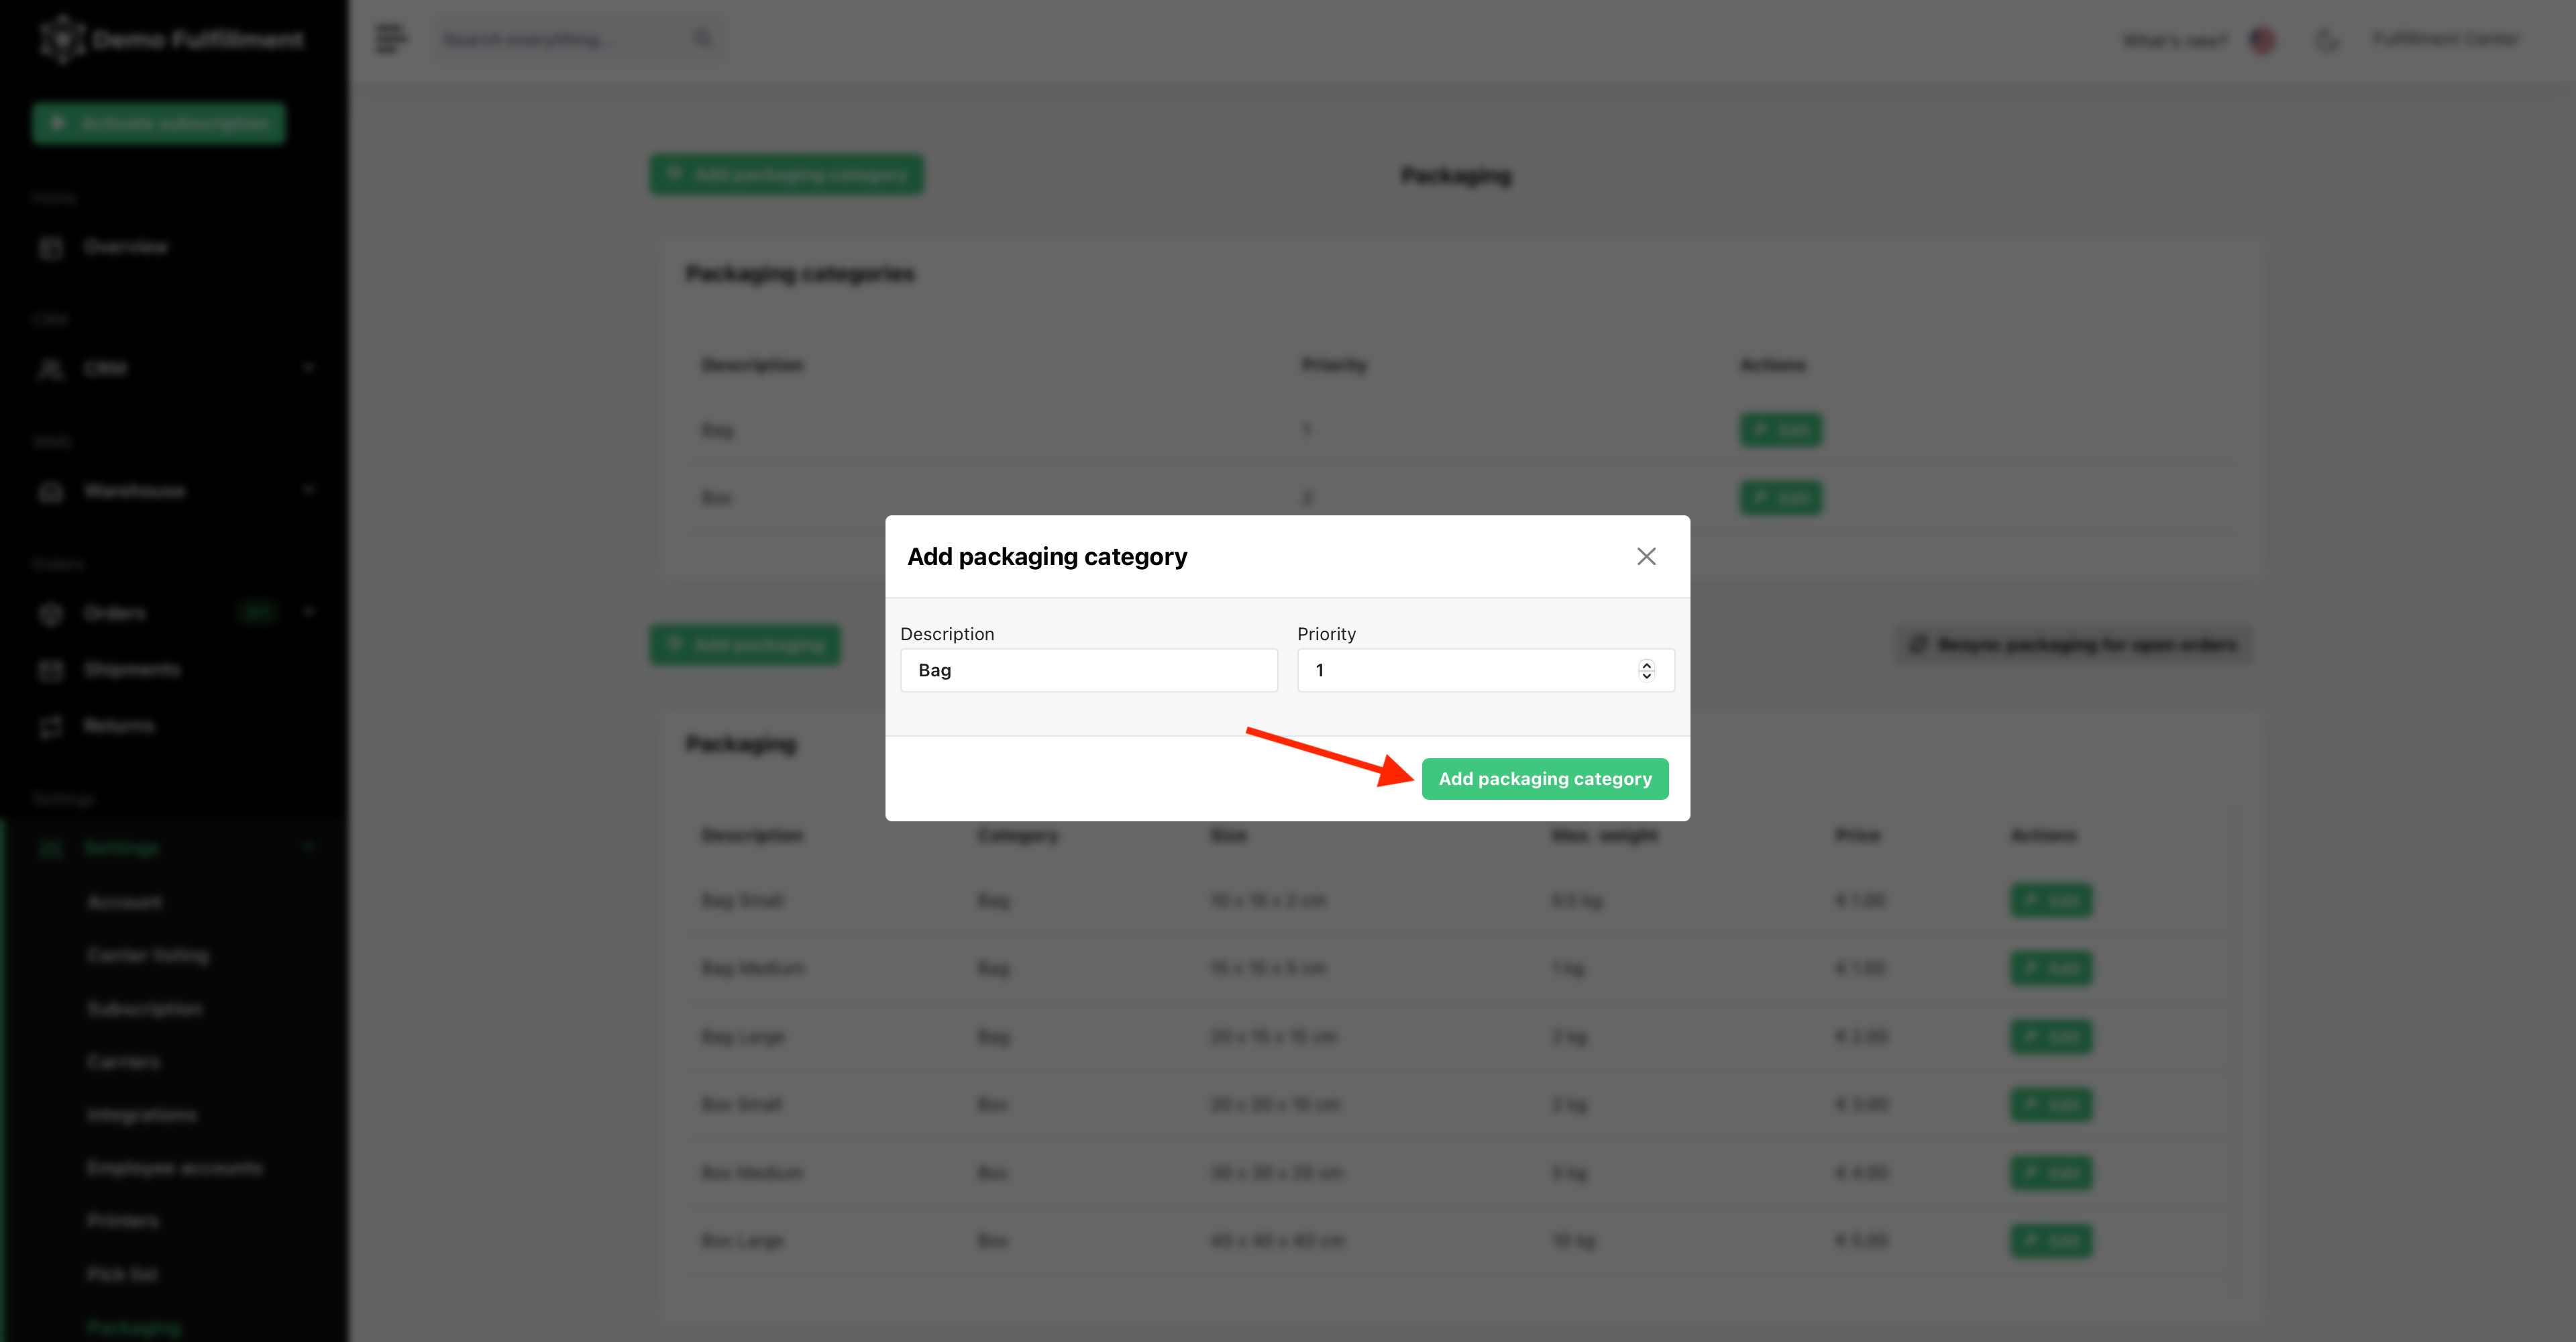
- Navigate to Settings > WMS > Packaging, then click on Add packaging category, fill in the description and priority fields then click on Add packaging category. You can add as many categories as you like.
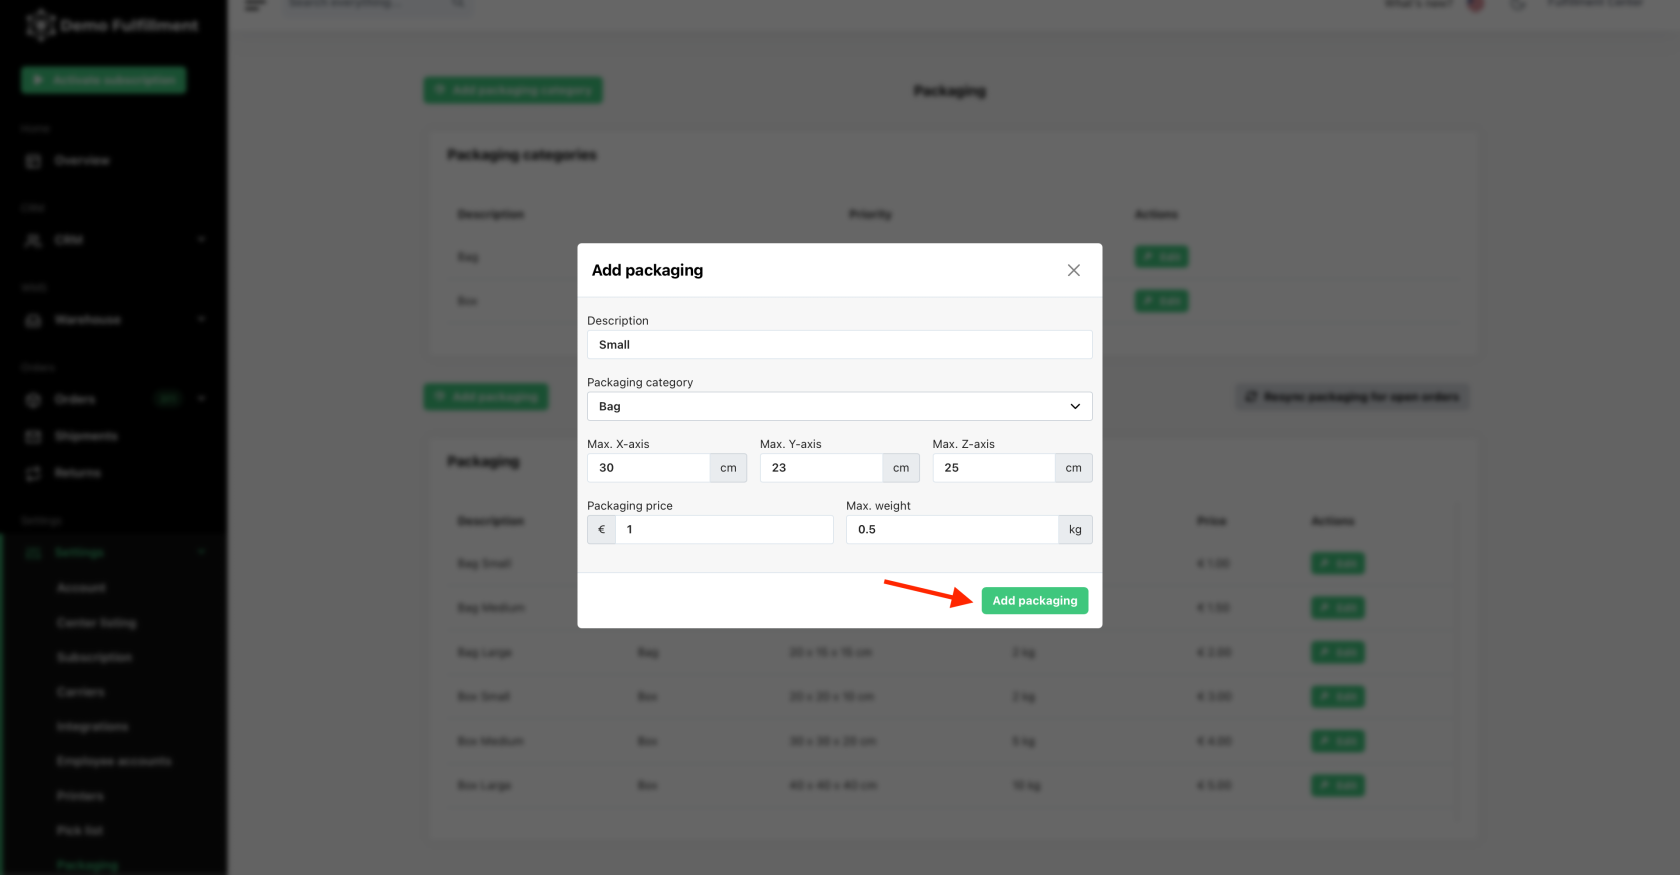
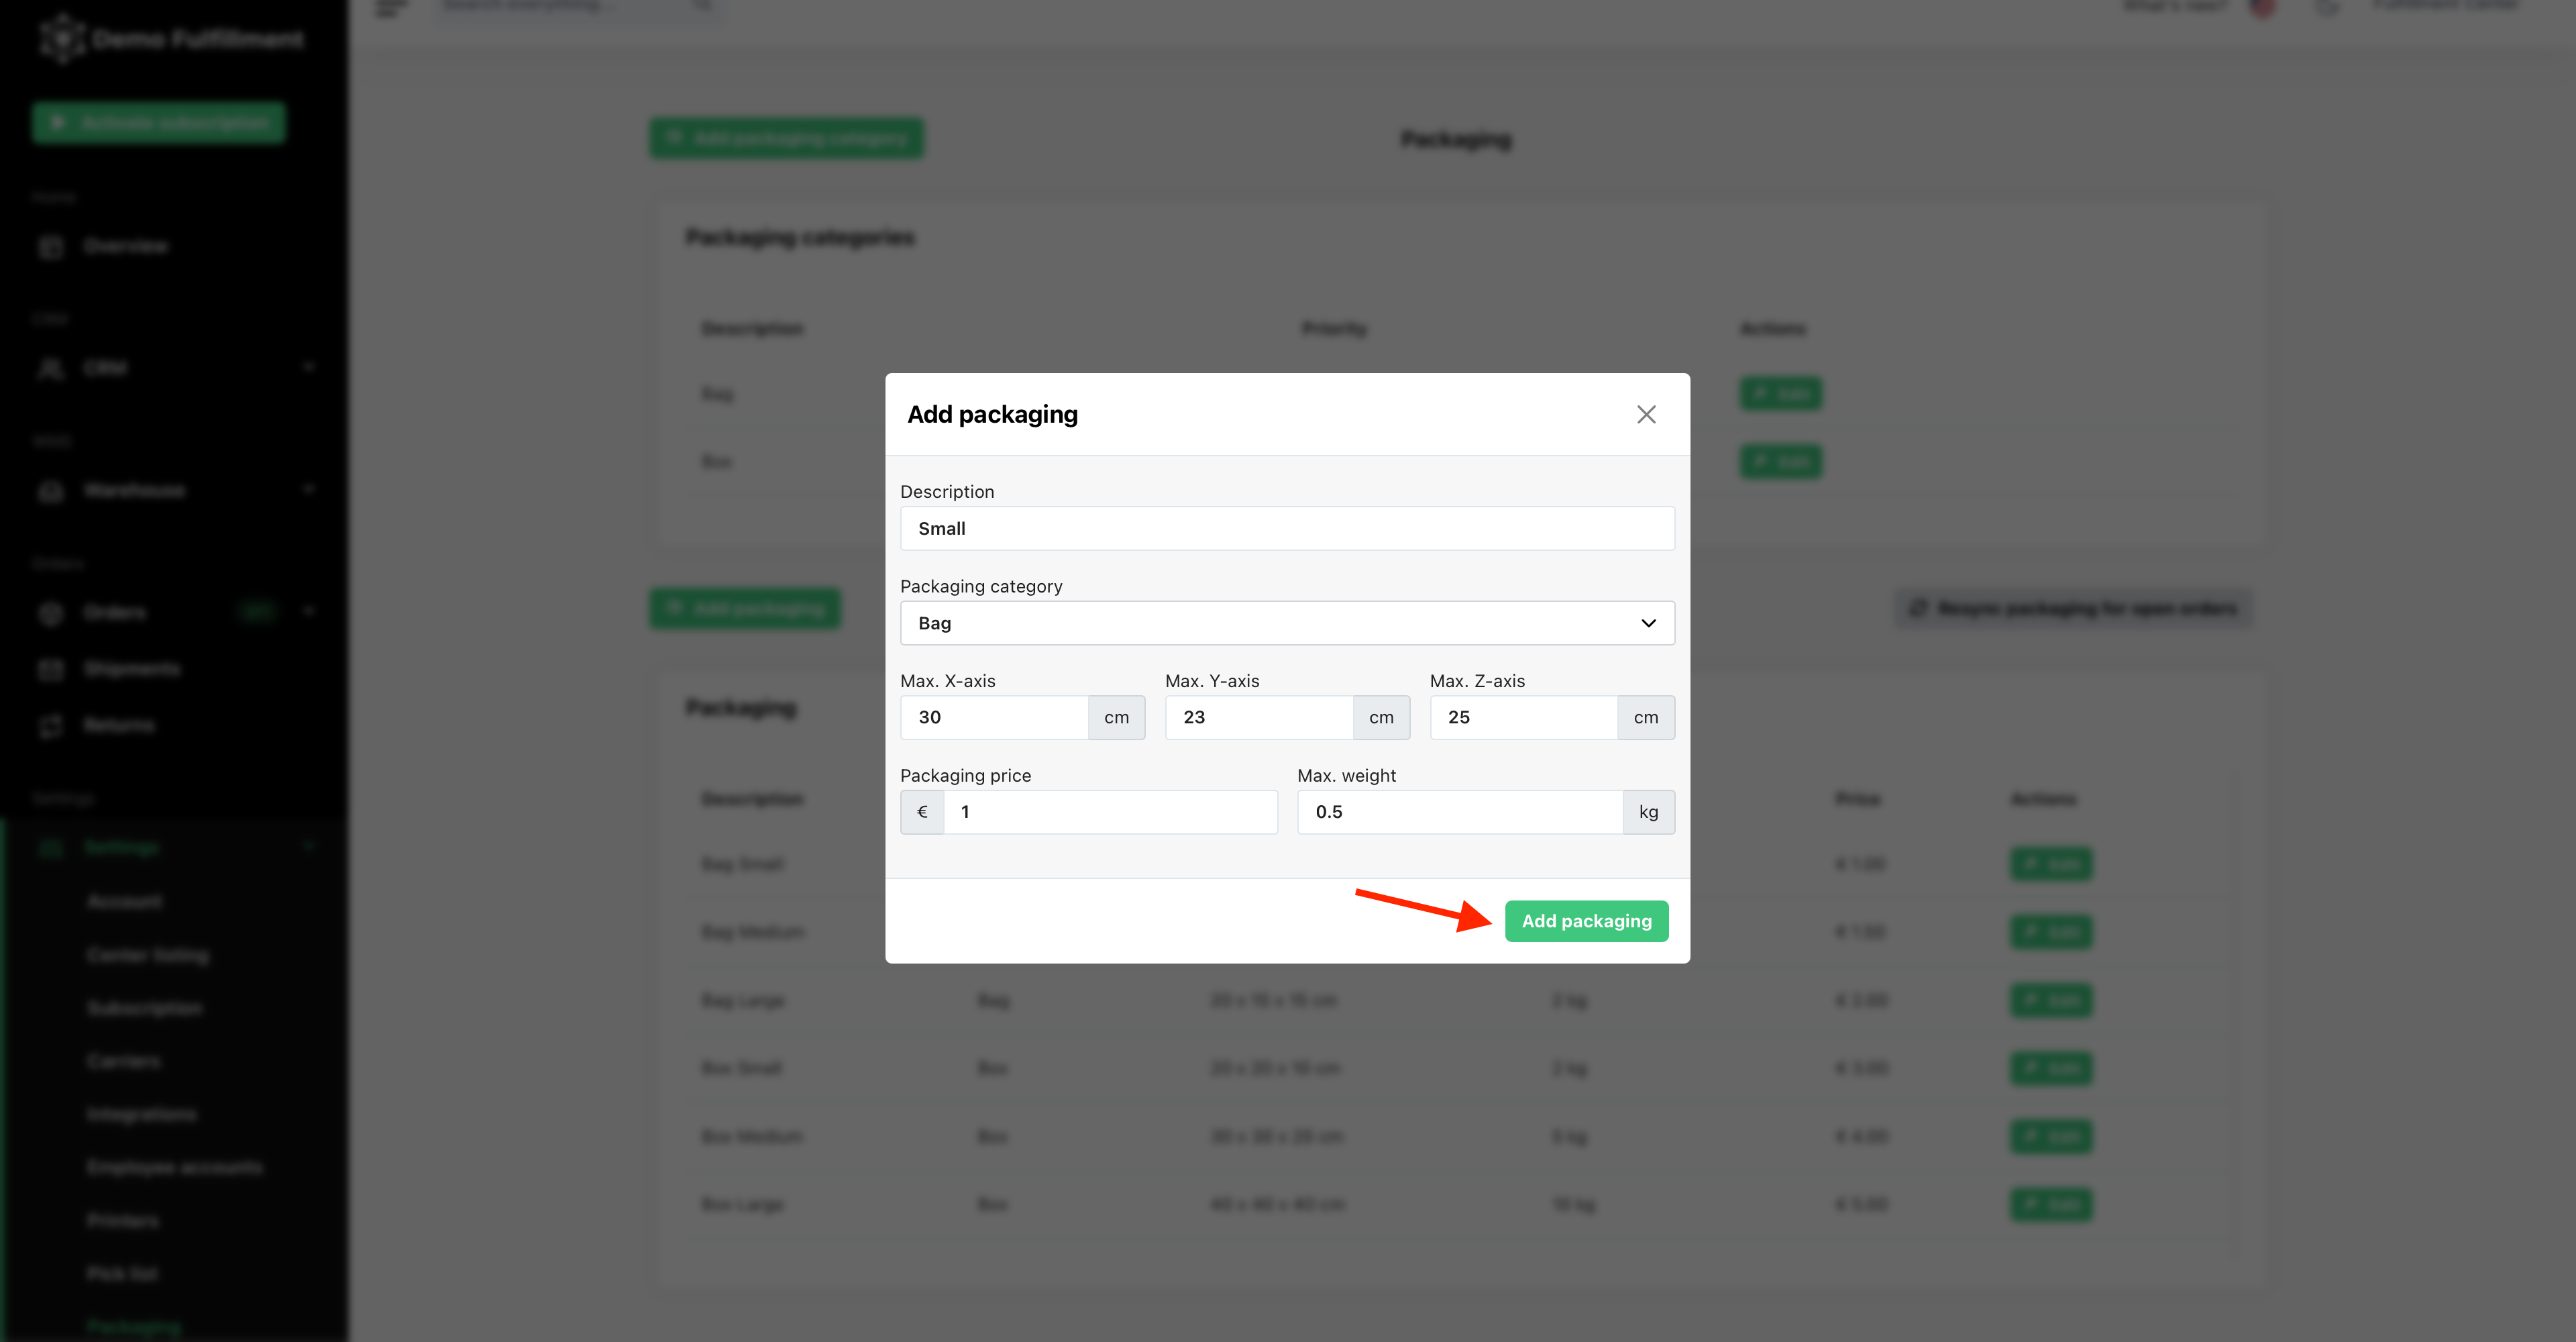
- On the same page, navigate to Add packaging and click on it, fill in the fields, select a packaging category and click Add packaging. You can add as many as you like.
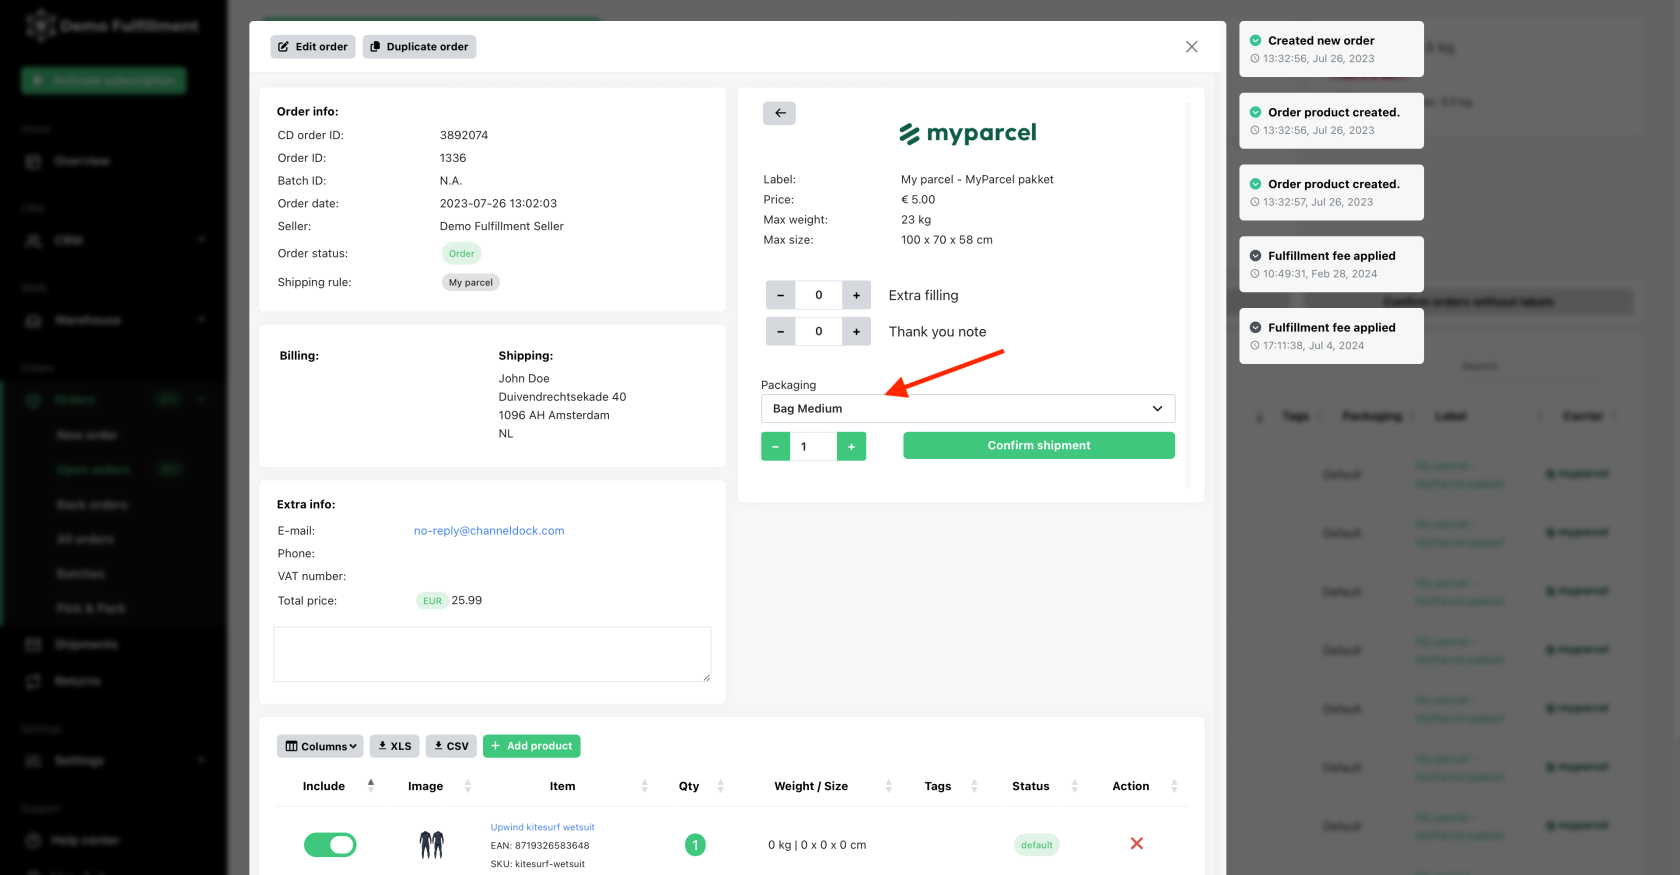
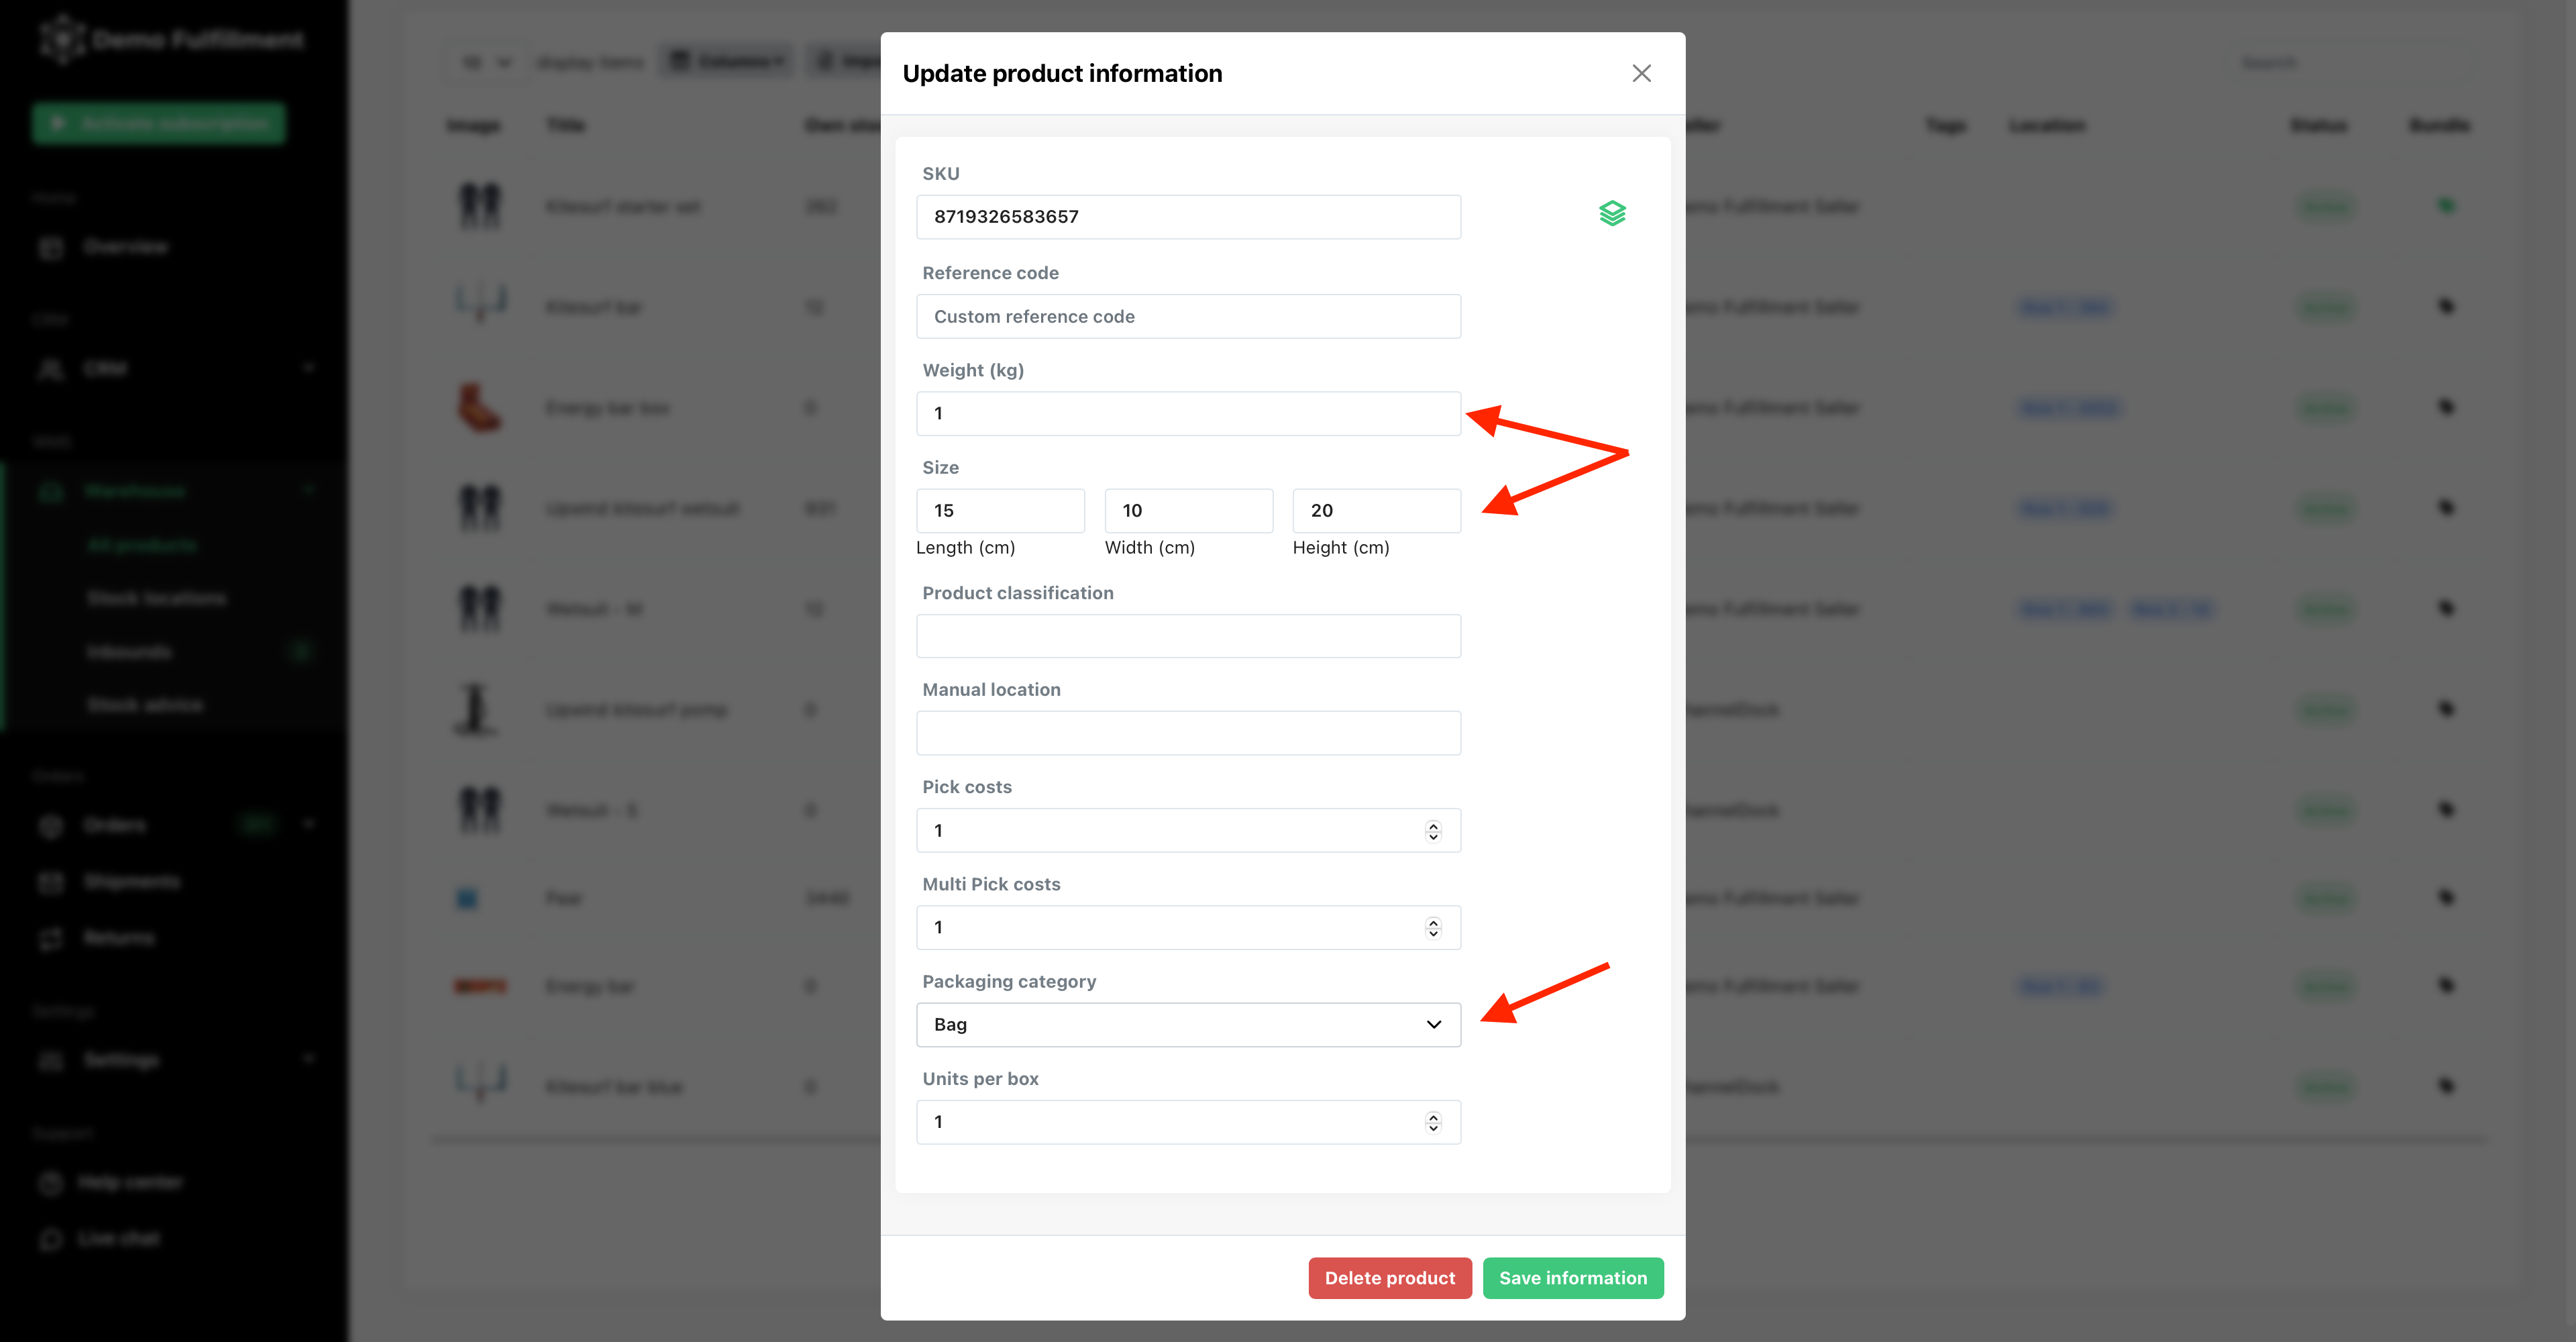
- Navigate to Warehouse > All products, select the product you wish to add the picking cost and click Edit. If you haven't added it already, add the item's details (weight, size), select your packaging category, and then Save information.

- Now, in open orders, for an order with that product in, the system will suggest the highest category you selected for this product (in this case is box) and the right size box for this order.

Carriers
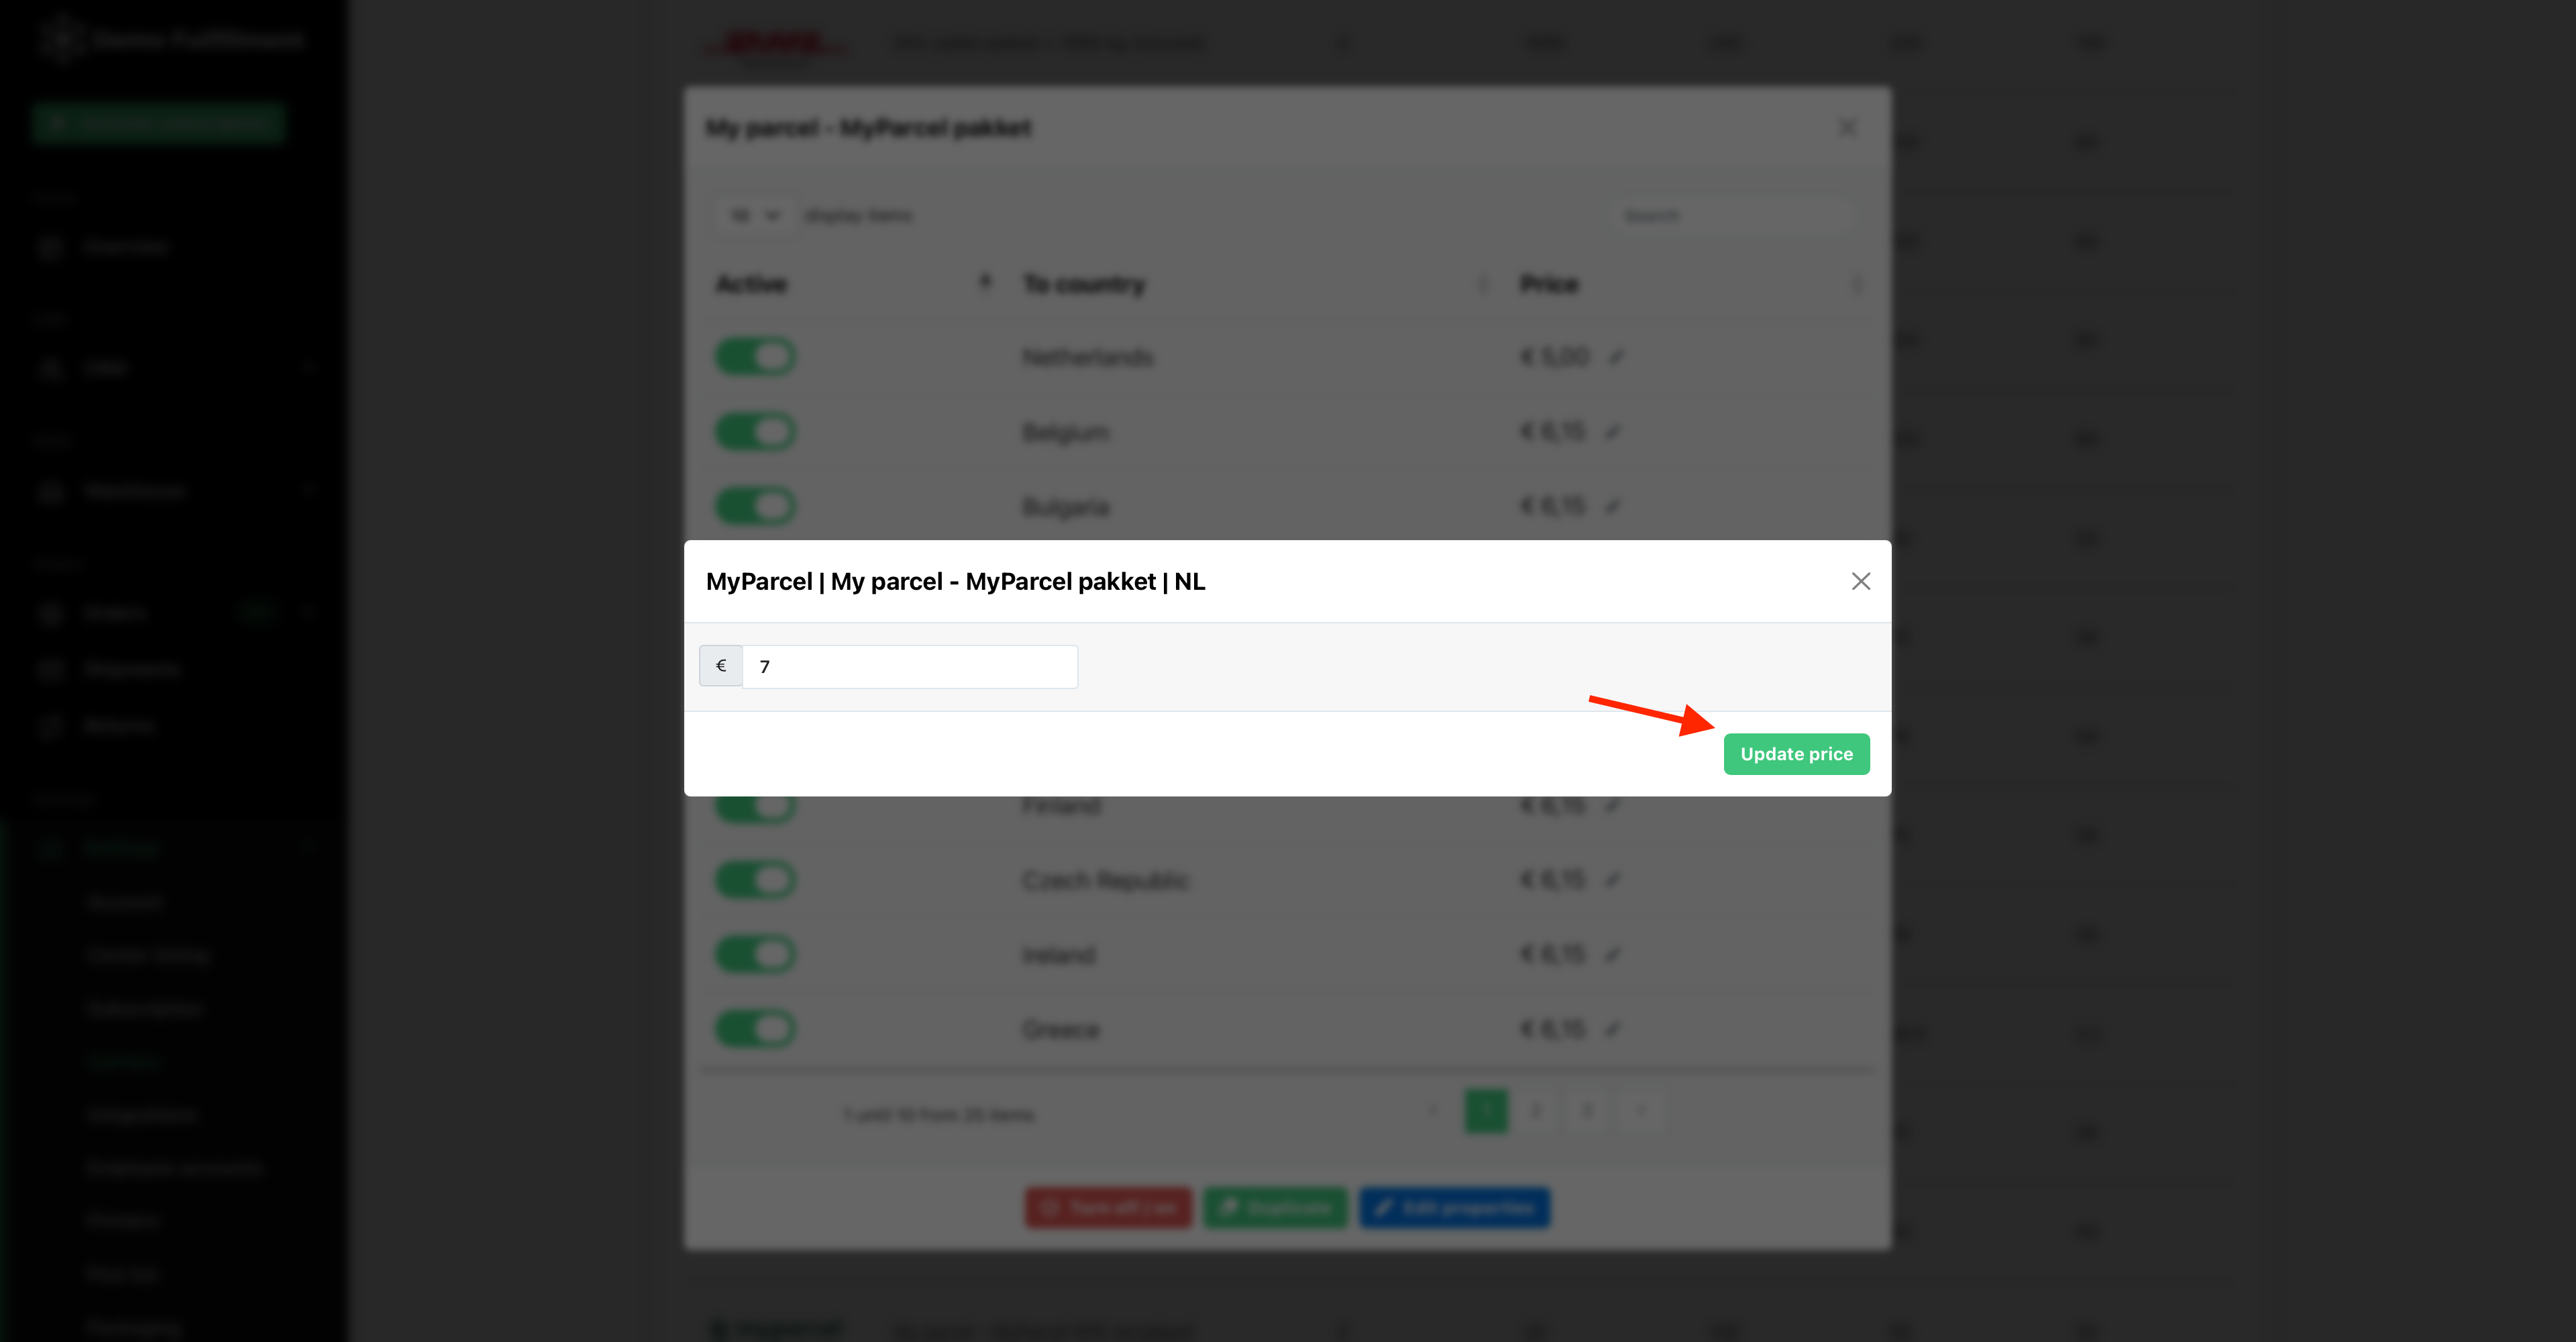
- Navigate to Settings > Carriers, then select the shipping carrier for which you want to edit the price.
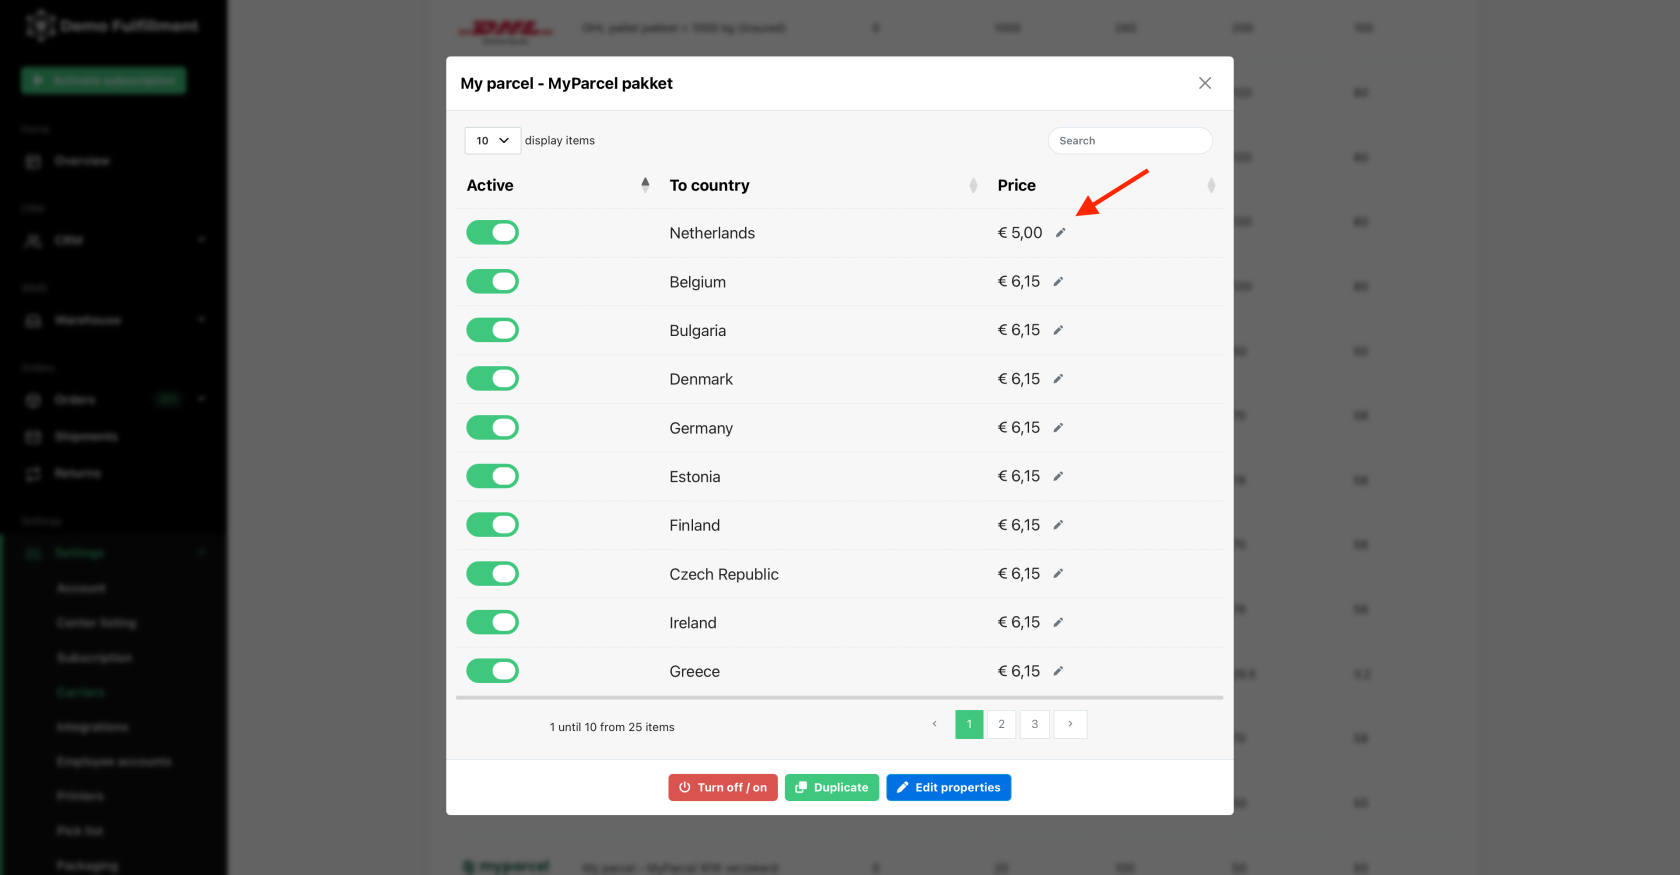
- Change the price to your desired value and click on 'Change price.' You need to do this for every shipment option.


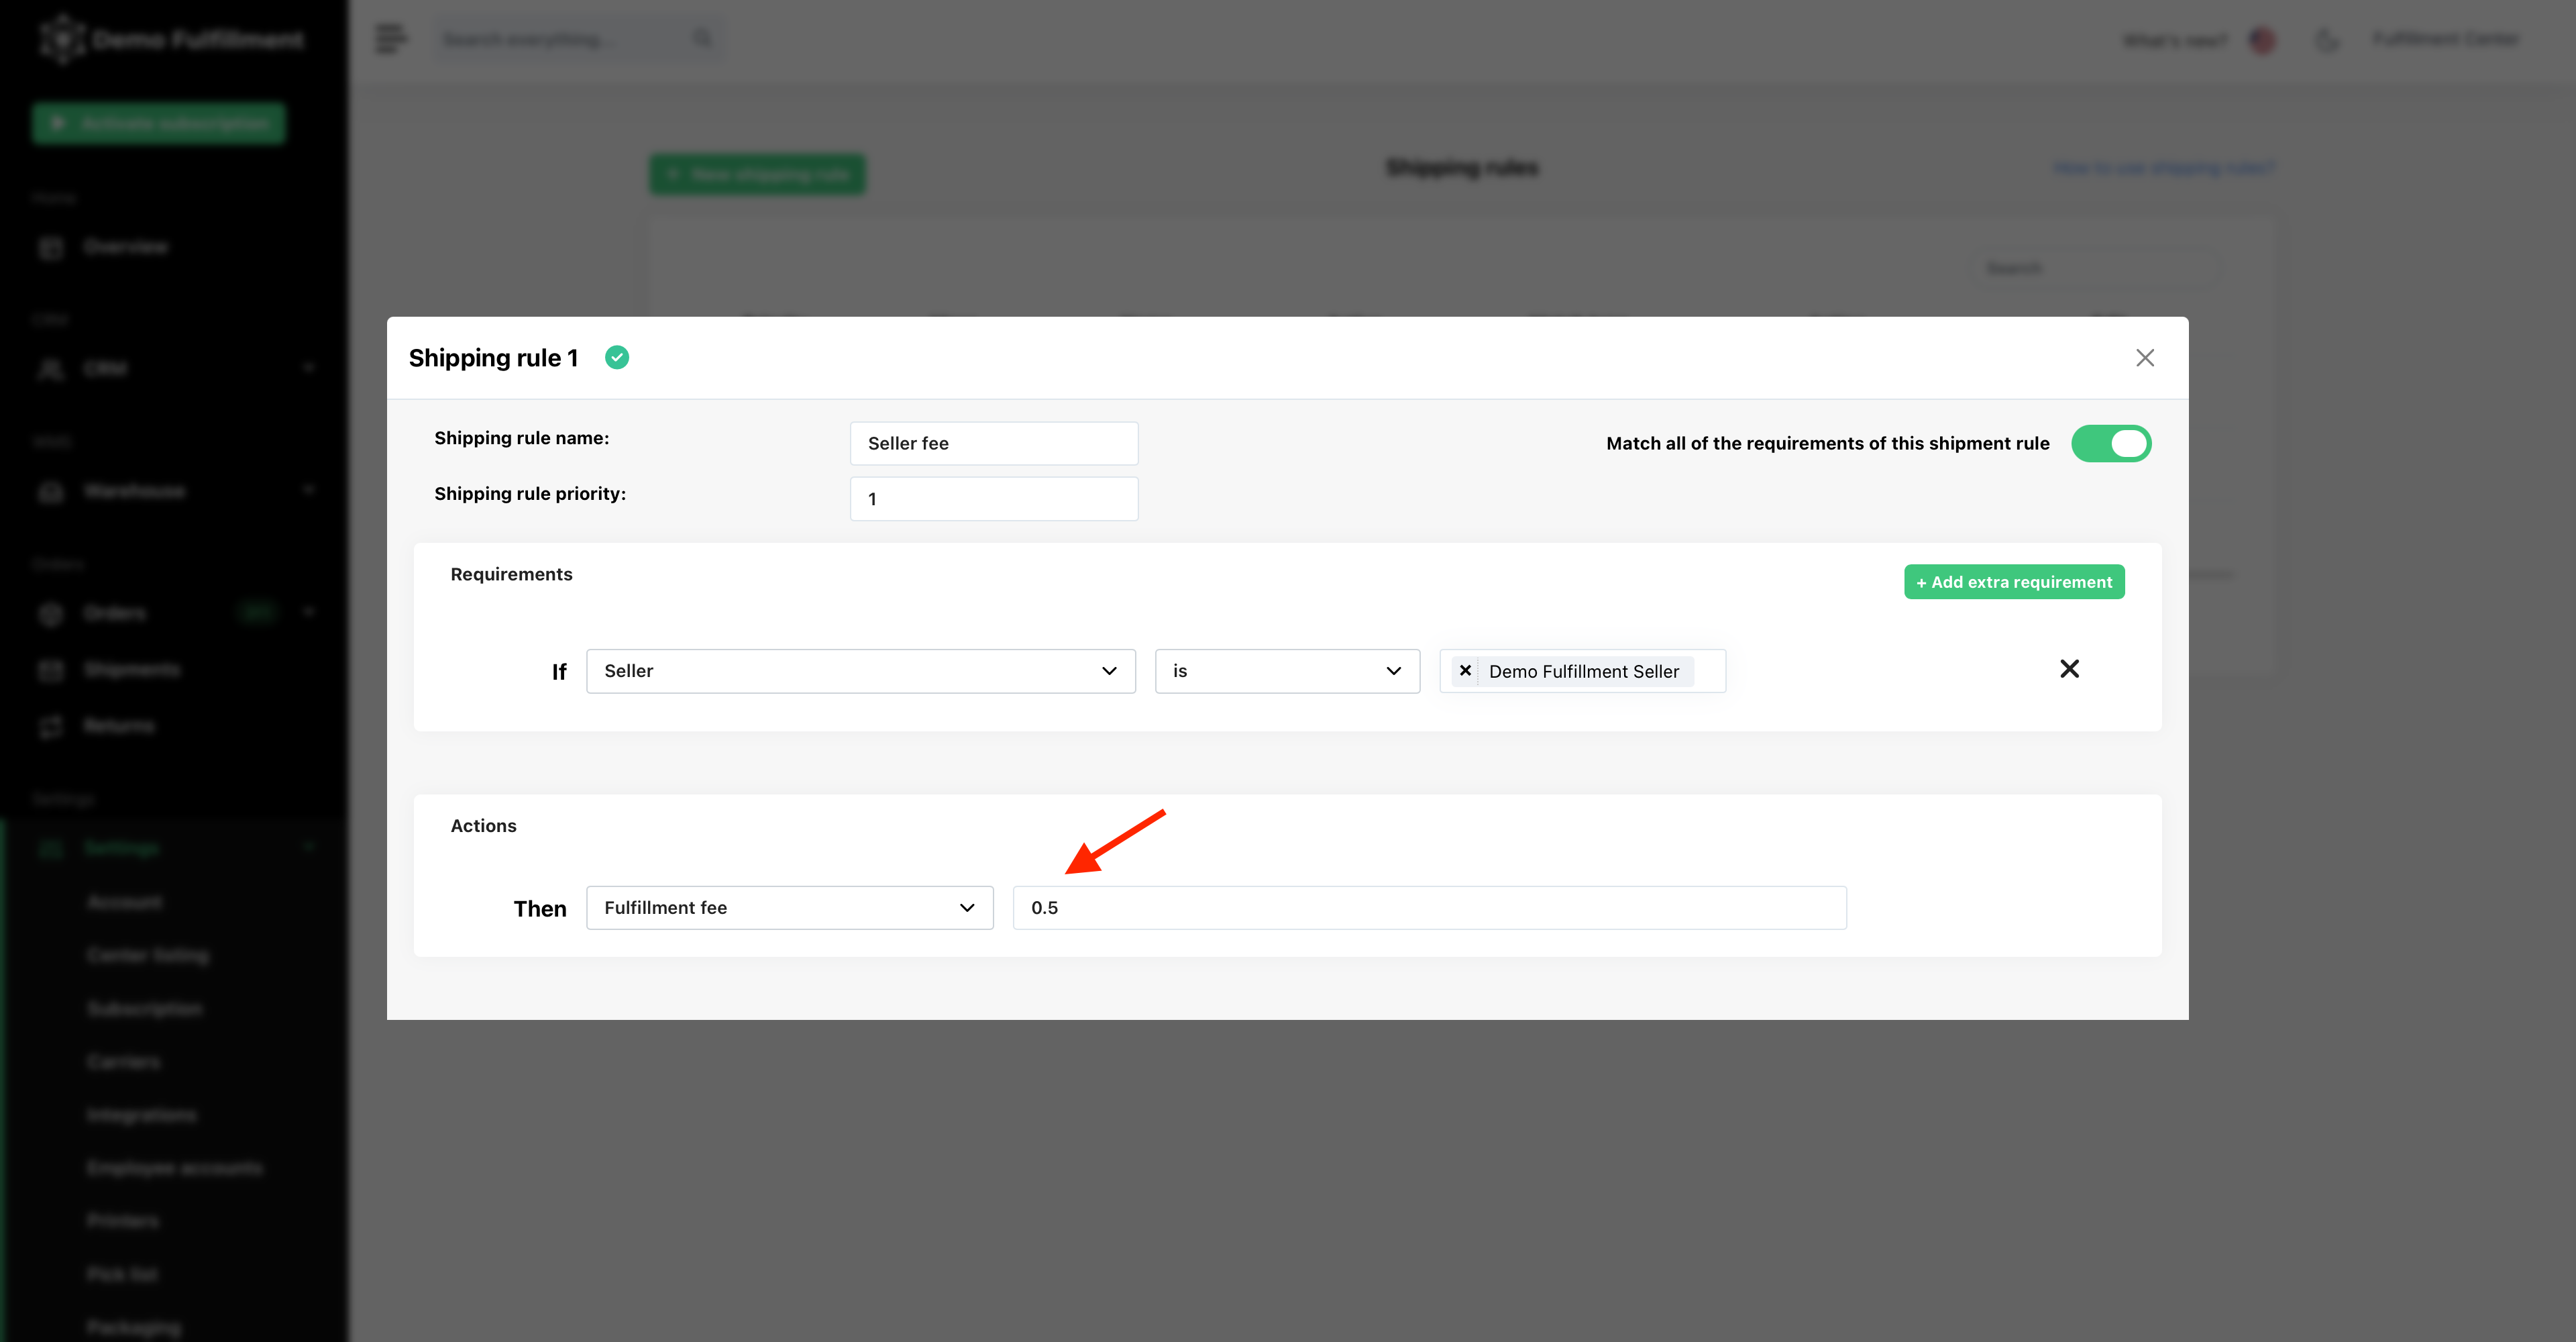
Create shipping rules
- Check out how to set up shipping rules here.
- In addition to those shipping rules, as a fulfillment center you can add shipping rules based on the sellers.
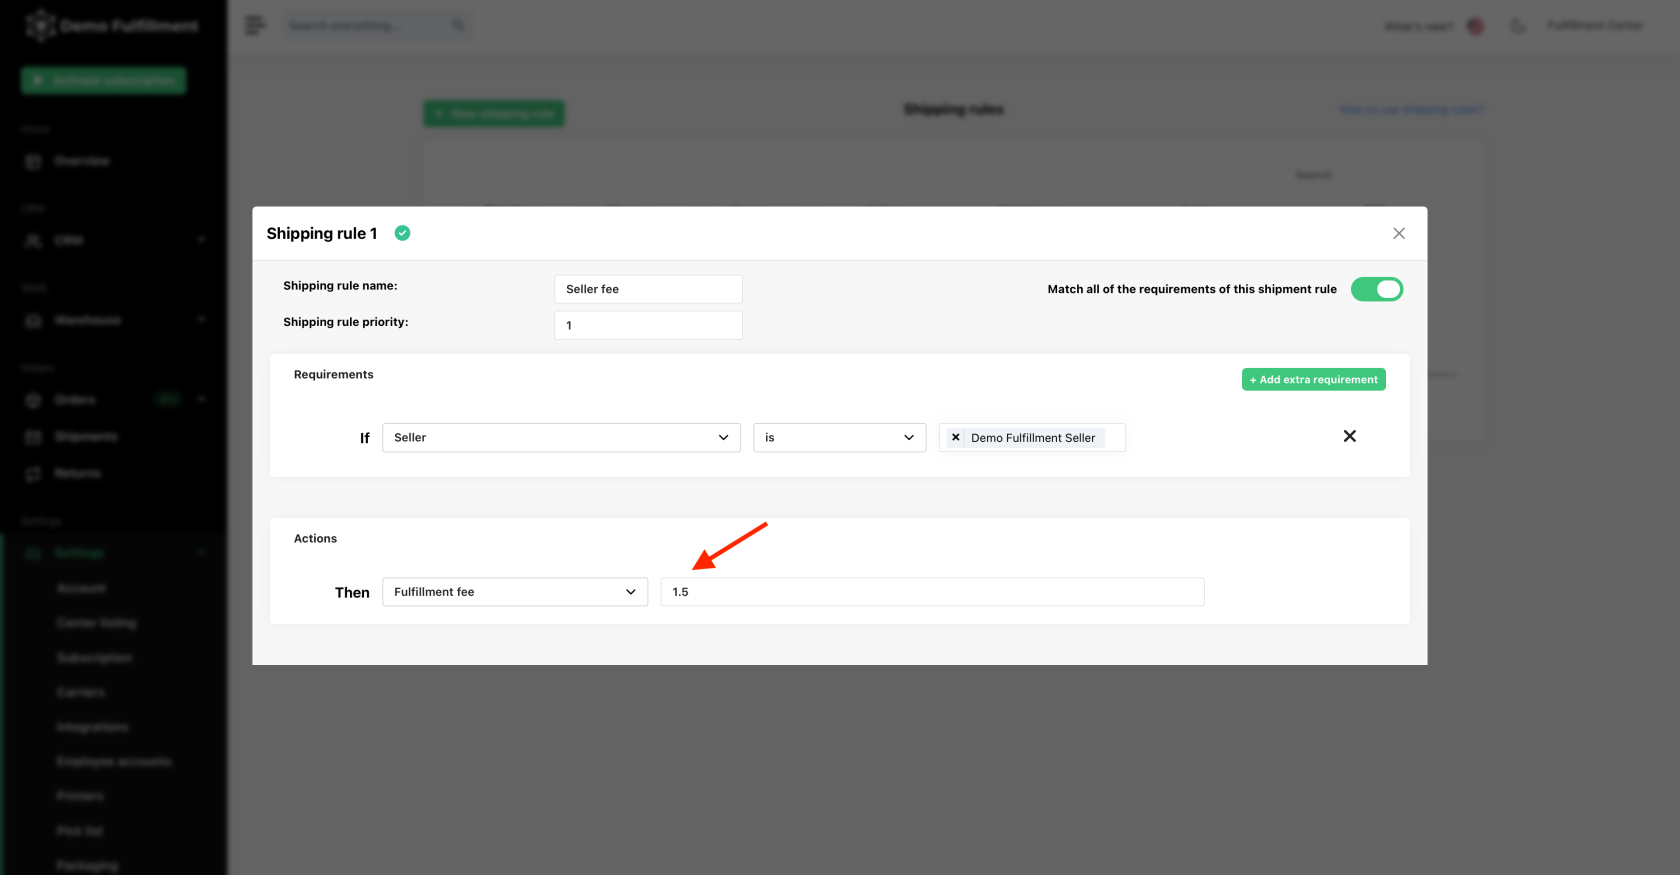
- Or maybe you wish to a add a discount for one of your sellers.


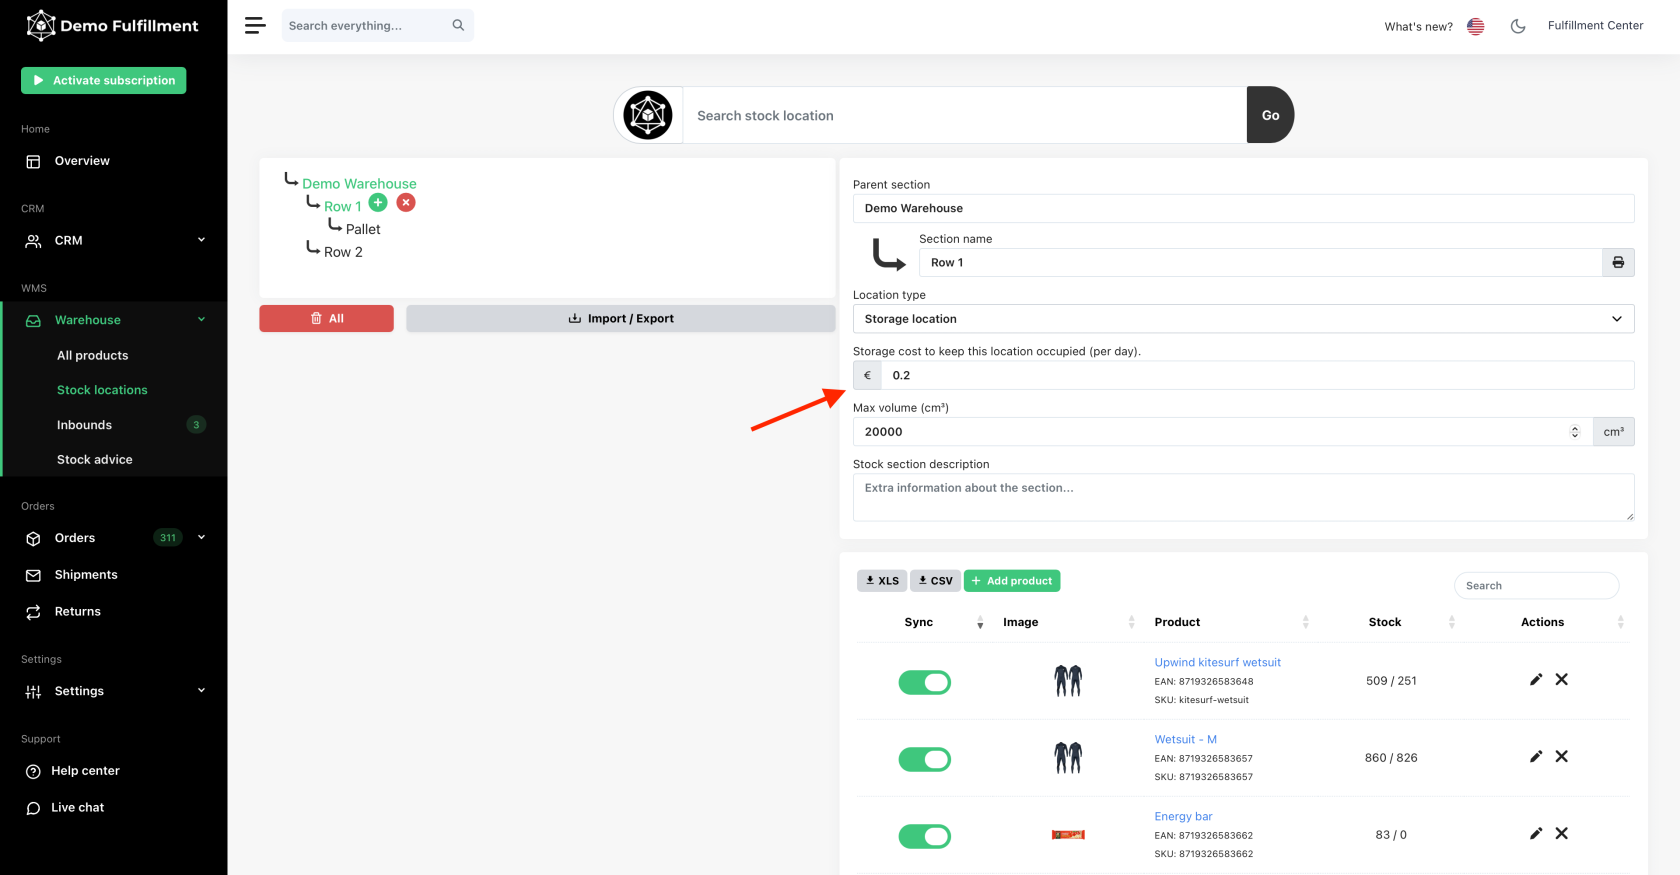
Storage costs
- Firstly, you need to map your warehouse. Help on how to do that here.
- Additionally, as a fulfillment center, you have an extra field where you can add storage costs.

By following these steps, you can now view all the administration details on one page for all the sellers.
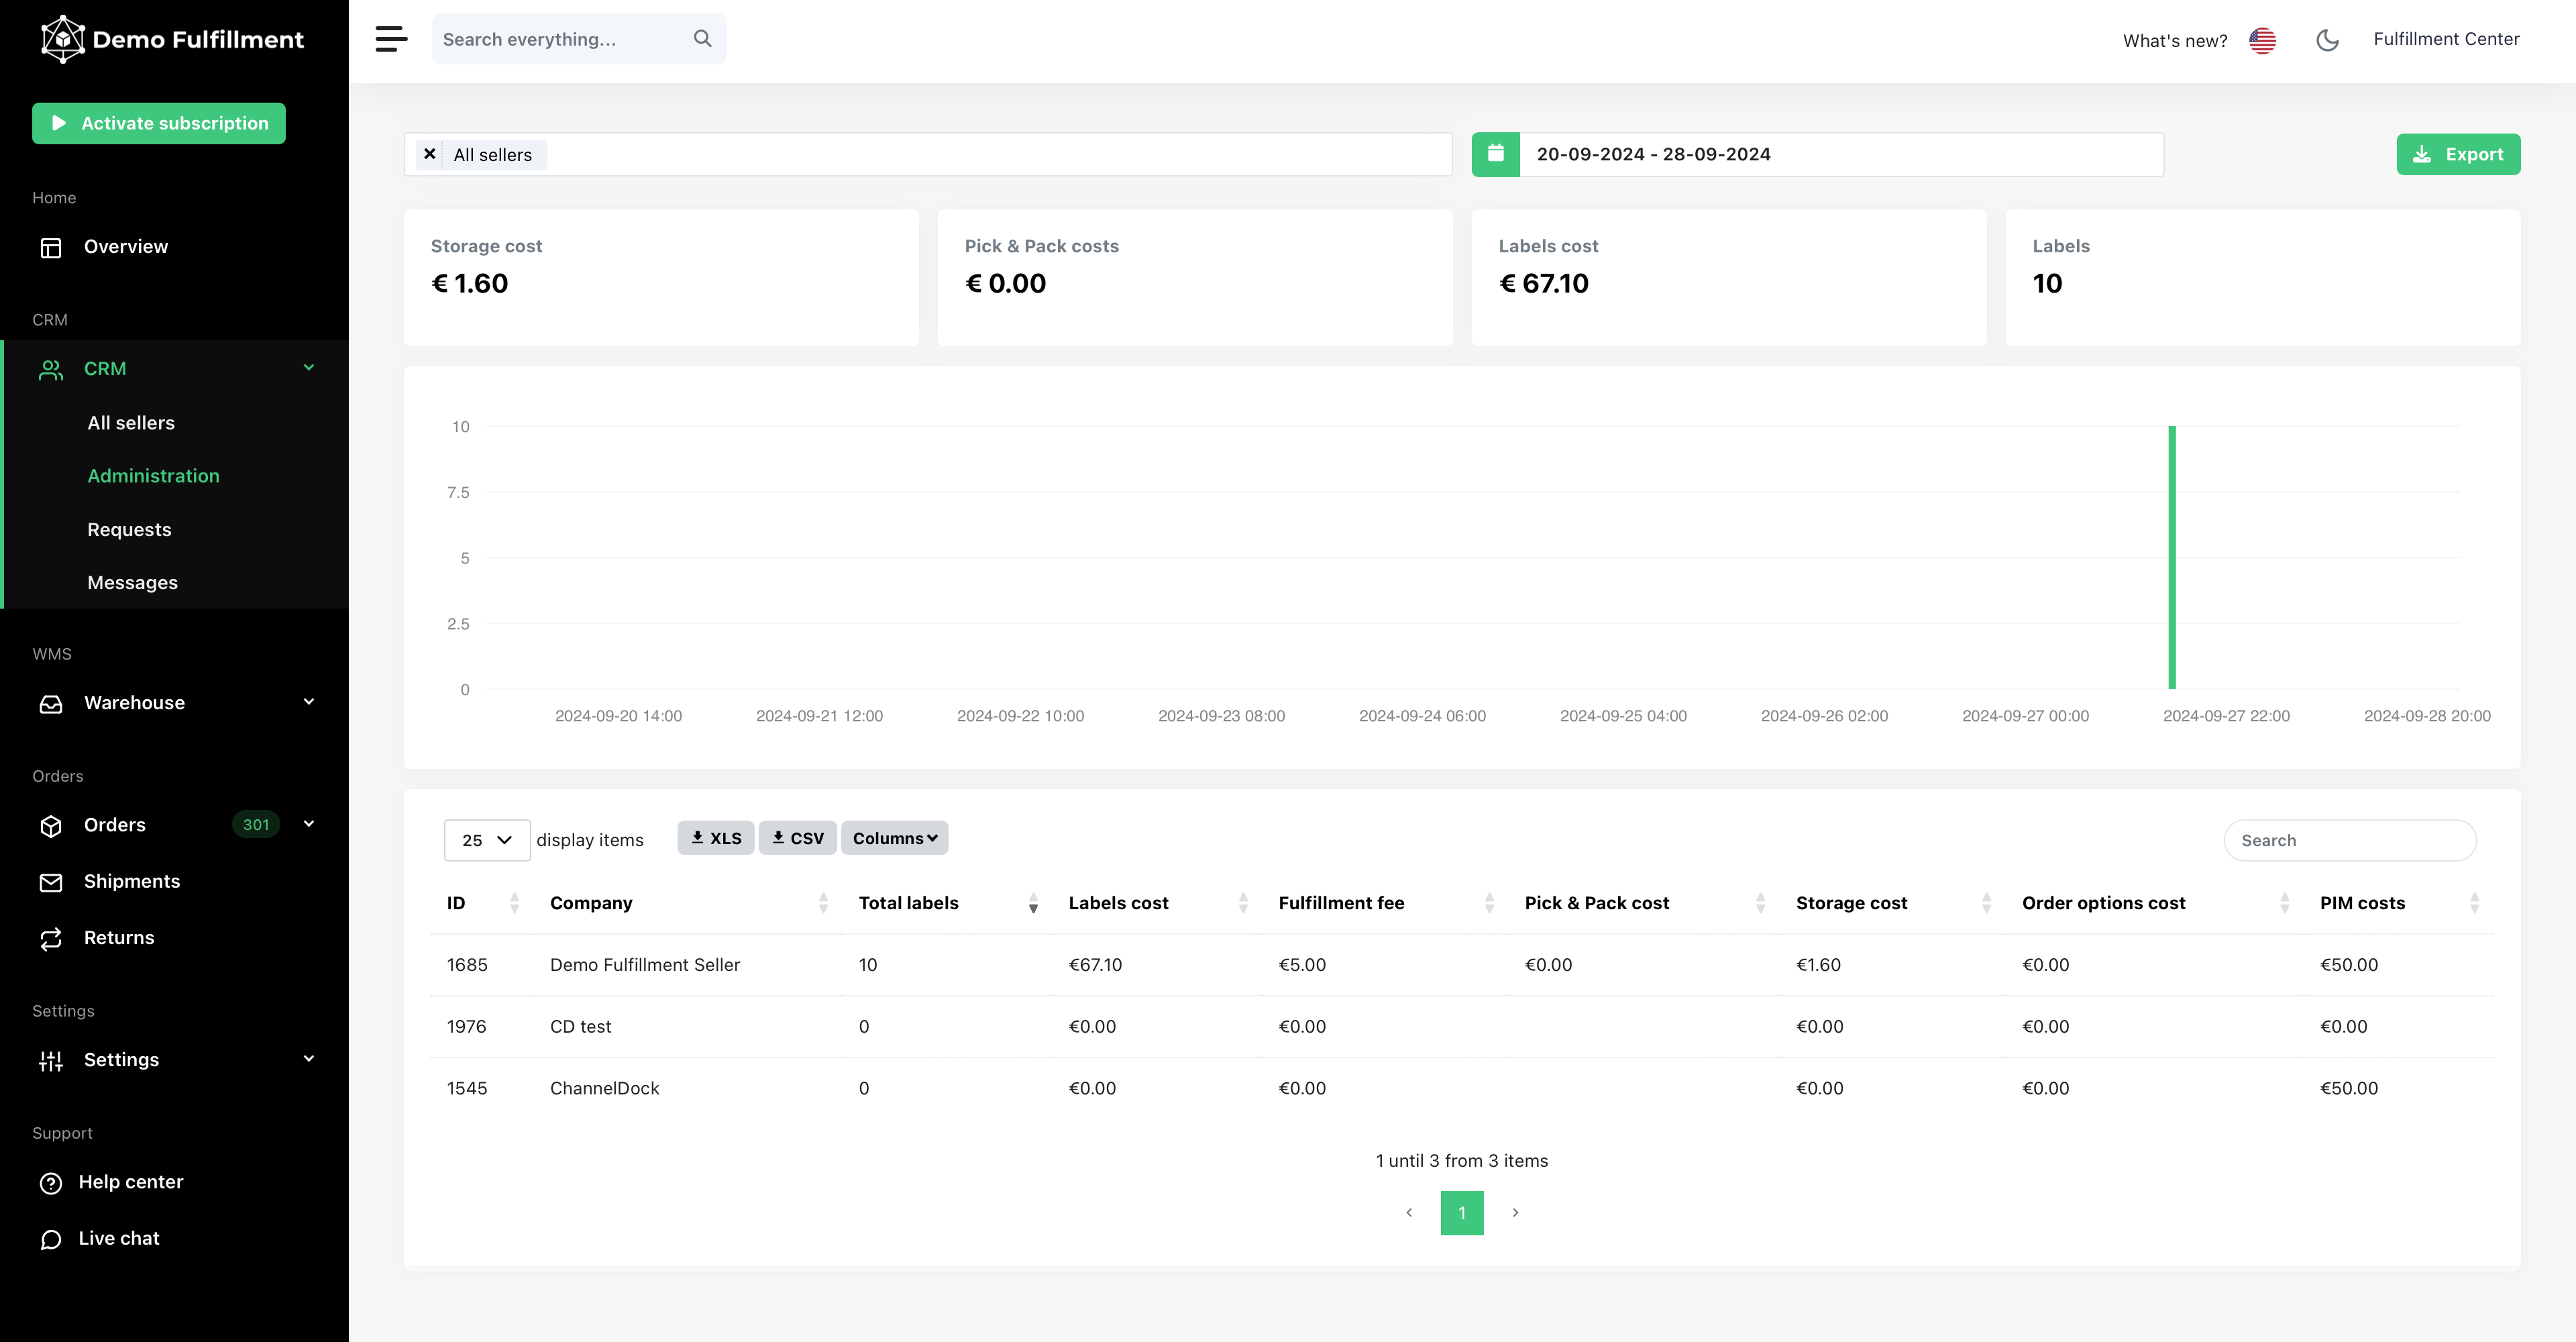
Alternatively, if you wish to view details per individual seller and in more depth, you can select the desired seller to find more information about their costs.

We hope this guide has been helpful in setting up your administration page efficiently. If you have any further questions or need assistance, don't hesitate to reach out to our support team.