Warehouse mapping
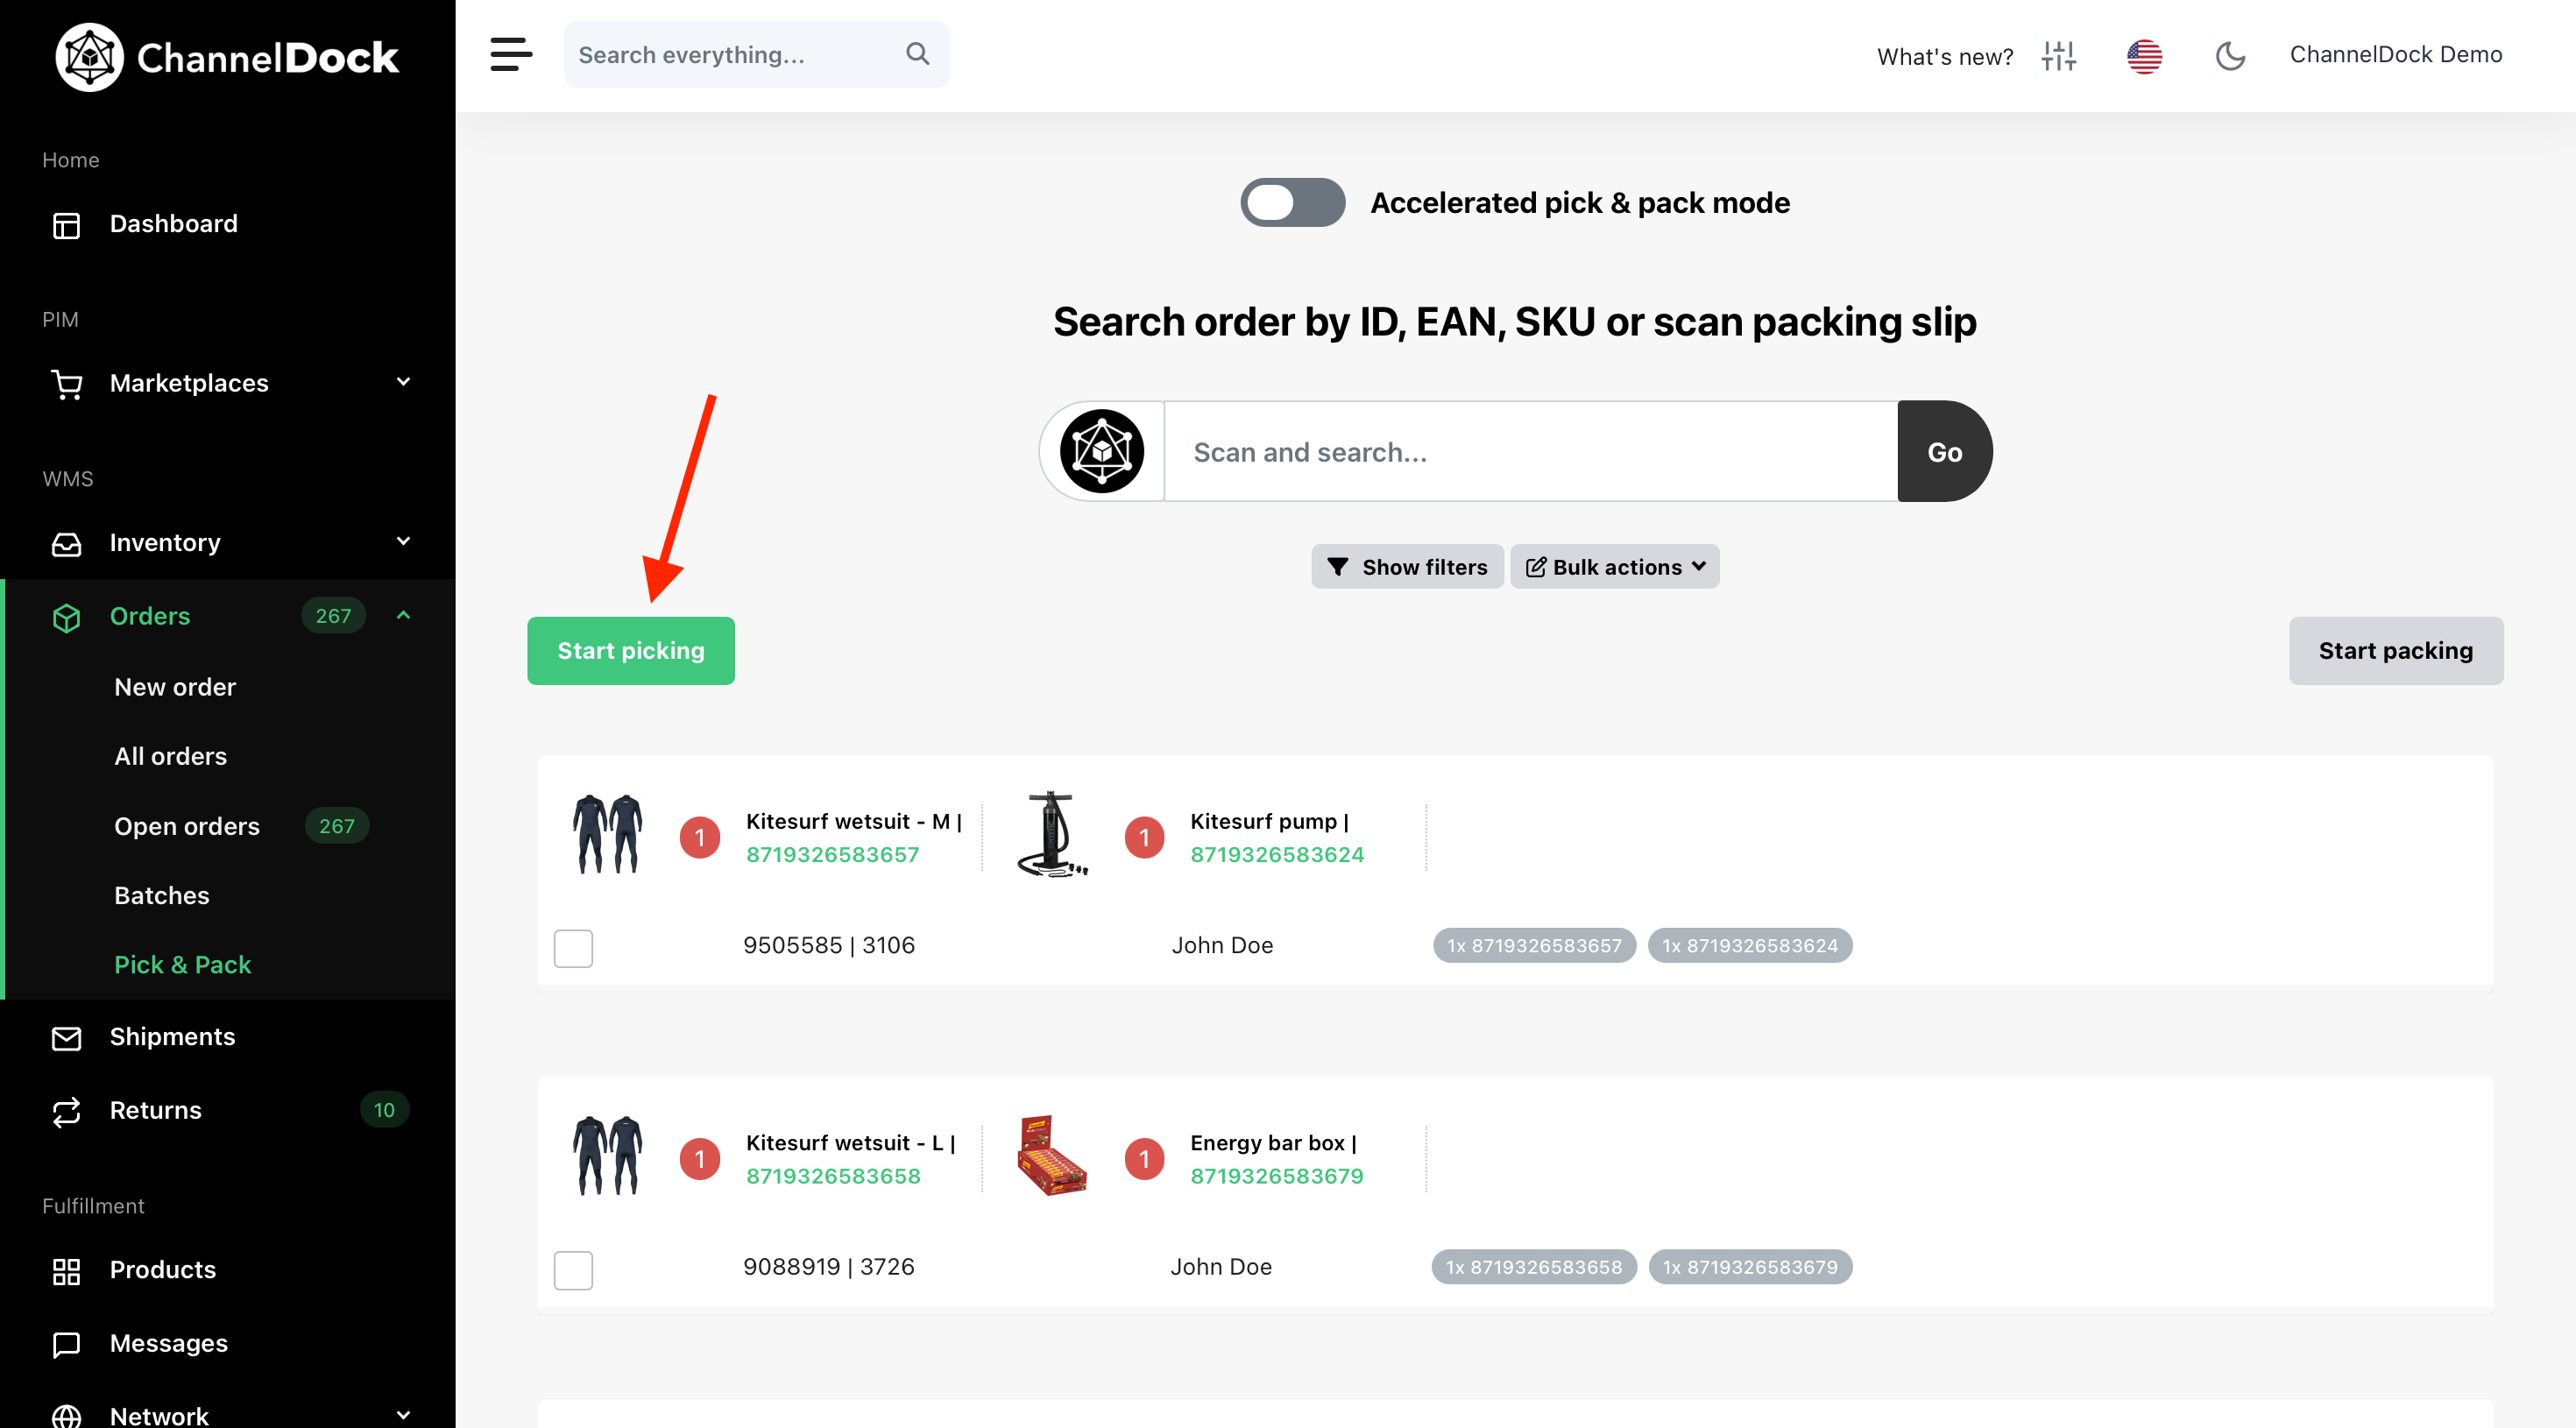
With ChannelDock’s warehouse mapping, you can easily create and manage warehouses (see image). The settings let you name warehouses, set priorities, and control whether they accept orders. This gives you clear visibility of product locations and stock levels, while also enabling ChannelDock to generate optimal picking routes, boosting order fulfillment efficiency.
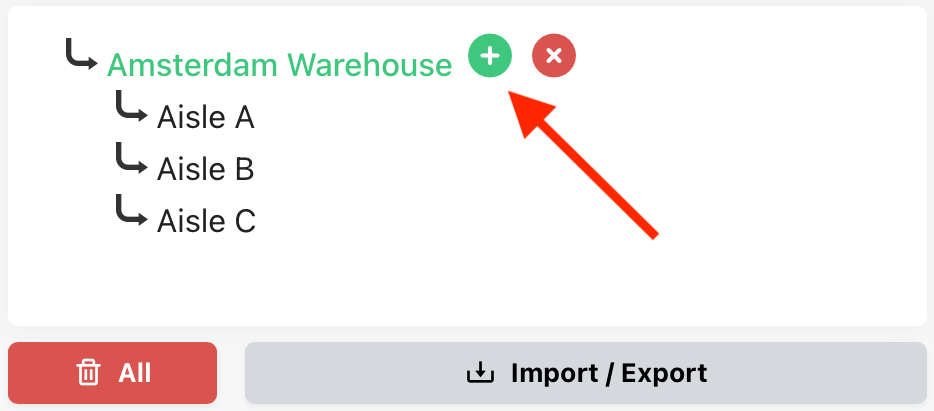
1. Create New Warehouse
You can create and manage warehouses from the Warehouse Management page.

-
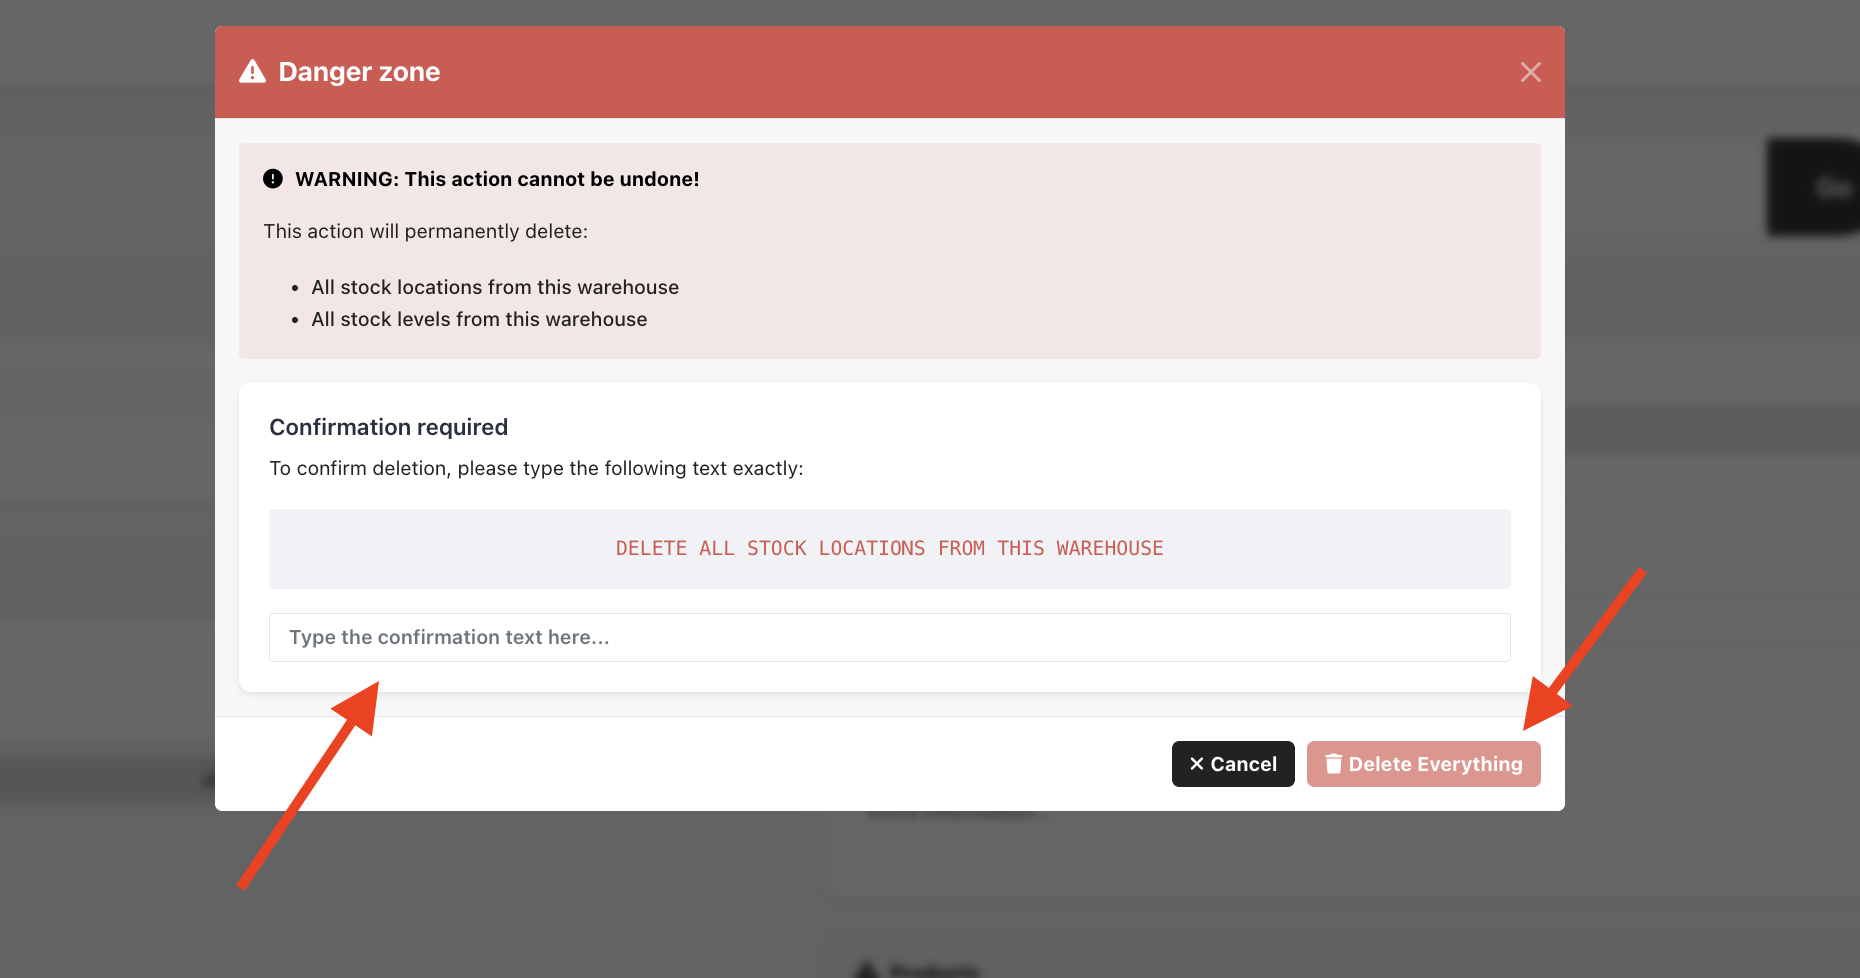
Deleting a Warehouse
Deleting a warehouse is a permanent action and cannot be undone.
When you delete a warehouse:
-
All stock locations assigned to it will be removed.
-
All stock levels will automatically be moved to the default warehouse.
⚠️ Important:
-
You must type the confirmation text exactly as shown.
-
Copy-paste is not allowed — the text must be entered manually.
-
Once confirmed, click Delete Everything to complete the deletion.
Use this option with caution, as the action is irreversible.

-
2. Create manual stock locations
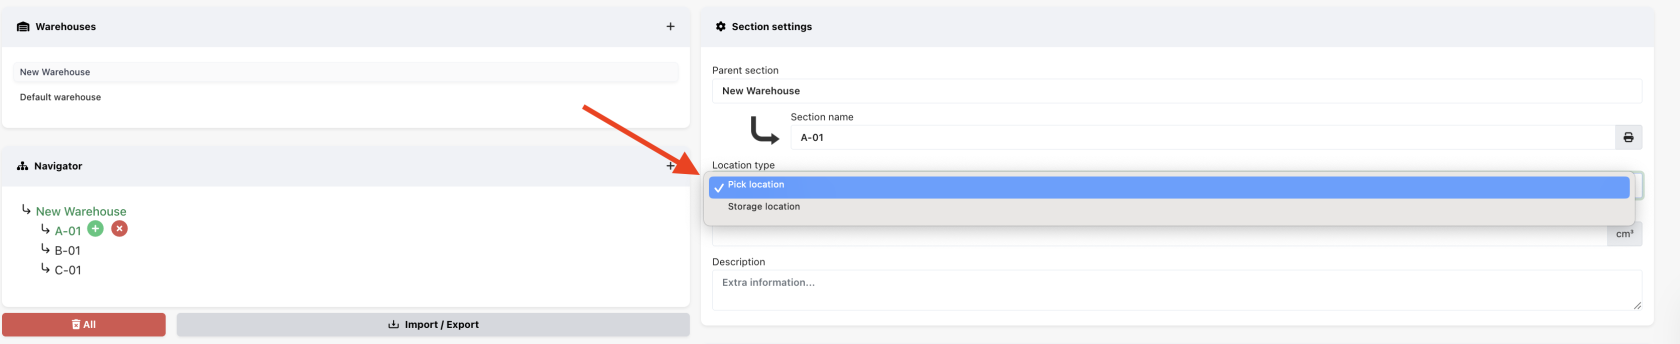
Section Name
To edit a stock location’s name, select it and enter the new name in the 'Section name' field.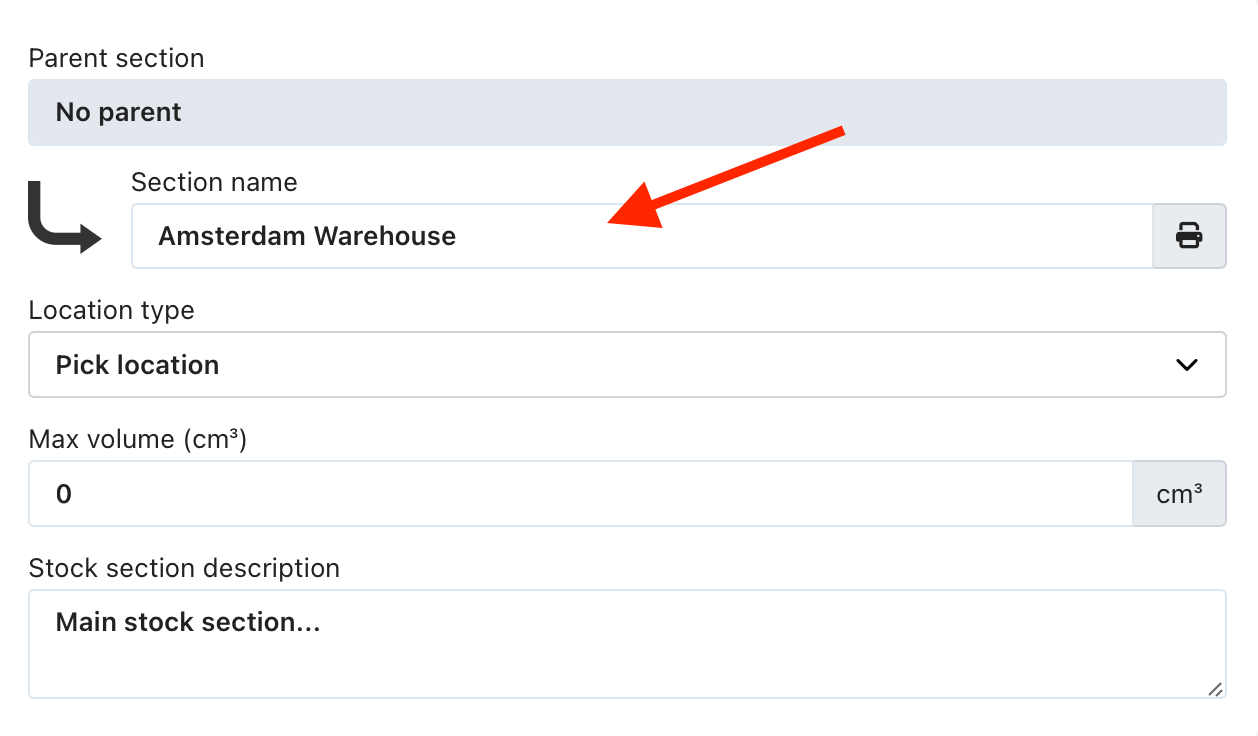
Location Types
Specify the Location type to help ChannelDock generate efficient picking routes:
- Pick Location: Used when picking orders. If a product is available in multiple locations, ChannelDock prioritizes the pick location with the least stock.
- Storage Location: When no pick locations are available, ChannelDock selects the storage location with the least stock.

ChannelDock provides daily recommendations to replenish pick locations from storage areas. You can view these on the Stock Advice page.
Volume and description
You can also set the maximum accepted volume for this stock location and add a description.
2. Create stock locations in bulk
For larger warehouses, bulk import of stock locations saves time. Here’s how:
1. Go to Import/Export, click Export Warehouse Mapping in the Warehouse section, and download the file from the Actions menu.
2. Fill in these columns:
- ID: Assign unique integer values for each location.
- Parent ID: Match this with the ID of a parent location to create location hierarchies.
- Title: Sets the “Section name”.
- Description (optional): Add notes or details if needed.
- Storage Cost: Only for fulfillment center accounts.
- Pick Location: Use “1” for pick locations and “0” for storage locations.
- Max Volume: maximum volume in cm3.
3. Upload the completed file. ChannelDock will confirm the number of updated locations.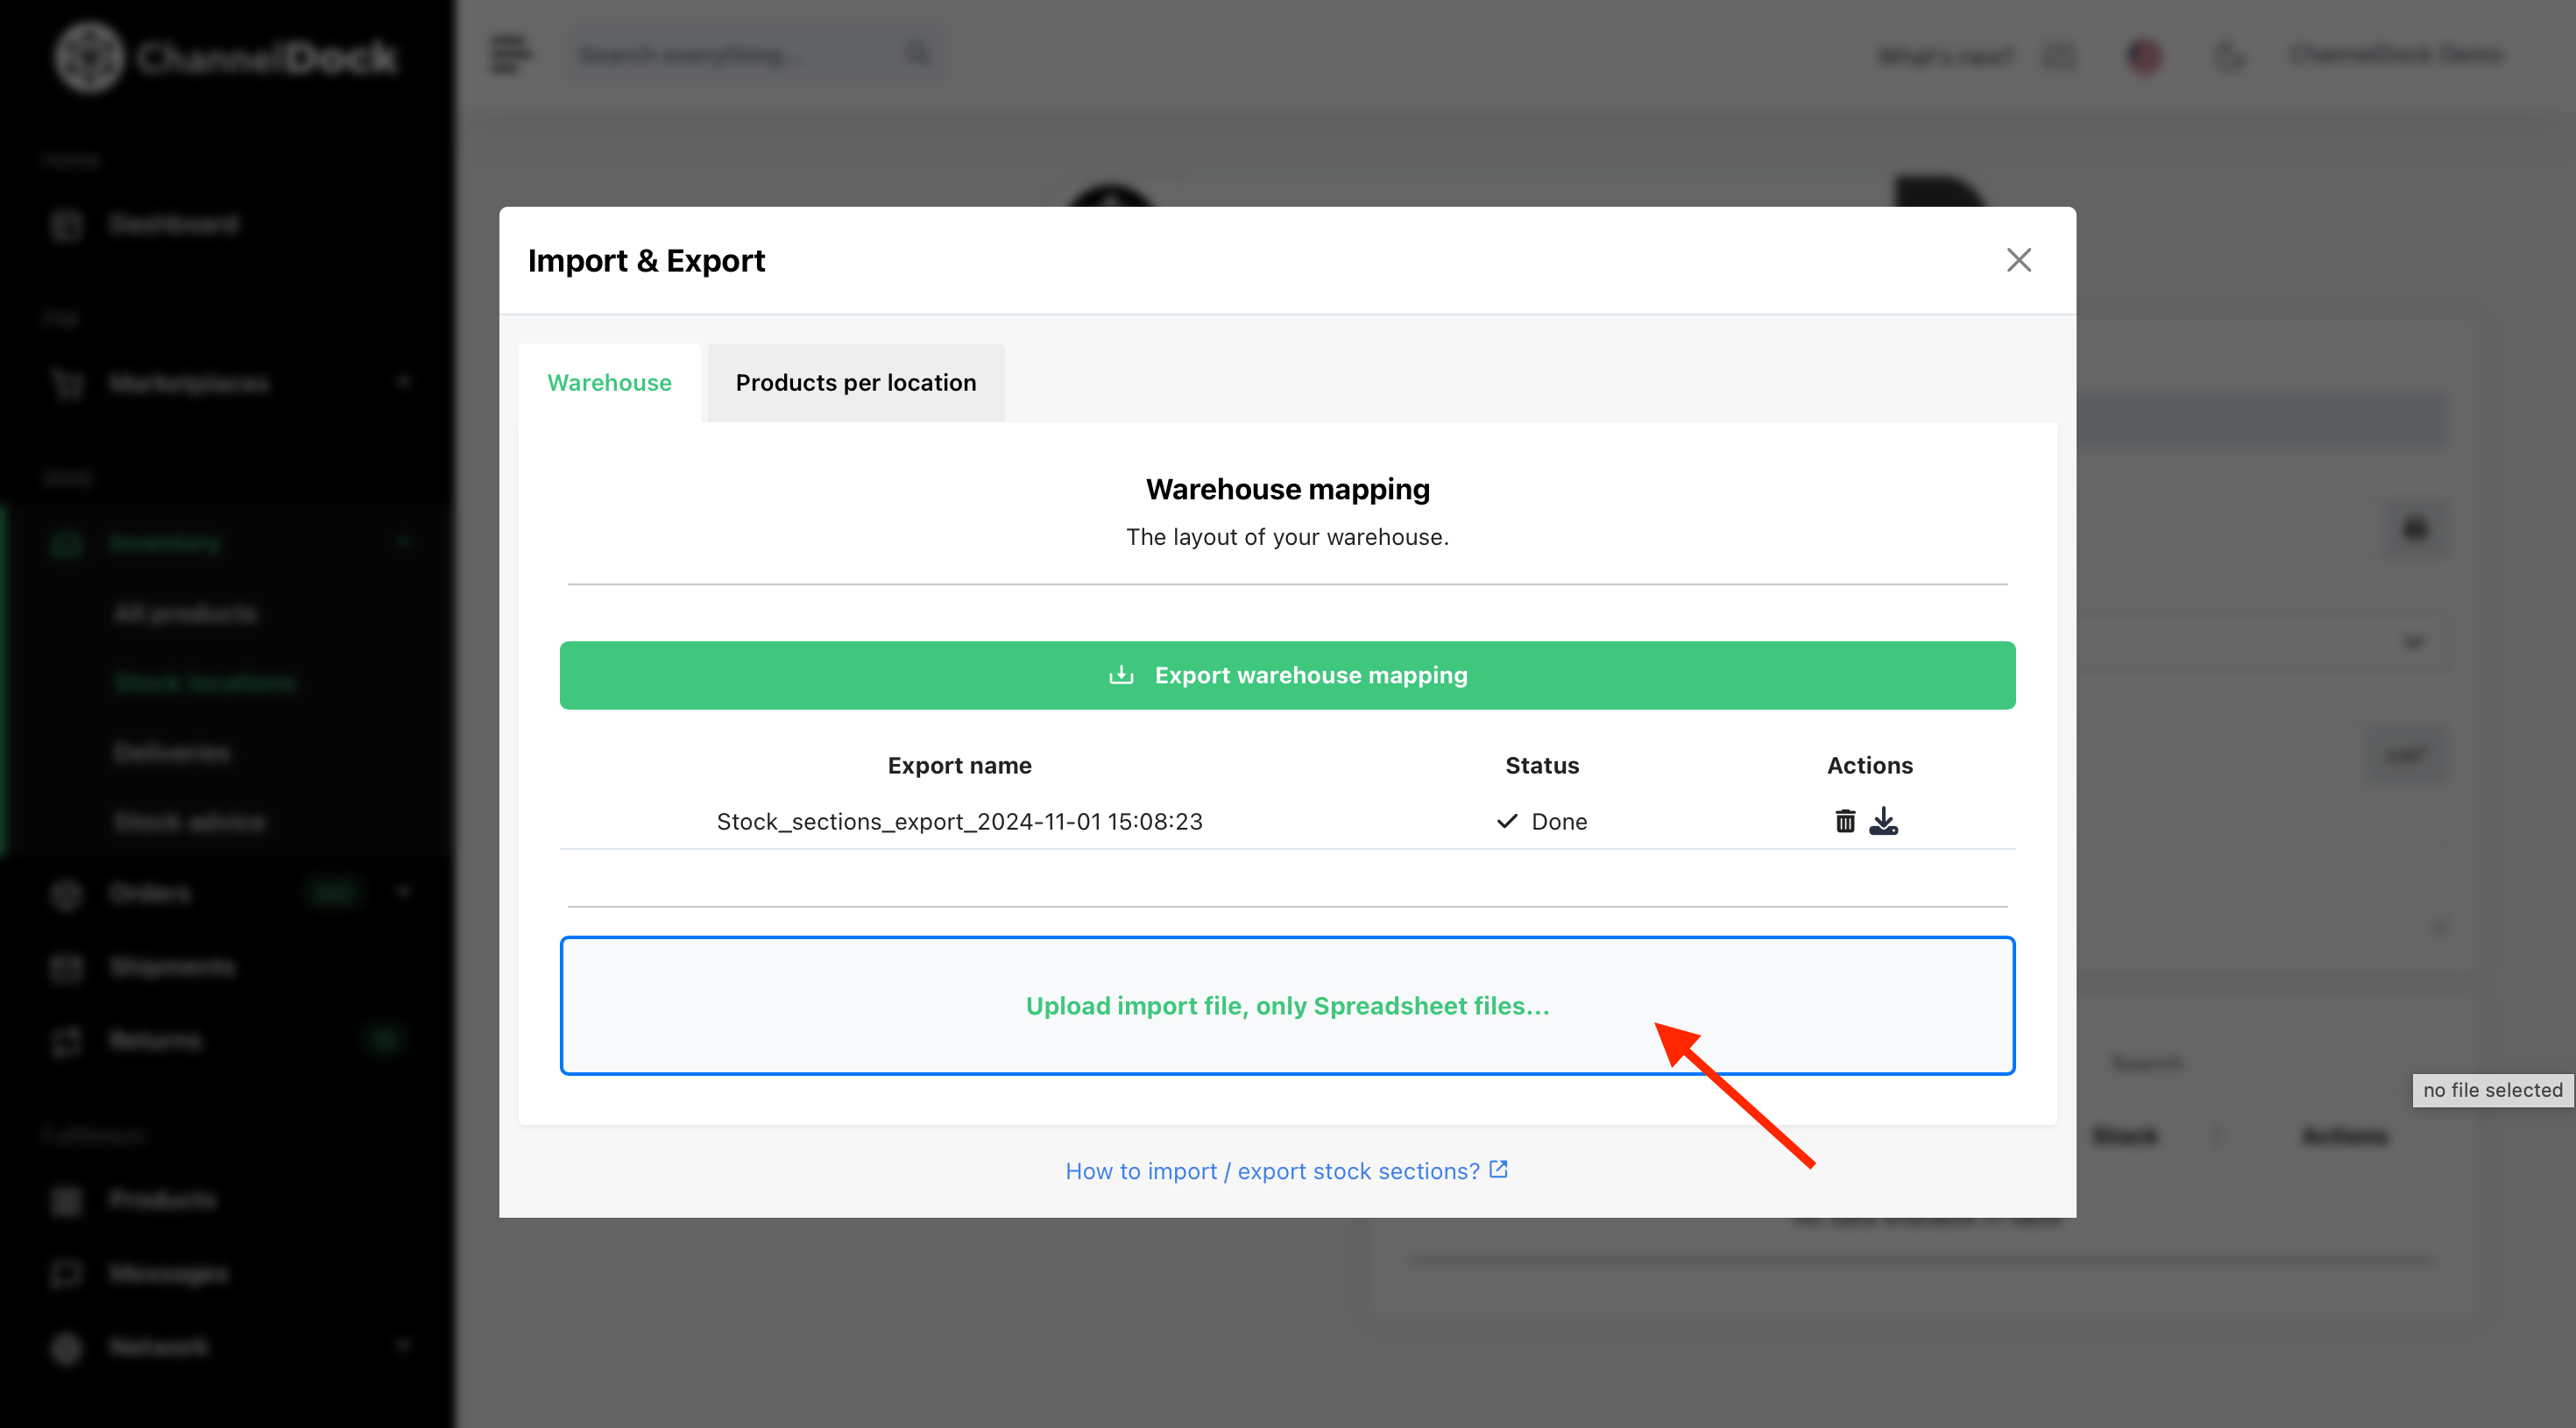
3. Assign products to a location manually
To assign a product to a specific location manually, select the stock location and click the Add Product button: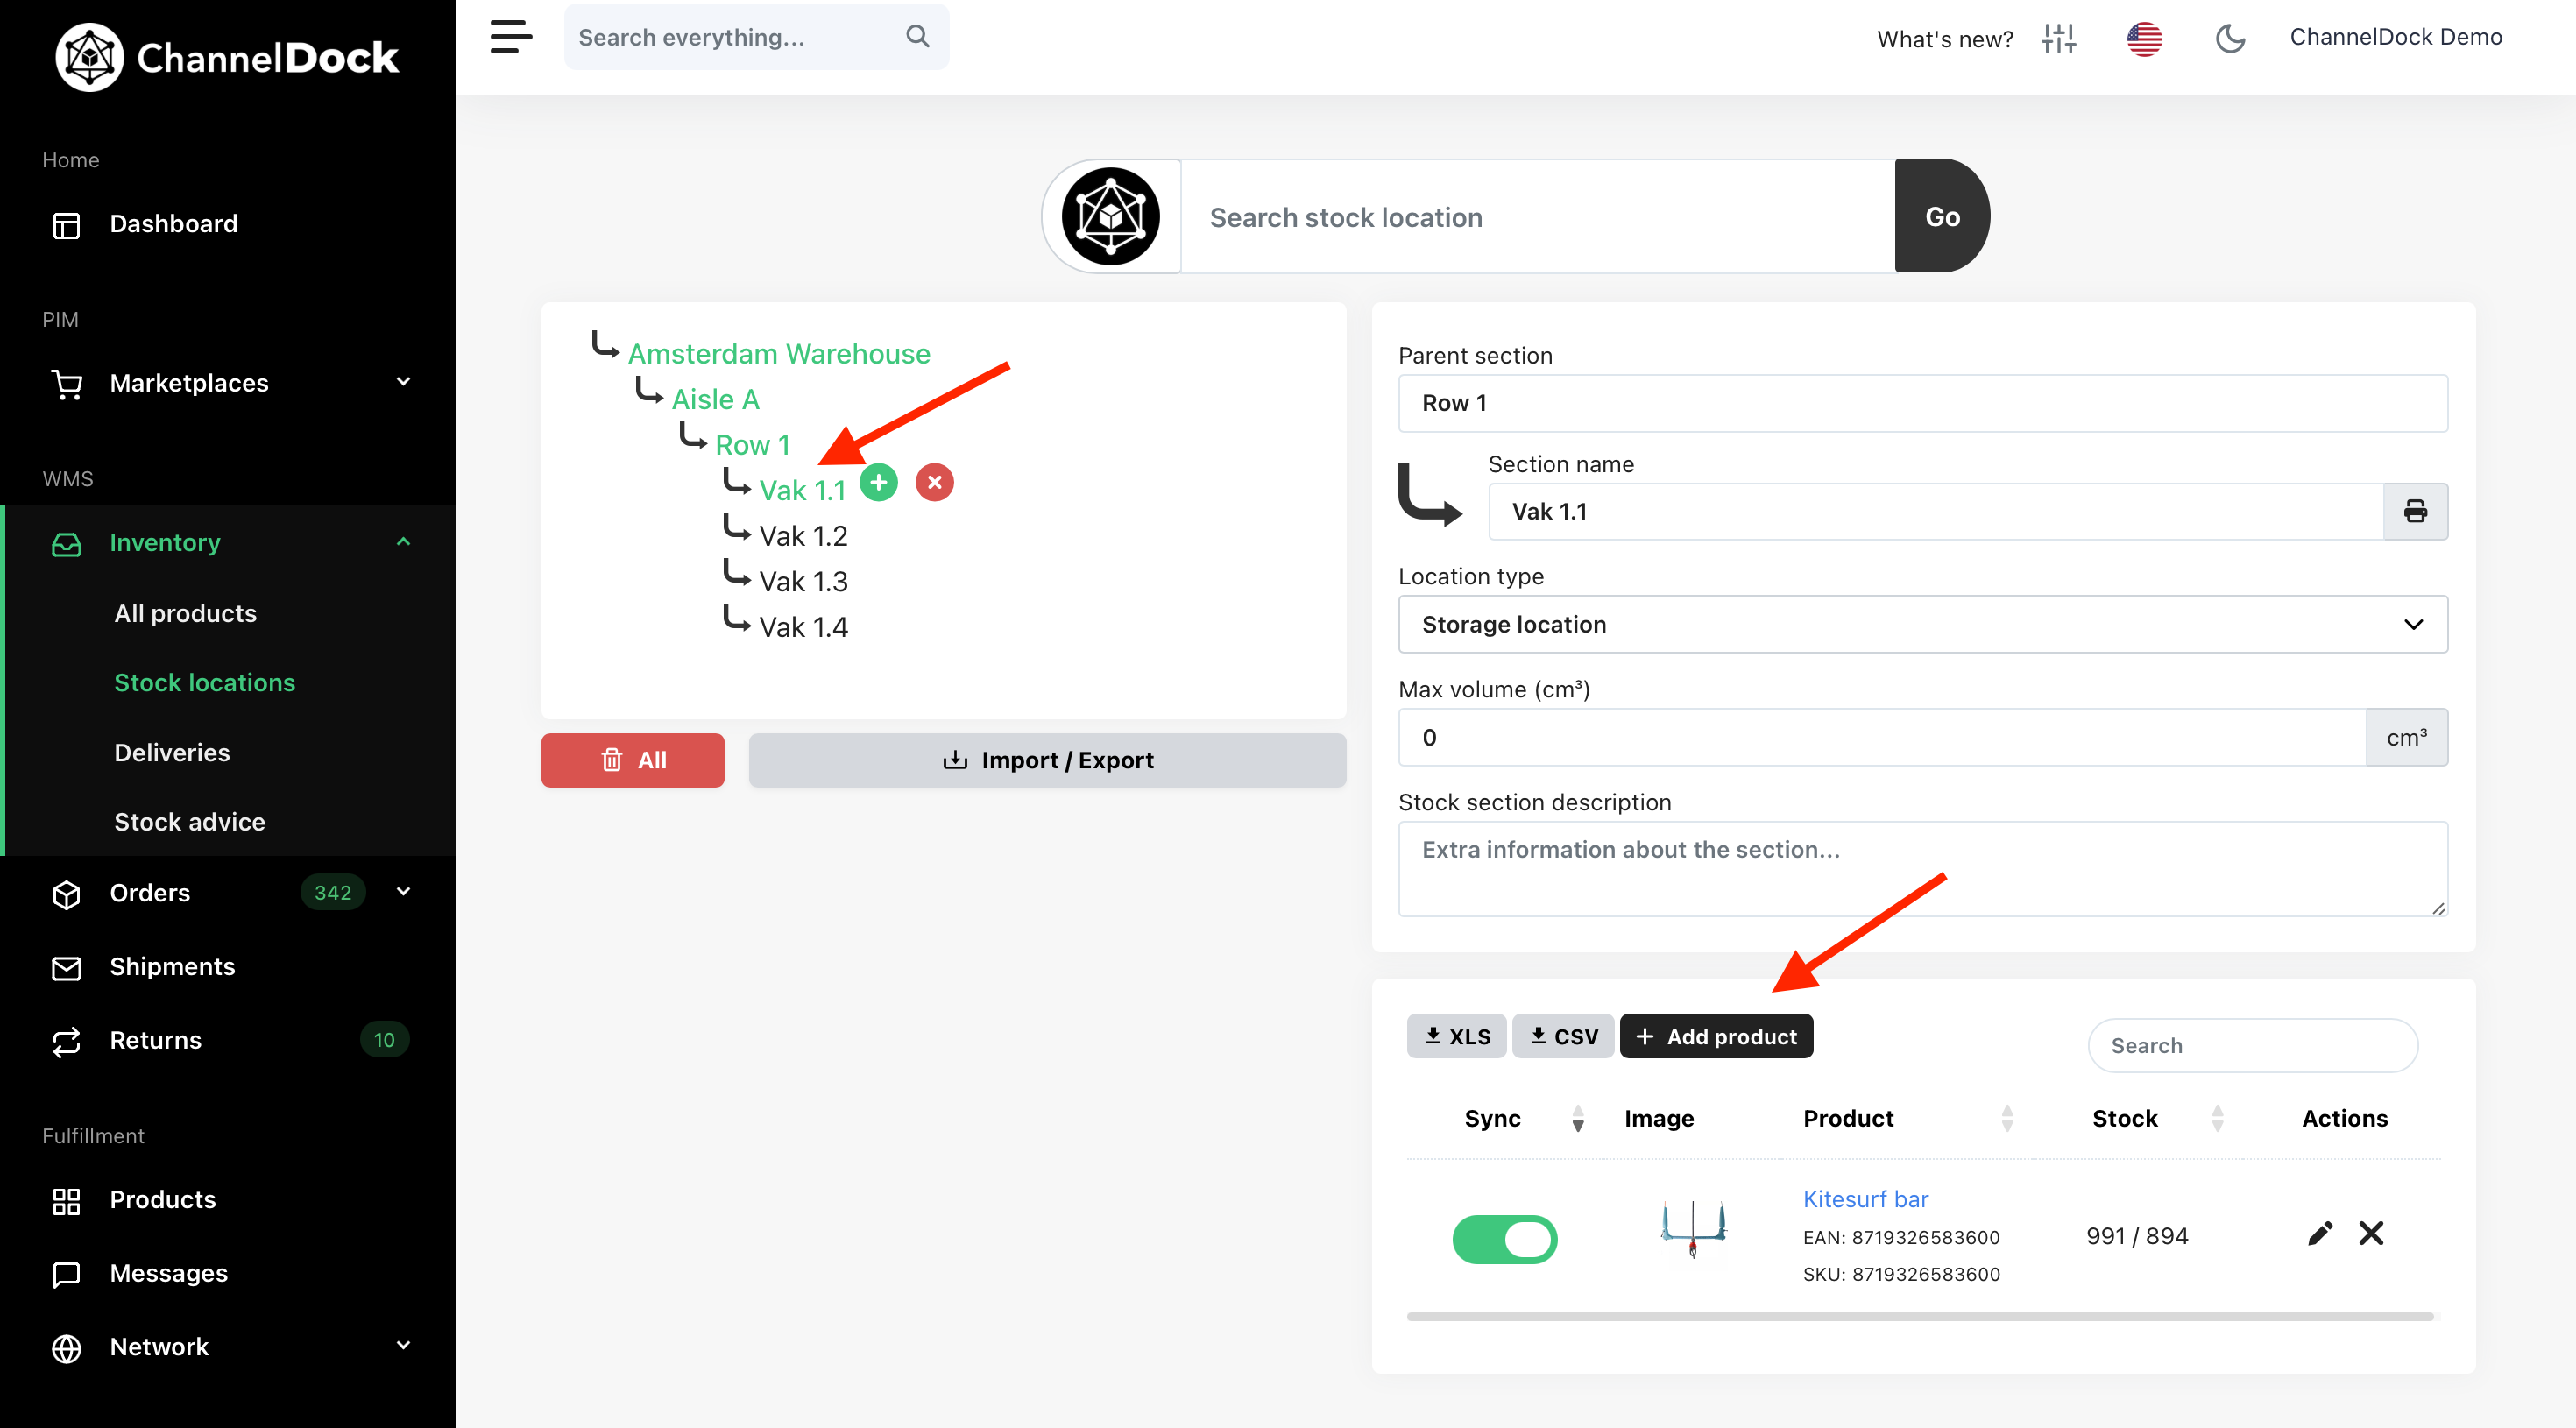
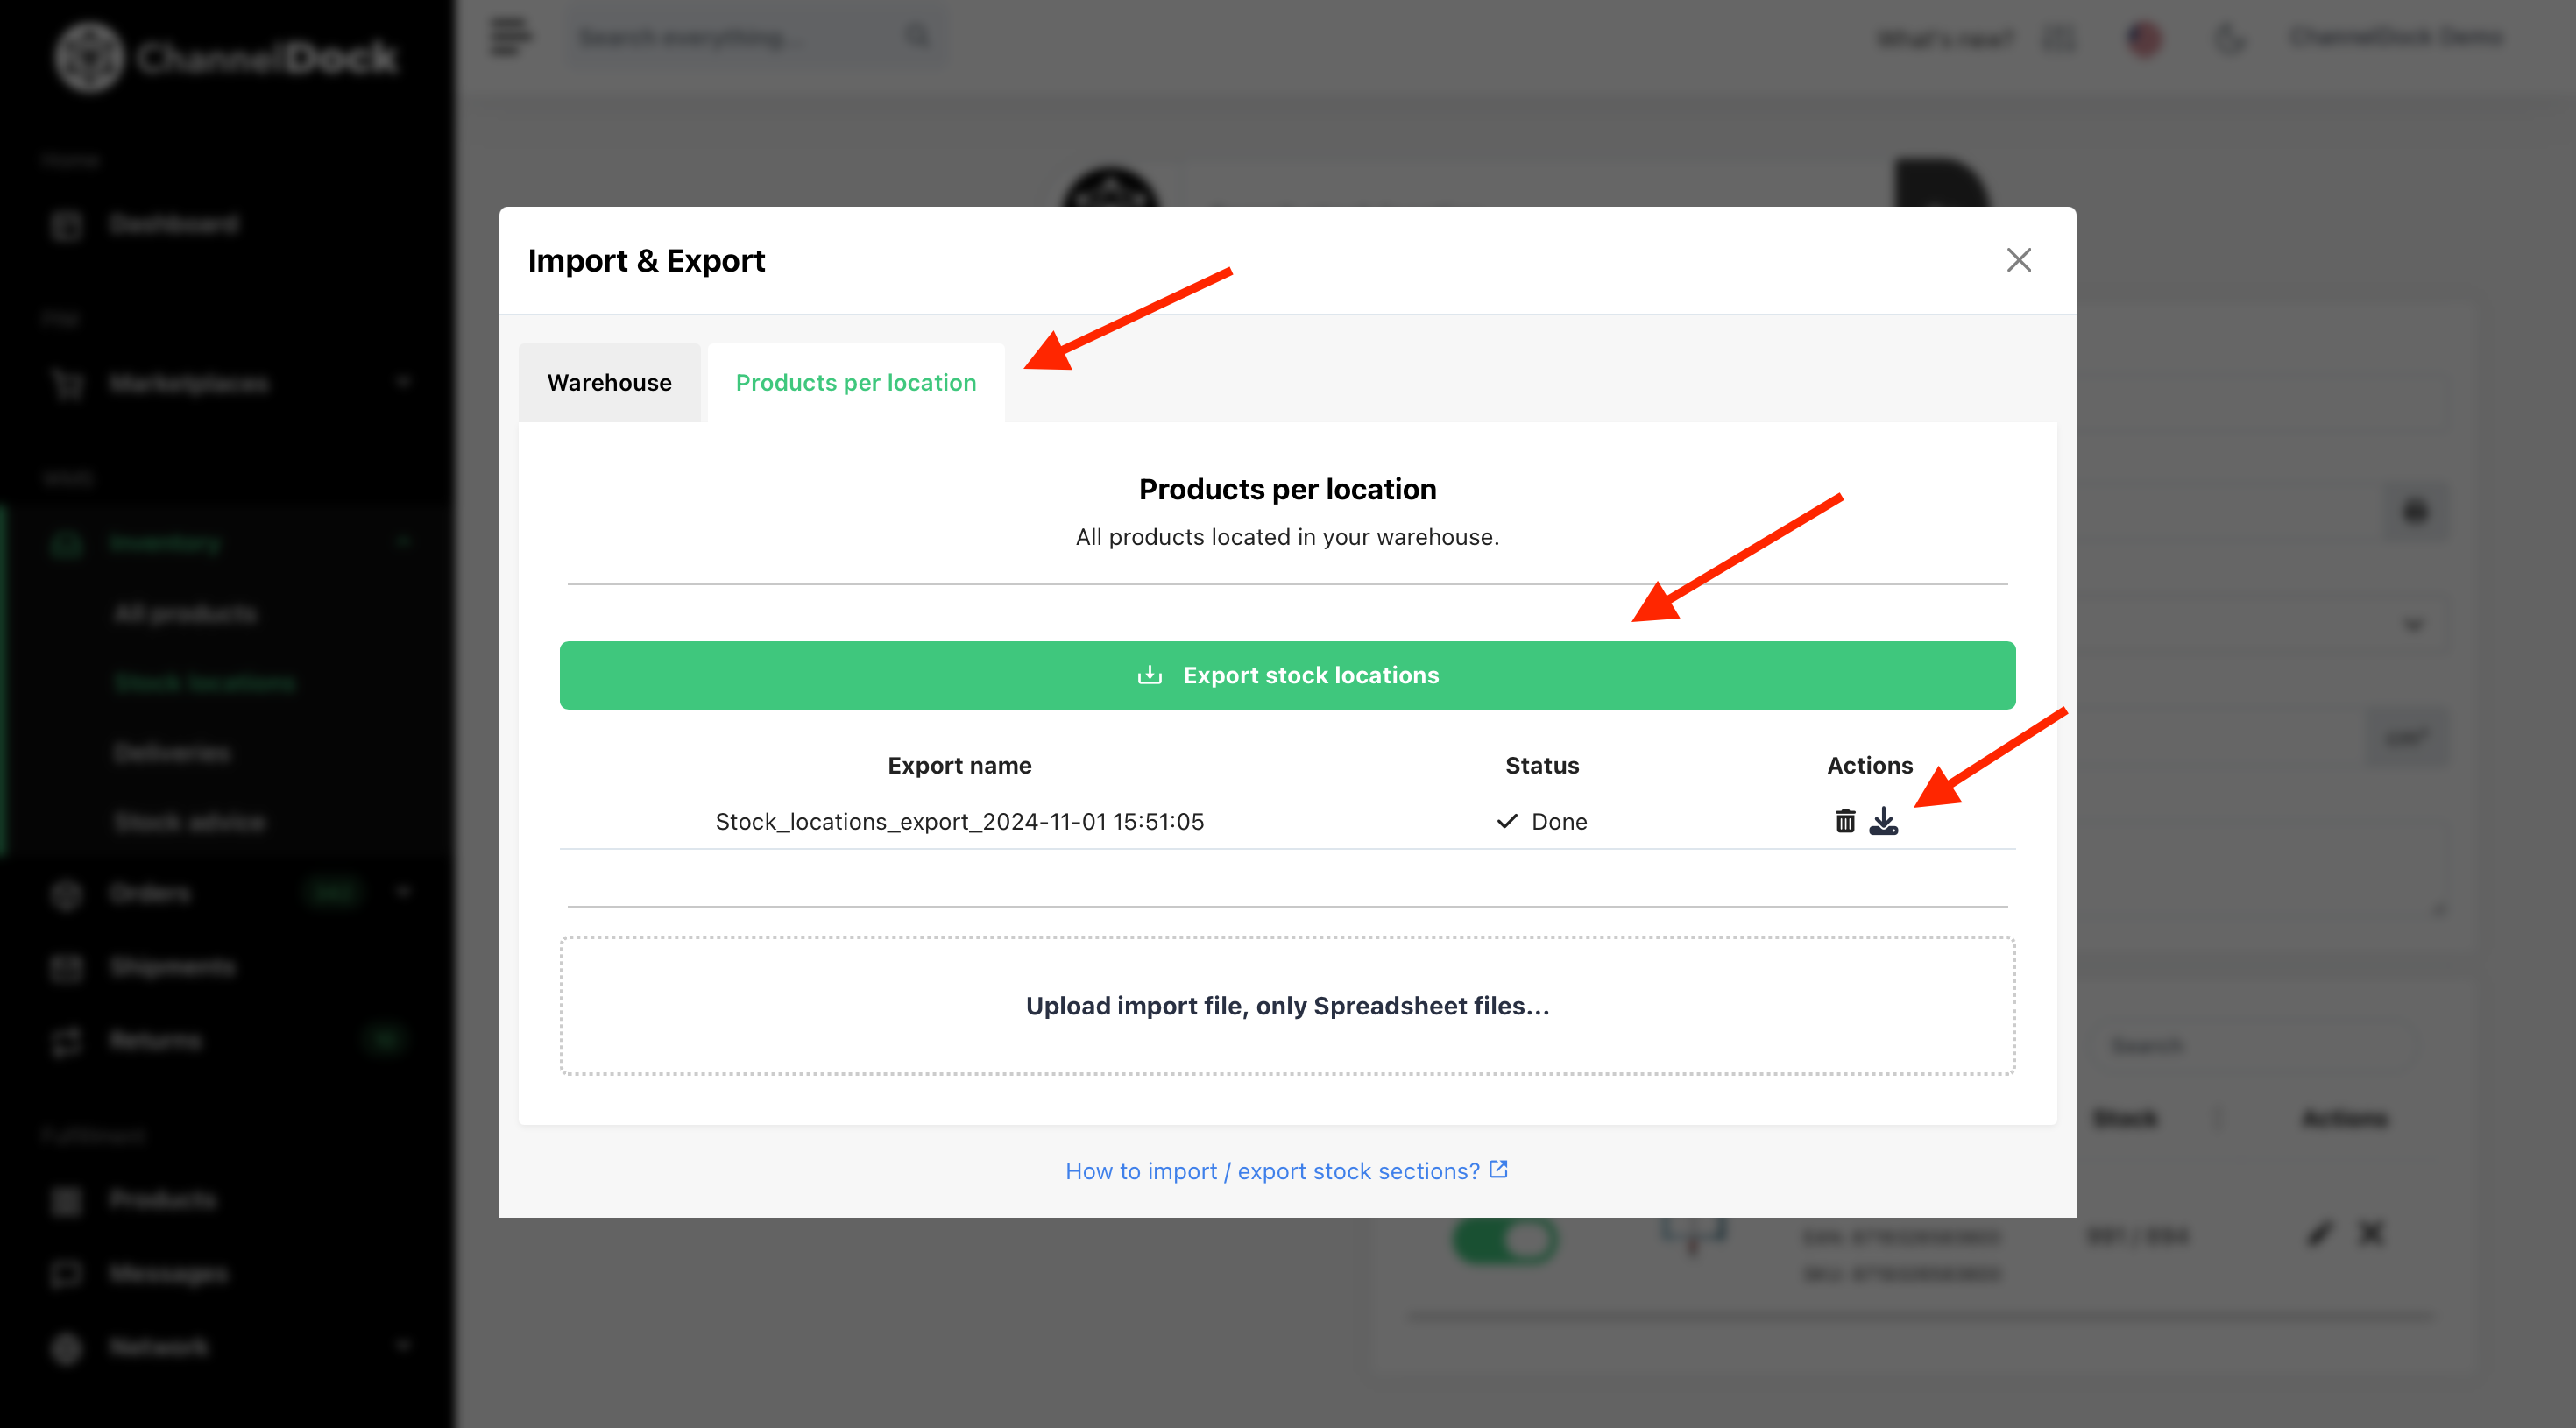
4. Assign products to a location in bulk
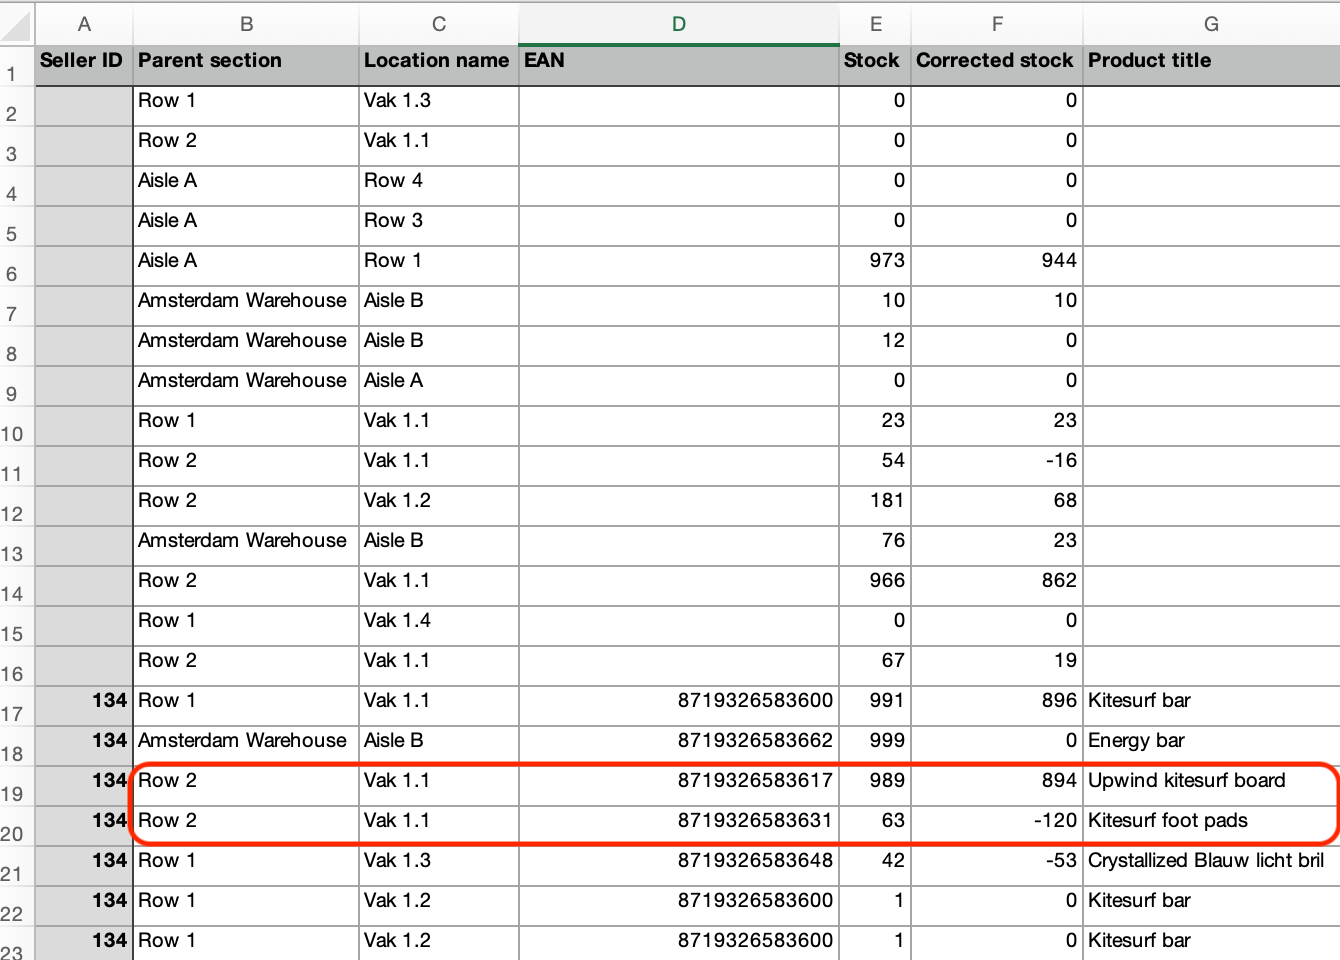
- Go to Import/Export, click Stock Locations in the Products per locations section, and download the file from the Actions menu.

-
In the EAN column, enter the EAN of the product you want to add to this location. To add multiple products to the same location, duplicate the row and enter each product’s EAN in the new row.
 .
.

Pick and pack route generation
Now that you have mapped your entire warehouse in ChannelDock and added products in the correct locations, you can start generating pick lists for all your open orders via Orders > Pick & Pack. You do this by pressing the 'Start the pick process' button: